
Dollar Store Wedding Decor DIY Ideas That Look Expensive
Dollar Store Wedding Decor DIY Ideas That Look Expensive
By zainzari • Published October 2026
📌 Save
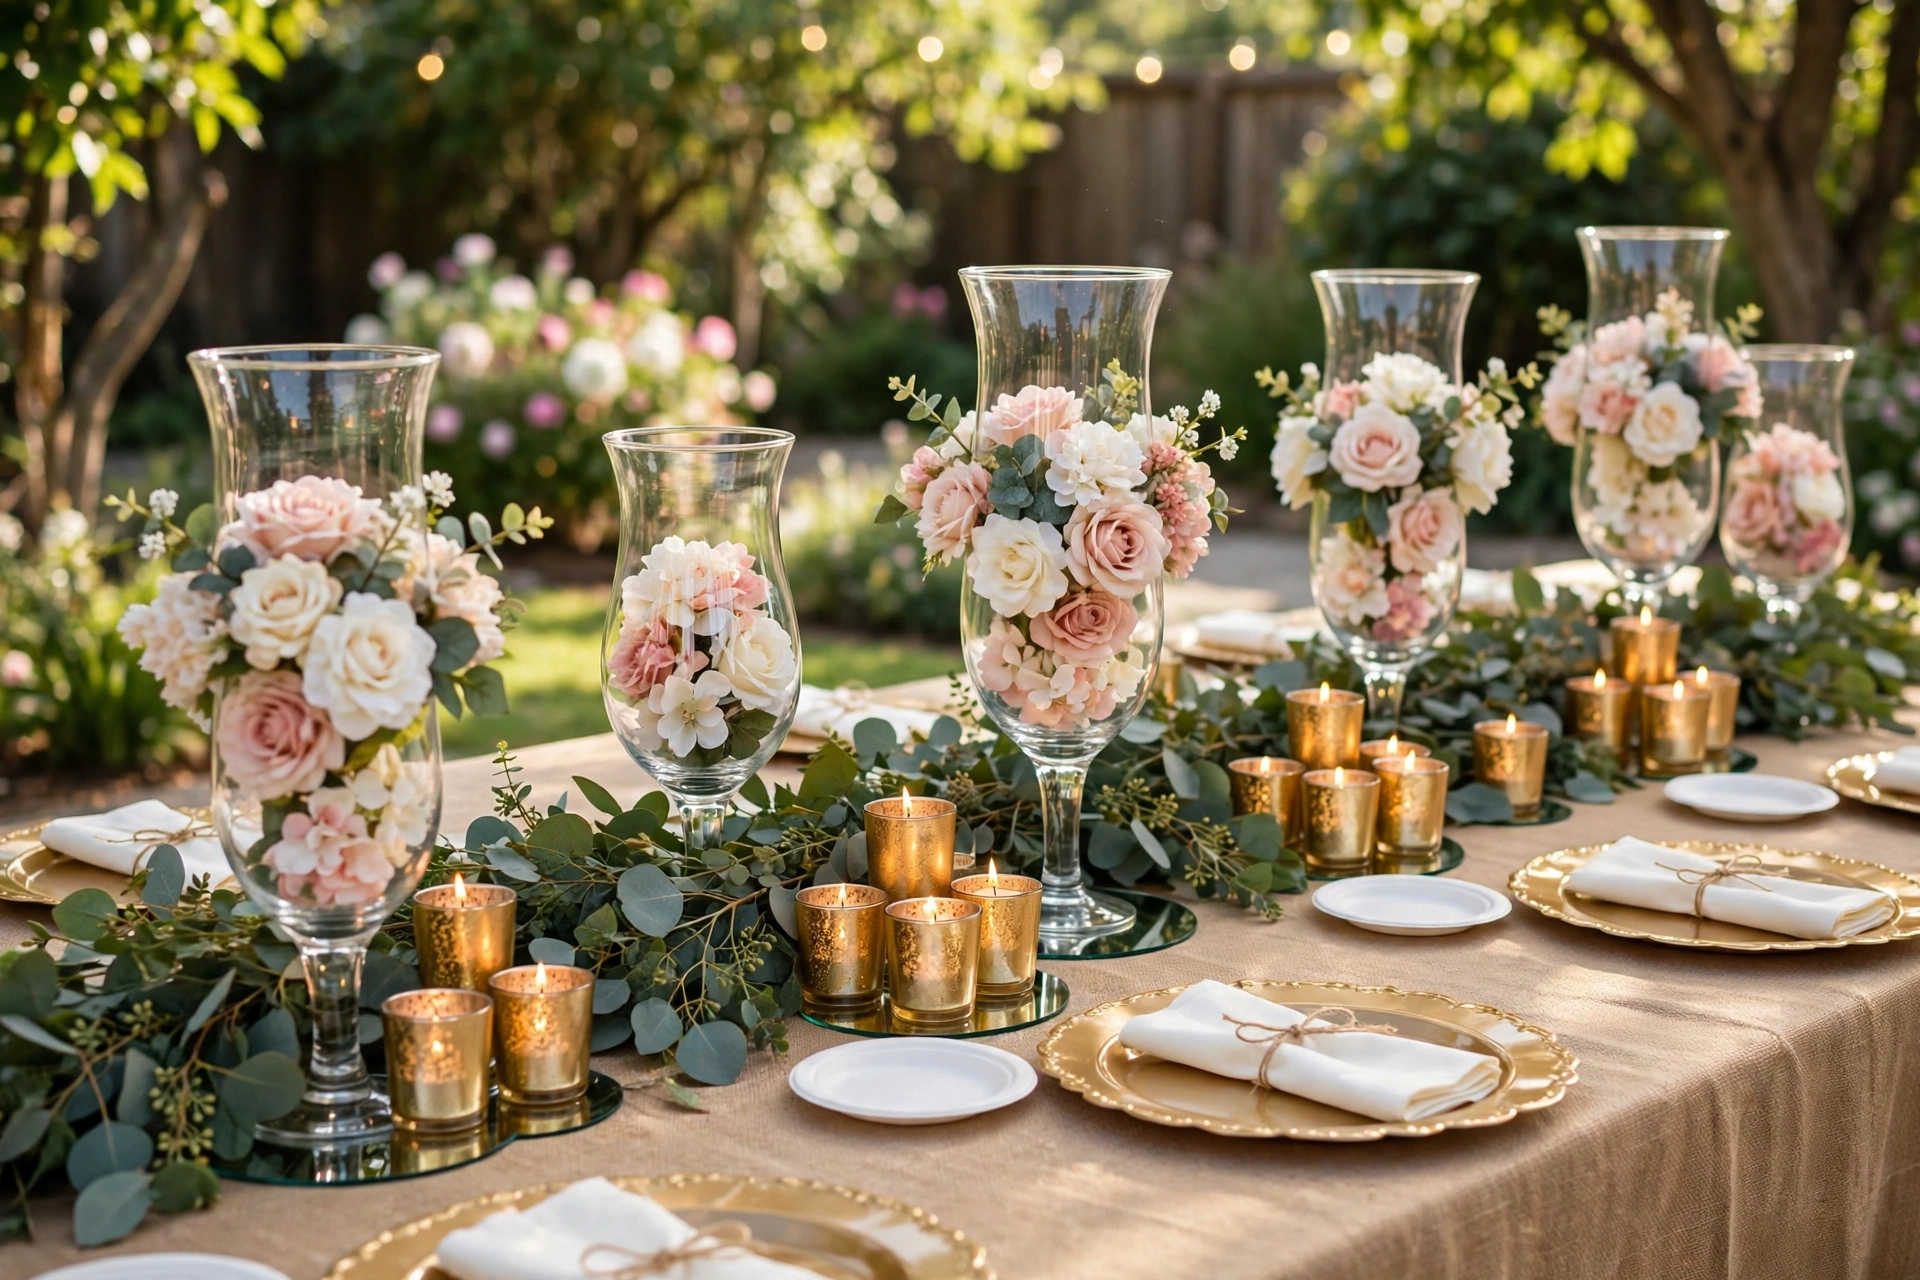
Short on time? The dollar store wedding decor projects that look the most expensive are gold spray-painted votive trios, floating candle cylinder vases, and greenery garland table runners. Keep everything in one palette with a single metallic finish, cluster pieces instead of scattering them, and let candlelight do the heavy lifting.
Gold Spray-Painted Votive Trio
📌 Save
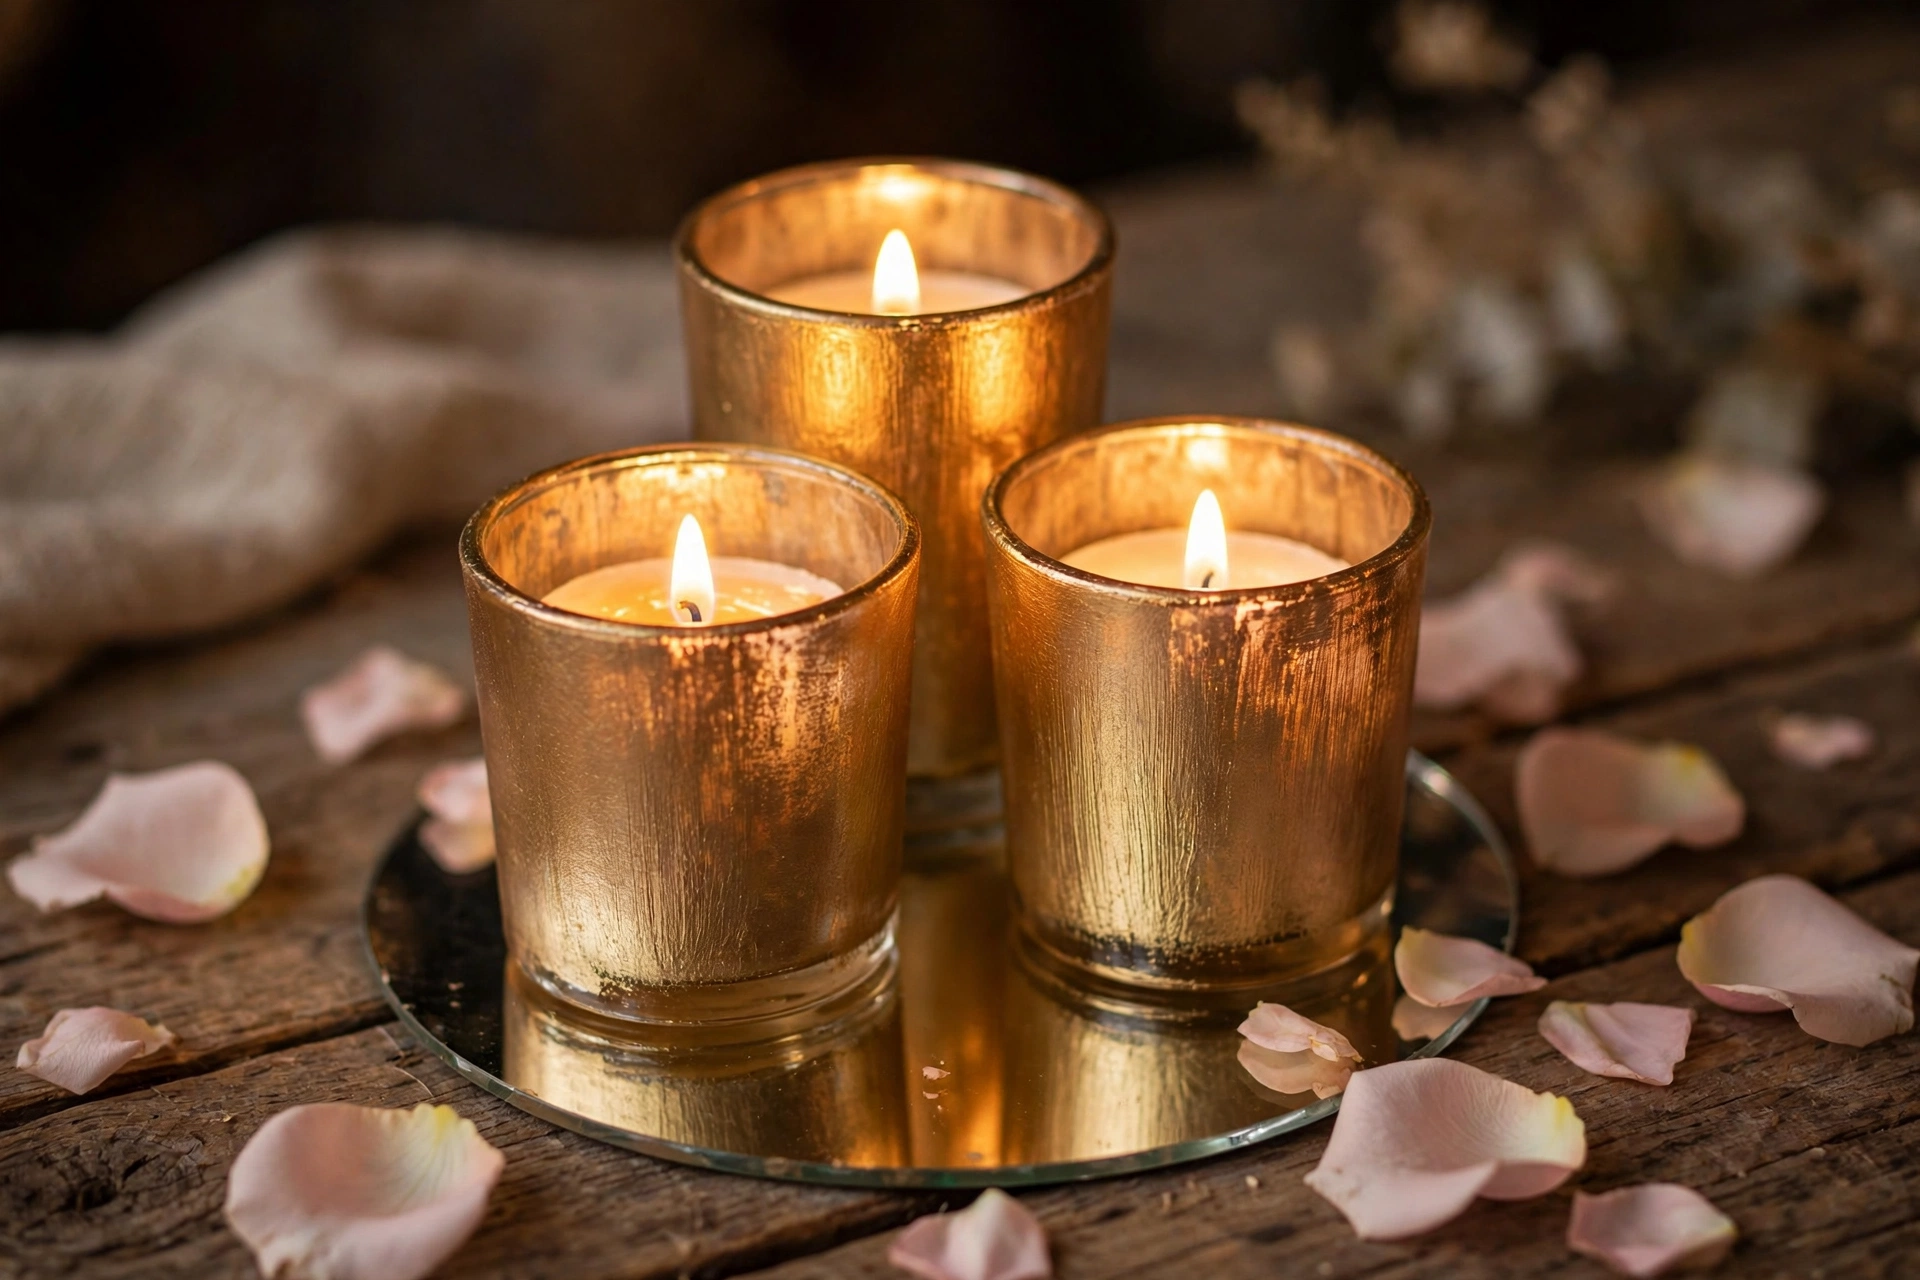
This is the single most-loved dollar store wedding DIY — plain glass votives transformed with one can of metallic gold spray paint.
Start by cleaning the votives with a damp cloth so the paint grips the glass. Spray light, even coats from about an arm’s length away, letting each coat dry fully before the next; two to three thin coats give a rich, even metallic finish without drips. Use painter’s tape around the rim if you want a crisp glass band at the top — that little detail is what makes them look store-bought rather than handmade. Once dry, drop a tea light or battery candle into each votive and arrange them in a tight trio on a mirror tile with a scatter of petals around the base.
The trick to the expensive look is repetition: one gold votive looks like a candle, a cluster of them looks like decor. Make enough sets for every table, and use the exact same finish everywhere so the whole room glows as one cohesive design.
Floating Candle Cylinder Vases

📌 Save
Tall glass cylinder vases with floating candles are the classic hotel-wedding centerpiece — and every piece can come from the dollar aisle.
Fill each cylinder about two-thirds full with water, then set a floating candle on top. The flame reflects off both the water and the glass, so one candle gives the glow of three. Around the base of each vase, nestle short-stemmed faux peonies or roses in your palette, tucked tight so no bare table shows. Vary the cylinder heights across each table — tall, medium, and short in one cluster — to create the layered look florists charge a fortune for.
For extra polish, tie a slim ribbon around the middle of each vase or add a thin band of gold washi tape. Fill the vases at the venue rather than transporting them full of water, and keep a spare bag of floating candles on hand for any that go out mid-reception.
Mirror Tile Centerpiece Bases
A single mirror tile under a centerpiece doubles your candlelight for free — reflections make every arrangement look fuller and brighter.
Dollar store mirror tiles are thin and lightweight, which makes them perfect as a base for table decor. Set one at the heart of each table and build your centerpiece on top: votives, a small floral compote, a few petals. The mirror catches every flame and reflects the whole arrangement back up, so a modest cluster suddenly looks abundant. Square tiles suit modern table styling; round mirror chargers feel more classic and romantic.
Mirror bases also solve the biggest centerpiece problem: the awkward empty space between pieces. Instead of spreading small items across a wide table, you anchor everything on one reflective stage and the arrangement reads as intentional. Wipe each tile with a lint-free cloth right before guests arrive — fingerprints show up fast under candlelight.
Faux Floral Compote Bowls
Footed candy bowls and glass compotes from the dollar store make perfect low floral arrangements that guests can talk across.
Fill the bowl with a crumpled ball of chicken wire or floral foam so stems stay put, then pack in faux blooms trimmed short — peonies, garden roses, and ranunculus in one or two colors, mixed with eucalyptus sprigs. The footed shape lifts the arrangement to just the right height: lush and full without blocking sightlines. Because the blooms are faux, you can assemble every centerpiece days ahead with zero wilting.
The secret is density. Faux flowers only look convincing when packed tightly, so fill generously and hide every inch of foam under petals. Tuck a few votives around each compote on the mirror tile and the whole table glows. One small upgrade makes a huge difference: snip the shiny plastic stems and replace any visible wire with ribbon-wrapped picks.
Spray-Painted Charger Place Settings
Chargers are the fastest way to make a plain table look formal — and plastic chargers painted gold or silver cost a fraction of the rental ones.
Give each charger two to three light coats of metallic spray paint on the front side only; the back never shows, so save your paint. Let them cure for a full day so they do not scuff when handled. Set one charger at every seat over your tablecloth or linen napkin, and finish each place with a folded napkin, a sprig of greenery, and a handwritten name card tucked into the fold. Suddenly a simple table reads as a formal seated dinner.
Match your charger finish to every other metallic in the room — your votives, your sign frame, your candle holders — so the eye travels around the space without snagging on mismatched tones. At the end of the night, stack them with tissue between layers and they are ready to sell or gift as a matched set.
Greenery Garland Table Runners

📌 Save
A full, flowing greenery runner is the signature of an expensive-looking reception — and dollar store garlands make it affordable.
Start with two or three garlands per table, overlapping their ends so the join disappears. Then comes the part most people skip: fluff and pull every leaf outward so the garland reads twice as wide and full. Weave a string of warm fairy lights through the greenery, nestle low floating-candle bowls along its length, and tuck in a few faux blooms in your palette at intervals. The result is a lush, glowing river of green running the full length of the table.
For round tables, coil the garland into a loose wreath shape in the center and build your centerpieces inside it. Garland runners also hide tablecloth seams and plain linen beautifully, which is another reason they punch so far above their price.
Printed Table Number Frames
Table numbers feel custom when you print them yourself and frame them in matching metallic frames from the dollar aisle.
Design your table number cards on a computer using a free elegant font — script for the number, a small line like “find your seat” beneath it — and print on heavy cardstock or textured paper. Slip each card into an identical dollar store frame, and spray the frames the same gold as your votives and chargers. Consistent frames across every table are what make them look like a curated collection rather than a bargain hunt.
Style each frame with intention: lean it against the floral compote, flank it with a pair of small votives, or prop it on a tiny easel for extra height. Because the frames match your whole metallic scheme, they disappear into the design as a seamless detail instead of standing out as an afterthought.
Foam Board Calligraphy Welcome Sign
Your welcome sign sets the tone for the whole day — and a dollar store foam board can look genuinely high-end with the right finish.
Start with a large foam board and wrap it in linen-look fabric or adhesive marble-pattern contact paper so the surface reads as something far fancier than foam. Then add your names and date with a vinyl decal ordered online — crisp, professional lettering is the entire difference between DIY and designer. Mount the finished board on an easel and flank it with two lantern-style candle holders and a small garland swag wired to the easel’s top.
Keep the wording simple: your names, your date, and one warm line. The restraint is what keeps it elegant. Photograph the finished sign in daylight before the wedding so you can adjust spacing or centering while there is still time to reprint a decal.
Mason Jar Aisle Lanterns
Line the aisle with glowing mason jar lanterns and your ceremony instantly feels romantic, whatever the venue.
Fill each jar with a battery-operated pillar candle or a string of fairy lights, then dress the outside: tie a ribbon in your palette around the neck, wrap the middle with lace or burlap, or hang each jar from a shepherd’s hook with wire. Set them in pairs down both sides of the aisle, alternating with small floral bundles for rhythm. When the ceremony starts and the light drops, that glowing path is what every photographer will frame.
The beauty of jar lanterns is how hard they work after the ceremony: carry them straight to the reception and scatter them across the bar, the cake table, and the guest book station. One project decorates two spaces, which is exactly the kind of value that keeps a wedding budget happy.
Fairy Light Photo Backdrop
A curtain of fairy lights behind the sweetheart table or ceremony arch gives you a glowing photo backdrop for almost nothing.
Hang several curtain-style fairy light strands from a backdrop stand, a bare wall, or a pipe-and-drape frame — the denser the better, so buy more strands than you think you need and overlap them. Layer a few garlands across the top to hide the hanging mechanism, and drape a length of sheer fabric over the lights so the glow softens into a dreamy haze. In photos, the individual pinpoints of light melt into golden bokeh that looks straight out of a magazine.
Set the backdrop behind the head table, the cake, or the dance floor — anywhere your photographer points the camera. Keep the lights on a battery timer so the backdrop glows from cocktail hour through the last dance without anyone touching a plug.
Ribbon Chair Sashes
Bare rental chairs are one of the least romantic things at a wedding — ribbon sashes fix them in minutes.
Buy satin or organza ribbon in your palette by the roll and tie a simple vertical sash down the back of each chair, finishing with a clean knot or a soft bow. For ceremony chairs, hang a small posy of faux flowers or a sprig of greenery from every other sash. For reception chairs, keep it simple: one sash per chair, all tied at the same height, so the room reads as a finished design rather than a craft project.
The key is uniformity — cut every ribbon to the same length using one template piece so the sashes hang evenly down the row. One box of ribbon dresses an entire ceremony’s worth of chairs, and the flowing tails catch the breeze beautifully in outdoor photos.
Petal and Candle Ceremony Circle
Instead of decorating up, decorate down: a wide circle of petals and candles around the ceremony spot frames the moment from the ground.
Scatter faux rose petals in a generous ring around where you will stand, mixing two tones — blush with ivory, or deep rose with gold — for depth. Nestle battery candles of varying heights among the petals and ring the outside with a few low floral bundles. From the photographer’s angle, the circle creates a glowing border that draws every eye straight to the couple, and it looks incredible in aerial and wide shots.
This works beautifully for outdoor ceremonies where hanging anything is a battle with wind, and for modern venues that feel too bare. At dusk it becomes pure magic: light the candles as guests are seated and let the ceremony space reveal itself glowing.
Projects compared
Every project in this guide costs very little — here is how they differ in effort and impact, so you can start with the winners.
| Project | Why it shines | What you need | Budget |
|---|---|---|---|
| Gold votive trio | Biggest glow for the least effort | Votives, metallic spray paint, tea lights | Pocket change |
| Floating candle vases | Classic luxury look, tall and dramatic | Cylinder vases, floating candles, faux blooms | A few dollars per table |
| Mirror tile bases | Doubles every candle’s glow | Mirror tiles, lint-free cloth | Pocket change |
| Garland table runners | Makes long tables look abundant | Garlands, fairy lights, candle bowls | Well under vendor prices |
| Foam board welcome sign | Sets the tone at the entrance | Foam board, fabric wrap, vinyl decal | A few dollars total |
| Fairy light backdrop | Magazine bokeh in every photo | Curtain light strands, sheer fabric | Well under vendor prices |
Budget key: pocket change = barely more than the price of a coffee; a few dollars = under what a single rental piece costs; well under vendor prices = a small fraction of professional decor rates.
Budget-saving tips
Stretch every dollar further with these shopping and styling rules:
Key takeaways
- One metallic finish across every project makes dollar finds look like a collection.
- Cluster decor in groups instead of scattering single pieces across tables.
- Candlelight and fairy lights do more for the look than any price tag can.
- Pack faux flowers tightly — density is what makes them read as real.
- Photograph a test table at night before committing to the final layout.
Frequently asked questions
What can you make from dollar store supplies for a wedding?
You can build almost an entire reception from the dollar aisle: candlelit centerpieces, gold-sprayed vases and chargers, mirror tile bases, garland runners, table number frames, a calligraphy welcome sign, aisle lanterns, and a fairy light photo backdrop. Candlelight and a tight color palette are what make it all look expensive.
Does dollar store wedding decor look cheap?
Not if you follow three rules: keep every piece in one or two colors plus one metallic finish, group items in odd clusters rather than scattering singles, and add candlelight everywhere. Cohesion and glow do far more for the look than price tags ever could.
How far ahead should I buy dollar store wedding decor?
Start shopping as soon as your theme is set, and buy extra of everything fragile. Dollar store inventory turns over fast and popular seasonal pieces sell out, so grab your core supplies early and check a second location for anything missing.
Are dollar store candles safe for a wedding?
Battery candles are the safest choice for enclosed vases, aisle lanterns, and anything near fabric. For real flames, check your venue rules first, keep wicks trimmed, and never leave a lit candle unattended. Assign one helper to light and watch all candles.
How do I make dollar store flowers look real?
Trim stems short, fluff every petal open, and mix the blooms with fresh greenery or eucalyptus so they read as texture rather than filler. Cluster flowers tightly instead of spreading them thin, and keep arrangements low and dense where guests view them up close.