35 Simple and Stylish DIY Wedding Decorations
By zainzari • Published April 2026 • Updated October 8, 2026
 📌 Save
The best DIY wedding decorations are simple to make, cheap to build and grouped by zone: centerpieces, backdrops, signage, table details, ceremony lighting, photo fun and favors. Start 2 to 3 months out, prototype each project once, and you can decorate an entire wedding for $300 to $800 instead of thousands.
There is a special magic in handmade wedding decor. When you help a friend with her wedding and see guests admiring centerpieces you built at the kitchen table, you realize something: DIY doesn’t look “crafty” when it’s done with a consistent palette and a little patience. It looks personal — and personal is what guests remember.
Below are 35 simple and stylish DIY wedding decorations for 2027, organized into 7 decor zones so you can plan the whole venue room by room. Each idea includes realistic time and cost estimates, because the best DIY is the one you actually finish.
At a Glance: DIYs by Decor Zone
| Decor Zone | Ideas | Time Each | Cost Each |
|---|---|---|---|
| Centerpieces | 1, 7, 12, 18, 23, 29 | 15 to 40 min | $2 to $12 |
| Backdrops | 2, 13, 28 | 2 to 4 hours | $15 to $60 |
| Signage & Numbers | 3, 8, 11, 16, 21 | 30 to 90 min | $5 to $30 |
| Table Details | 4, 9, 20, 24, 30, 31 | 10 to 45 min | $1 to $8 |
| Ceremony & Lighting | 10, 17, 19, 32 | 30 to 90 min | $10 to $40 |
| Photo & Guest Fun | 5, 22, 27, 33, 35 | 30 to 120 min | $5 to $40 |
| Favors & Displays | 6, 14, 15, 25, 26, 34 | 15 to 60 min | $1 to $15 |
Times are per finished piece after your first prototype. Costs assume craft-store and thrifted supplies; buying in bulk cuts them further.
Mason Jar Centerpieces
 📌 Save
Mason jars work as vases, candle holders and fairy-light lanterns — sometimes all three on one table.
Steps: Clean the jars and remove labels with hot soapy water. Wrap the middle with lace, burlap or twine and secure with hot glue. Fill one-third with water and add fresh flowers, or drop in a tea light or a short string of fairy lights for a glowing version.
Group jars in odd numbers (3 or 5) per table, mixing heights for a styled look. They suit rustic, vintage and boho themes, and guests happily take them home afterward.
Read next: 27 Rustic Wedding Decoration Ideas
Paper Flower Backdrop
 📌 Save
Oversized paper flowers create a dramatic focal point for a fraction of real-flower prices.
Steps: Cut petal templates from cardstock or crepe paper in your wedding colors. Curl each petal around a pencil, then glue petals in concentric rings onto a circular base, finishing with a contrasting center. Make 8 to 12 blooms in three sizes and mount them on a fabric-draped frame or directly on a wall with removable hooks.
This is a perfect assembly-line project for a crafting party — one person cuts, one curls, one glues. The backdrop works behind the sweetheart table, the cake table or the photo booth.
Wooden Welcome Signs
 📌 Save
A stained wood board and some paint become the warmest greeting your guests receive.
Steps: Sand a wooden board or pallet plank, then stain or paint it in your palette. Sketch your message lightly in pencil — or print the text, shade the back with pencil and trace it as a transfer guide. Fill in with white or metallic acrylic paint using a small brush, then seal with clear matte spray.
Lean it on an easel at the entrance flanked by flower pots or lanterns. Keep the message short (“Welcome to our forever”) so it’s readable from ten feet away.
Read next: DIY Dollar Tree Wedding Decor Ideas
Lace-Wrapped Candles
 📌 Save
Plain glass votives become vintage treasures with a strip of lace and a dot of glue.
Steps: Cut lace or burlap to wrap once around each votive with a slight overlap. Secure with hot glue or a twine bow, then drop in a tea light or LED candle. Add a tiny pearl or dried flower to the bow for extra charm.
Cluster them in groups down the table or along the aisle. Use LED candles inside if they’ll sit near fabric, dried flowers or curious toddlers.
Read next: 45 Stunning IKEA Wedding Hacks and Ideas
DIY Photo Display Clothesline
 📌 Save
Twine, clothespins and your favorite photos — the most sentimental decor at the wedding.
Steps: Print 20 to 30 favorite photos (matte drugstore prints are fine). String twine between two posts, along a wall or across a wooden frame, and clip photos with mini clothespins. Weave in fairy lights and a greenery garland for the finished look.
Arrange photos roughly chronologically so guests walk through your story. It doubles as cocktail-hour entertainment — people love spotting themselves in old pictures.
Read next: 10 Budget Outdoor Wedding Decor Ideas
Floral Hoop Wreaths
 📌 Save
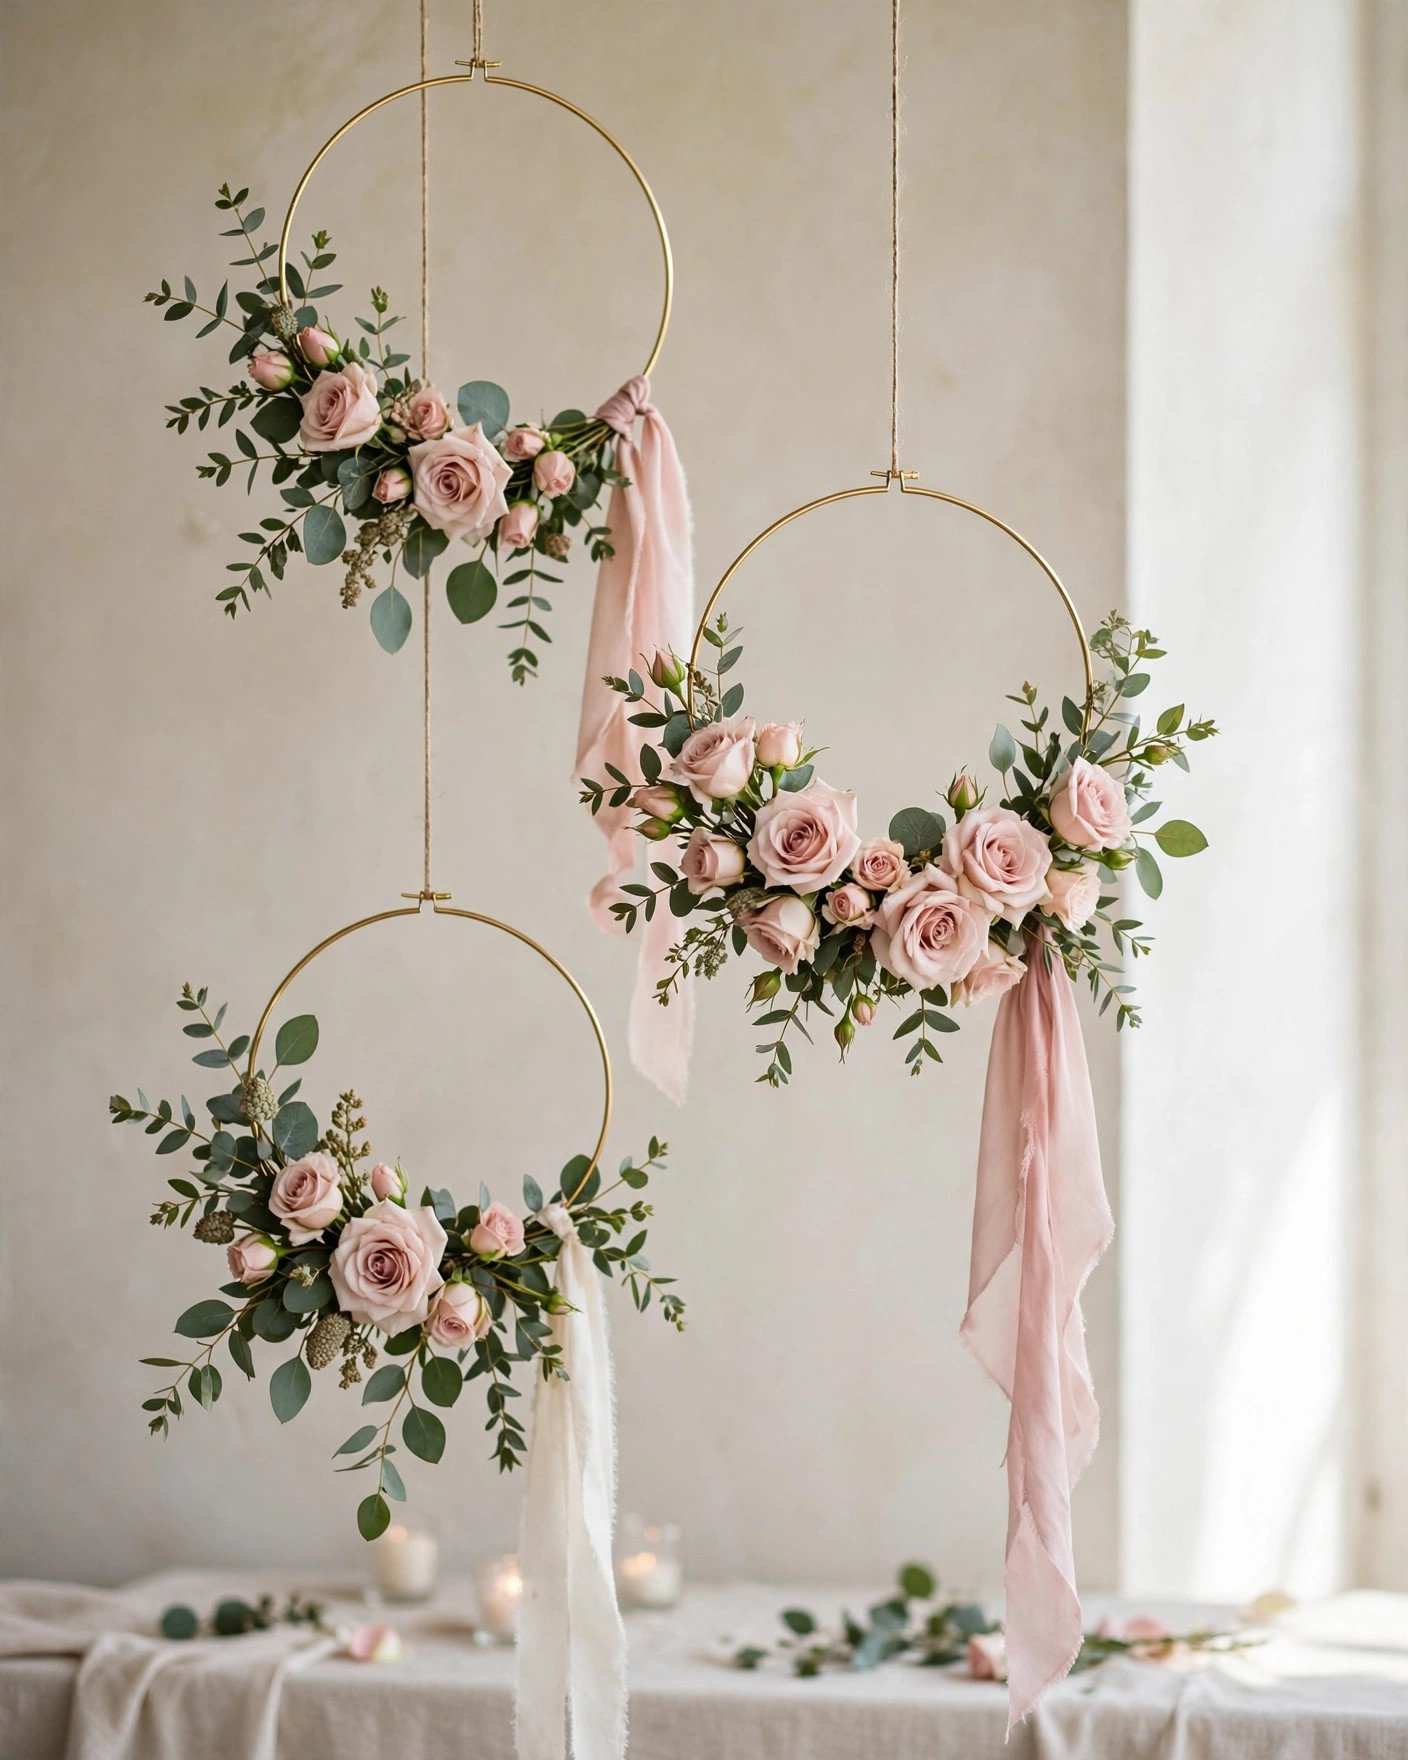
Metal or wooden hoops dressed with greenery and blooms are the modern wreath.
Steps: Wire small bundles of greenery around the bottom third of each hoop, then tuck in flowers and finish with a trailing ribbon. Hang at varying heights from shepherd’s hooks, branches or the ceiling with fishing line.
They work as ceremony decor, chair markers, wall art and photo booth props — make a dozen and scatter them everywhere. Faux flowers work beautifully here since nobody examines them up close.
Read next: 27 Rustic Wedding Decoration Ideas
Wine Bottle Vases
 📌 Save
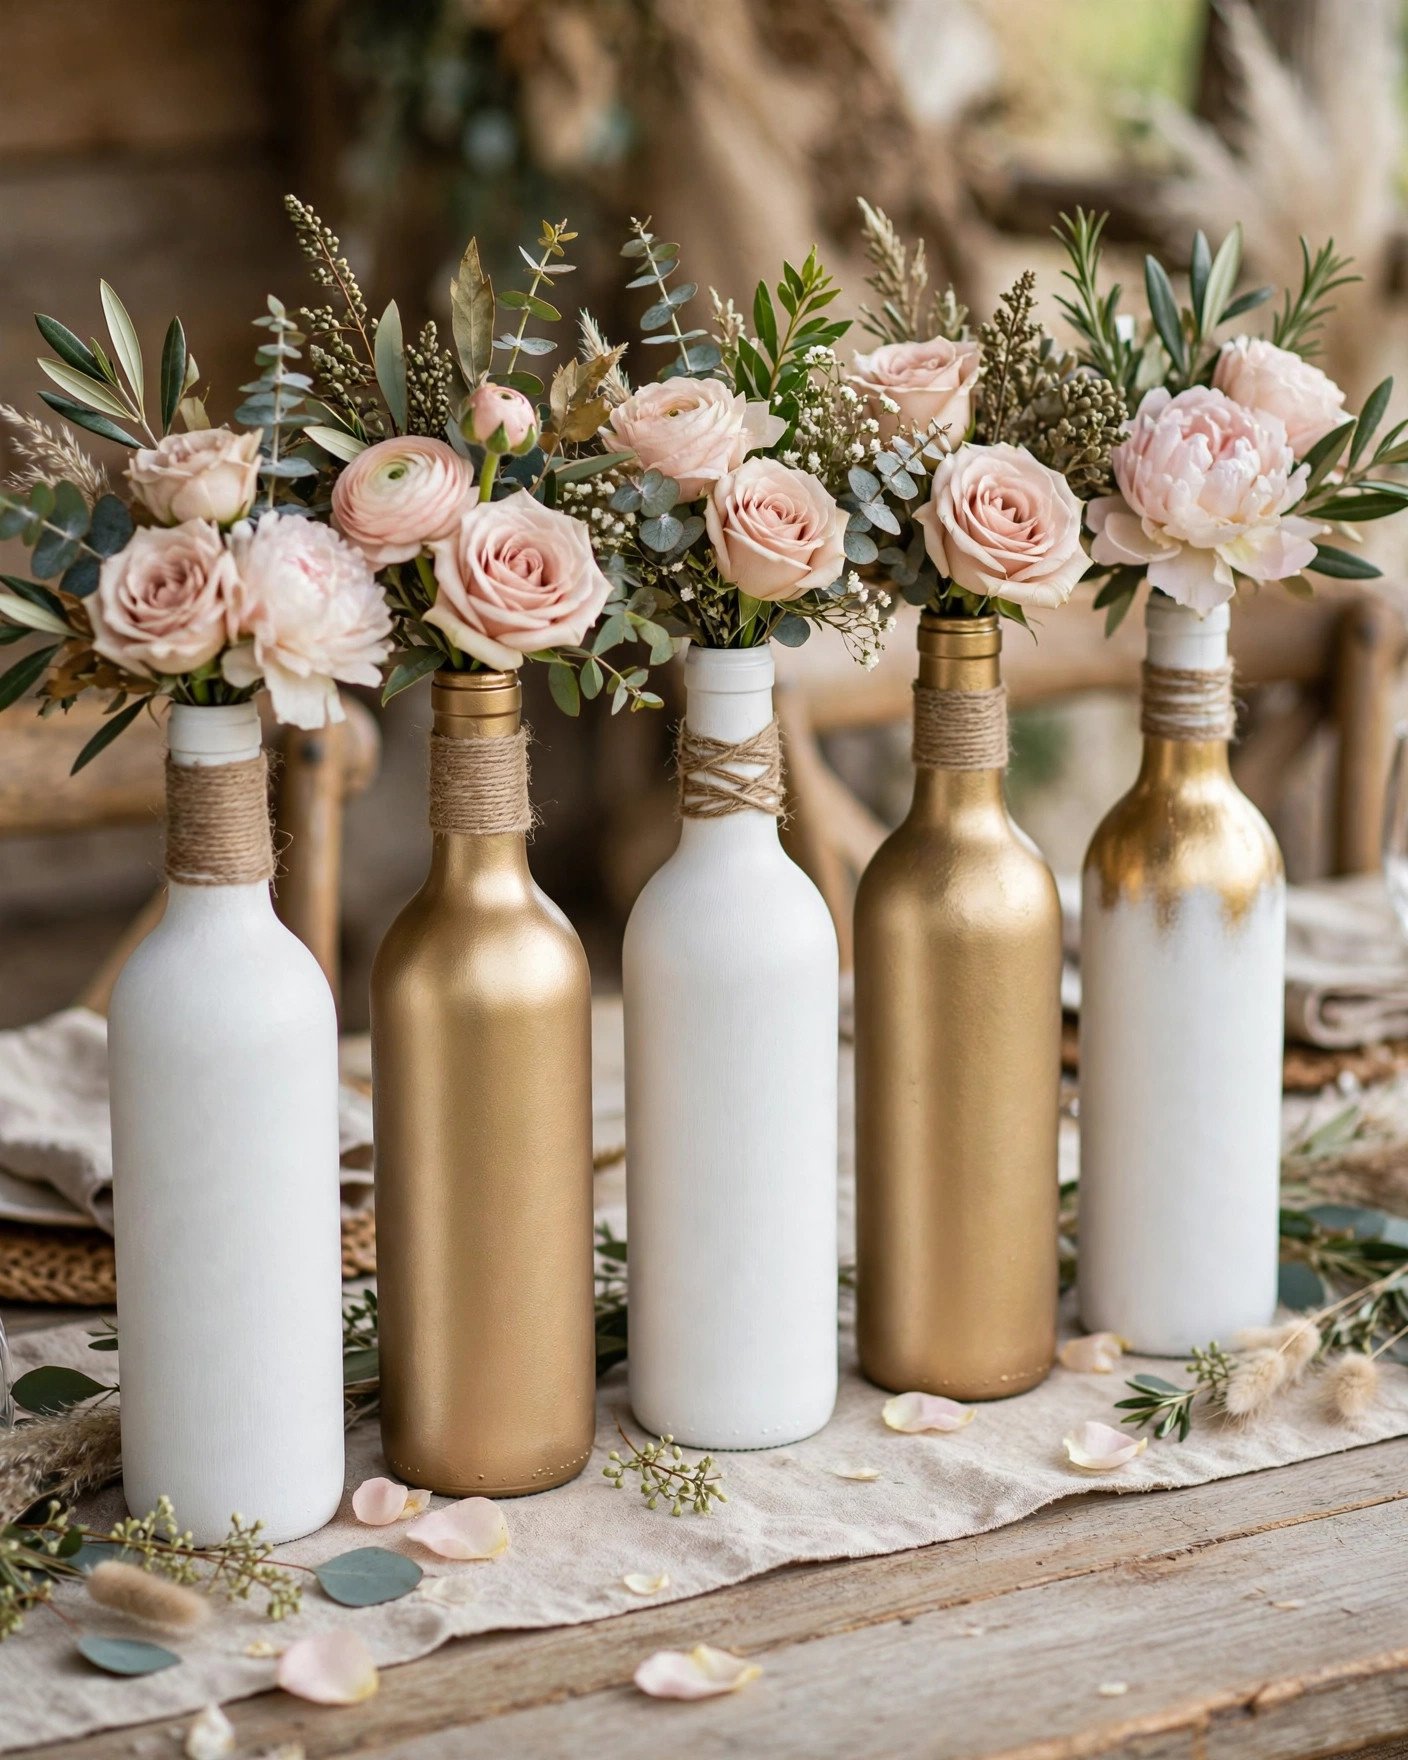
Start saving wine bottles now — with paint and twine they become elegant bud vases.
Steps: Soak bottles to remove labels, then spray-paint in your wedding colors — matte white, blush or metallic gold all photograph beautifully. Wrap twine twice around the neck for rustic charm, or leave painted bottles clean for a modern look. Fill with single stems or small wildflower bunches.
Line 3 to 5 bottles of varying heights down each table. It’s eco-friendly, nearly free, and the varied silhouettes look intentionally styled.
Wooden Table Numbers
 📌 Save
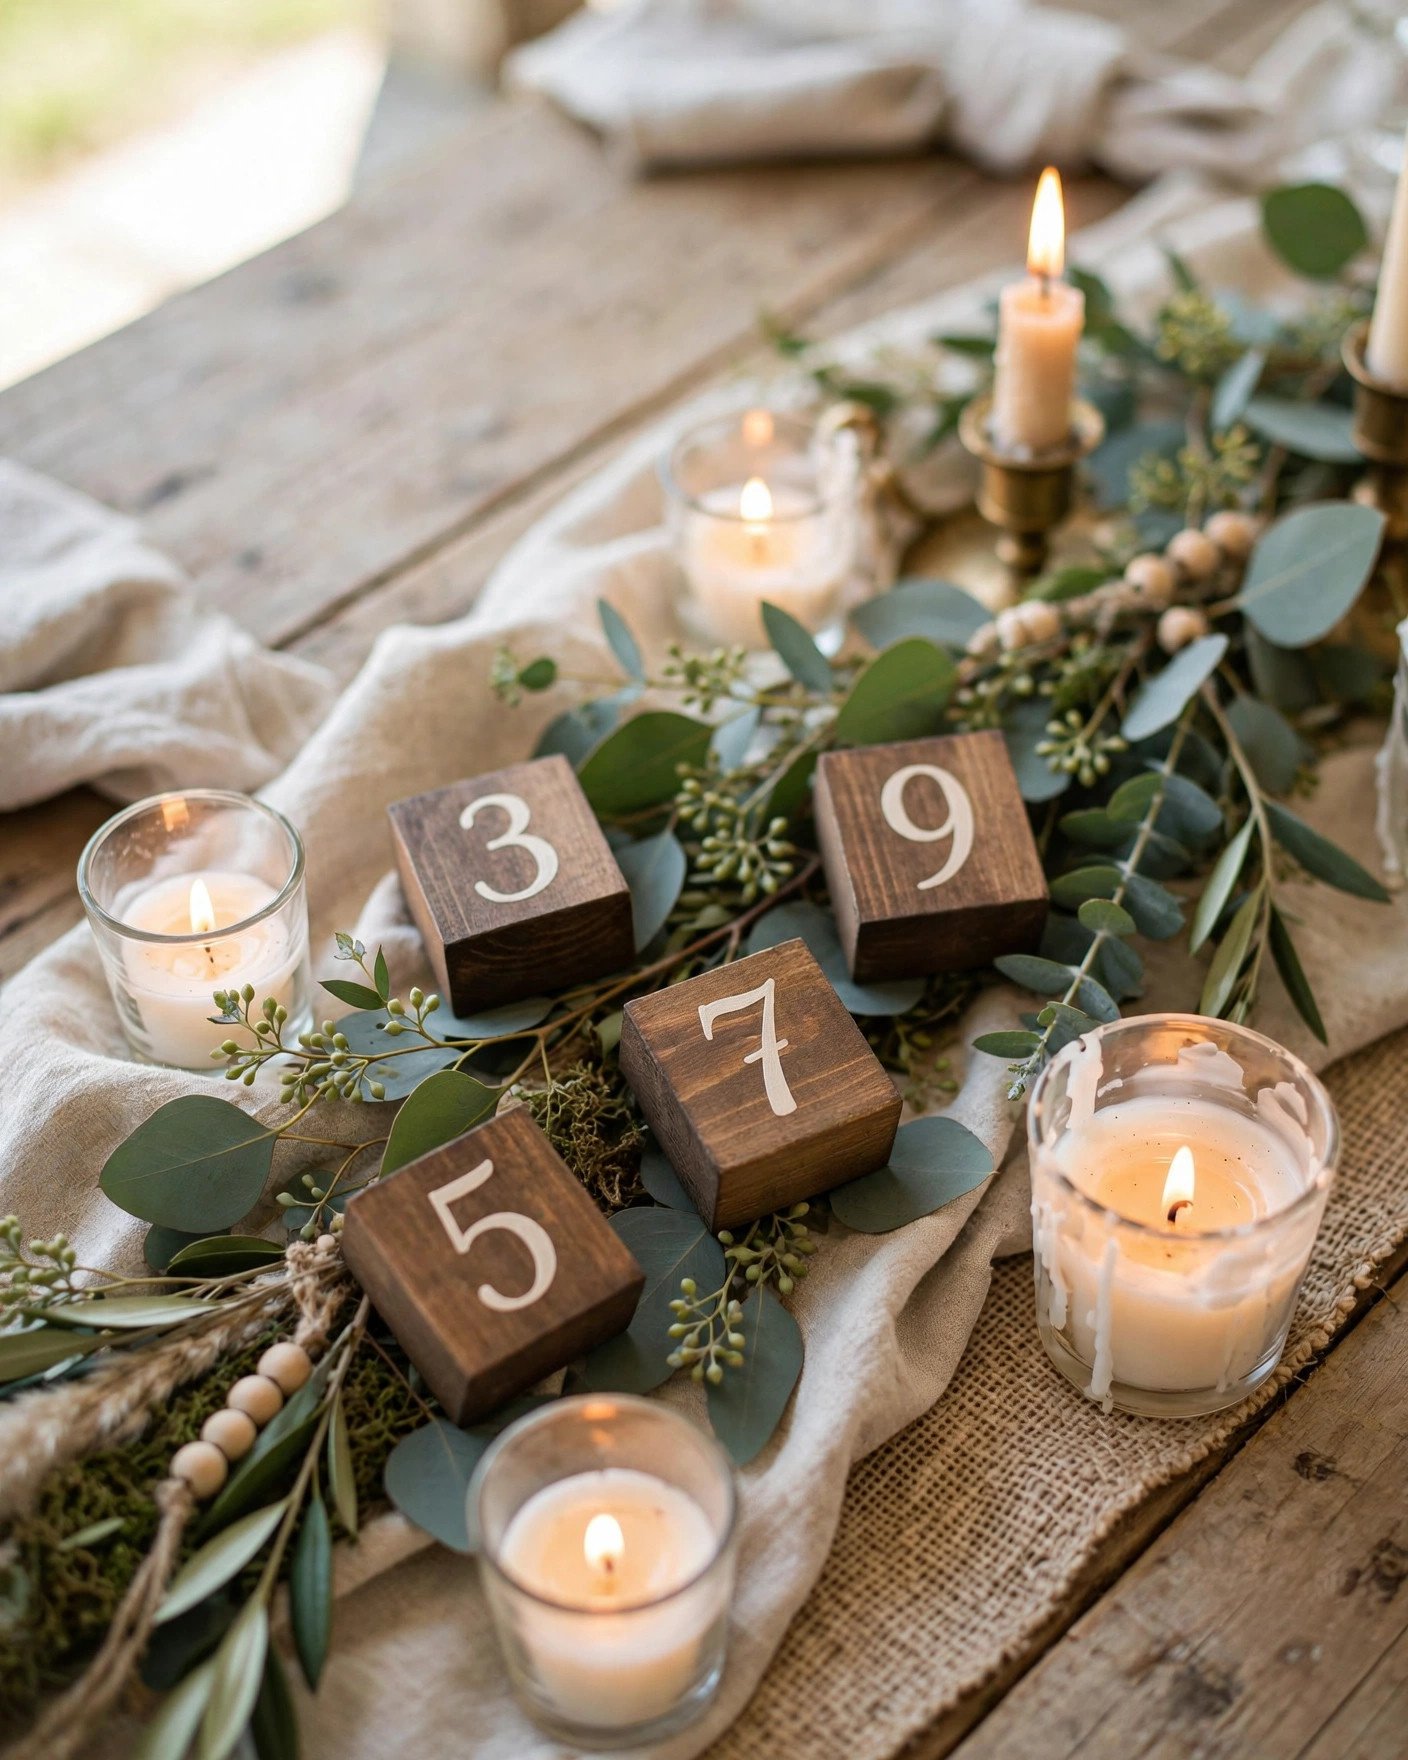
Small wood blocks with painted numbers beat printed cards for rustic and outdoor weddings.
Steps: Cut or buy small wood slices or blocks and sand the faces smooth. Stencil or freehand the table number in white or gold acrylic paint, then seal lightly. Lean each against a small easel or prop it in a holder with greenery.
Stain the wood for a farmhouse look or paint it in your wedding colors for a modern twist. They double as keepsakes for the wedding party afterward.
Read next: DIY Dollar Tree Wedding Decor Ideas
Tulle Chair Sashes
 📌 Save
Tulle bows transform plain rental chairs into something straight out of a styled shoot.
Steps: Cut tulle into 8-inch-wide, 3-foot-long strips. Tie each around the chair back in a full bow, fluff the loops, and tuck a small flower or greenery sprig into the knot. One bolt of tulle covers roughly 20 chairs.
Blush, ivory and champagne tulle suit most palettes; go bolder with dusty blue or burgundy for contrast. This is a great job to delegate — it needs zero skill, just hands.
Read next: 10 Budget Outdoor Wedding Decor Ideas
Hanging Lanterns
 📌 Save
Paper and metal lanterns with fairy lights create the most magical evening atmosphere for the least money.
Steps: Hang paper lanterns in varying sizes from tree branches, tent ceilings or shepherd’s hooks using fishing line. Tuck a short string of battery fairy lights inside each one, with the battery pack taped to the lantern’s wire frame. Switch them all on at dusk.
Cluster lanterns at different heights rather than in a straight line — the organic arrangement looks far more magical. White and blush lanterns glow warmest.
Read next: 27 Rustic Wedding Decoration Ideas
Chalkboard Signs
 📌 Save
Chalkboard paint turns any frame or board into endlessly reusable wedding signage.
Steps: Apply two coats of chalkboard paint to wood boards or thrifted frames, letting each coat cure fully. “Season” the surface by rubbing chalk all over and wiping off, then letter your message with chalk markers for crisp lines. Frame with a flower garland on an easel.
Use them for the welcome message, bar menu, timeline and directional signs — one batch of boards covers the whole venue. Chalk markers (not regular chalk) survive humidity and handling.
Read next: 45 Stunning IKEA Wedding Hacks and Ideas
Geometric Terrariums
 📌 Save
Brass geometric terrariums with succulents are the chic, modern answer to floral centerpieces.
Steps: Line the bottom with small pebbles for drainage, add a thin layer of cactus soil, then nestle in 2 to 3 small succulents or air plants. Top with decorative sand or moss and tuck in a tea light beside (not inside) the plants.
Succulents need almost no care, so you can assemble these a week ahead. They double as guest favors — set out a “take me home” card and watch them disappear.
Read next: DIY Dollar Tree Wedding Decor Ideas
Pallet Backdrop
 📌 Save
Wooden pallets make a sturdy, characterful base for ceremony and photo backdrops.
Steps: Source clean, heat-treated pallets (look for the HT stamp) and sand any rough spots. Stand two or three upright and secure them together, then drape fabric across the top, weave in string lights, and attach flower garlands and greenery with wire. A “Mr & Mrs” or neon-style sign in the center finishes it.
Pallets are often free from warehouses and garden centers — just ask. The backdrop works for the ceremony, then moves behind the sweetheart table for the reception.
Read next: 27 Rustic Wedding Decoration Ideas
DIY Confetti Cones
 📌 Save
Paper cones filled with biodegradable confetti make the ceremony exit magical.
Steps: Cut craft or patterned paper into circles, roll each into a cone and glue the seam. Fill with dried flower petals, biodegradable confetti or fresh petals, and display upright in a crate or basket with a “toss me” sign at the ceremony entrance.
Match the paper to your palette for a coordinated look. Dried lavender buds smell amazing and photograph beautifully mid-air.
Hanging Flower Jars
 📌 Save
Small jars of flowers hung overhead add a dreamy floating-garden effect.
Steps: Wrap twine securely around the neck of small glass jars, leaving long tails. Fill each jar one-third with water and a few fresh blooms, then hang from a wooden beam, branch or frame at staggered heights using the twine tails tied in firm knots.
Perfect for cocktail areas and over the dessert table where floor space is tight. Keep arrangements small — heavy jars plus water get surprisingly weighty.
Read next: 10 Budget Outdoor Wedding Decor Ideas
Mirror Seating Chart
 📌 Save
A thrifted mirror with hand-lettered assignments is the most glamorous DIY on this list.
Steps: Find a large framed mirror at a thrift store and clean it well. Plan your layout on paper first, then write names and table assignments with a white or gold paint marker. Frame the mirror with a eucalyptus garland and stand it on an easel at the reception entrance.
Paint markers wipe off glass with a razor scraper, so mistakes aren’t permanent — practice the layout on the back first if you’re nervous. It suits vintage, glam and modern weddings alike.
Read next: DIY Dollar Tree Wedding Decor Ideas
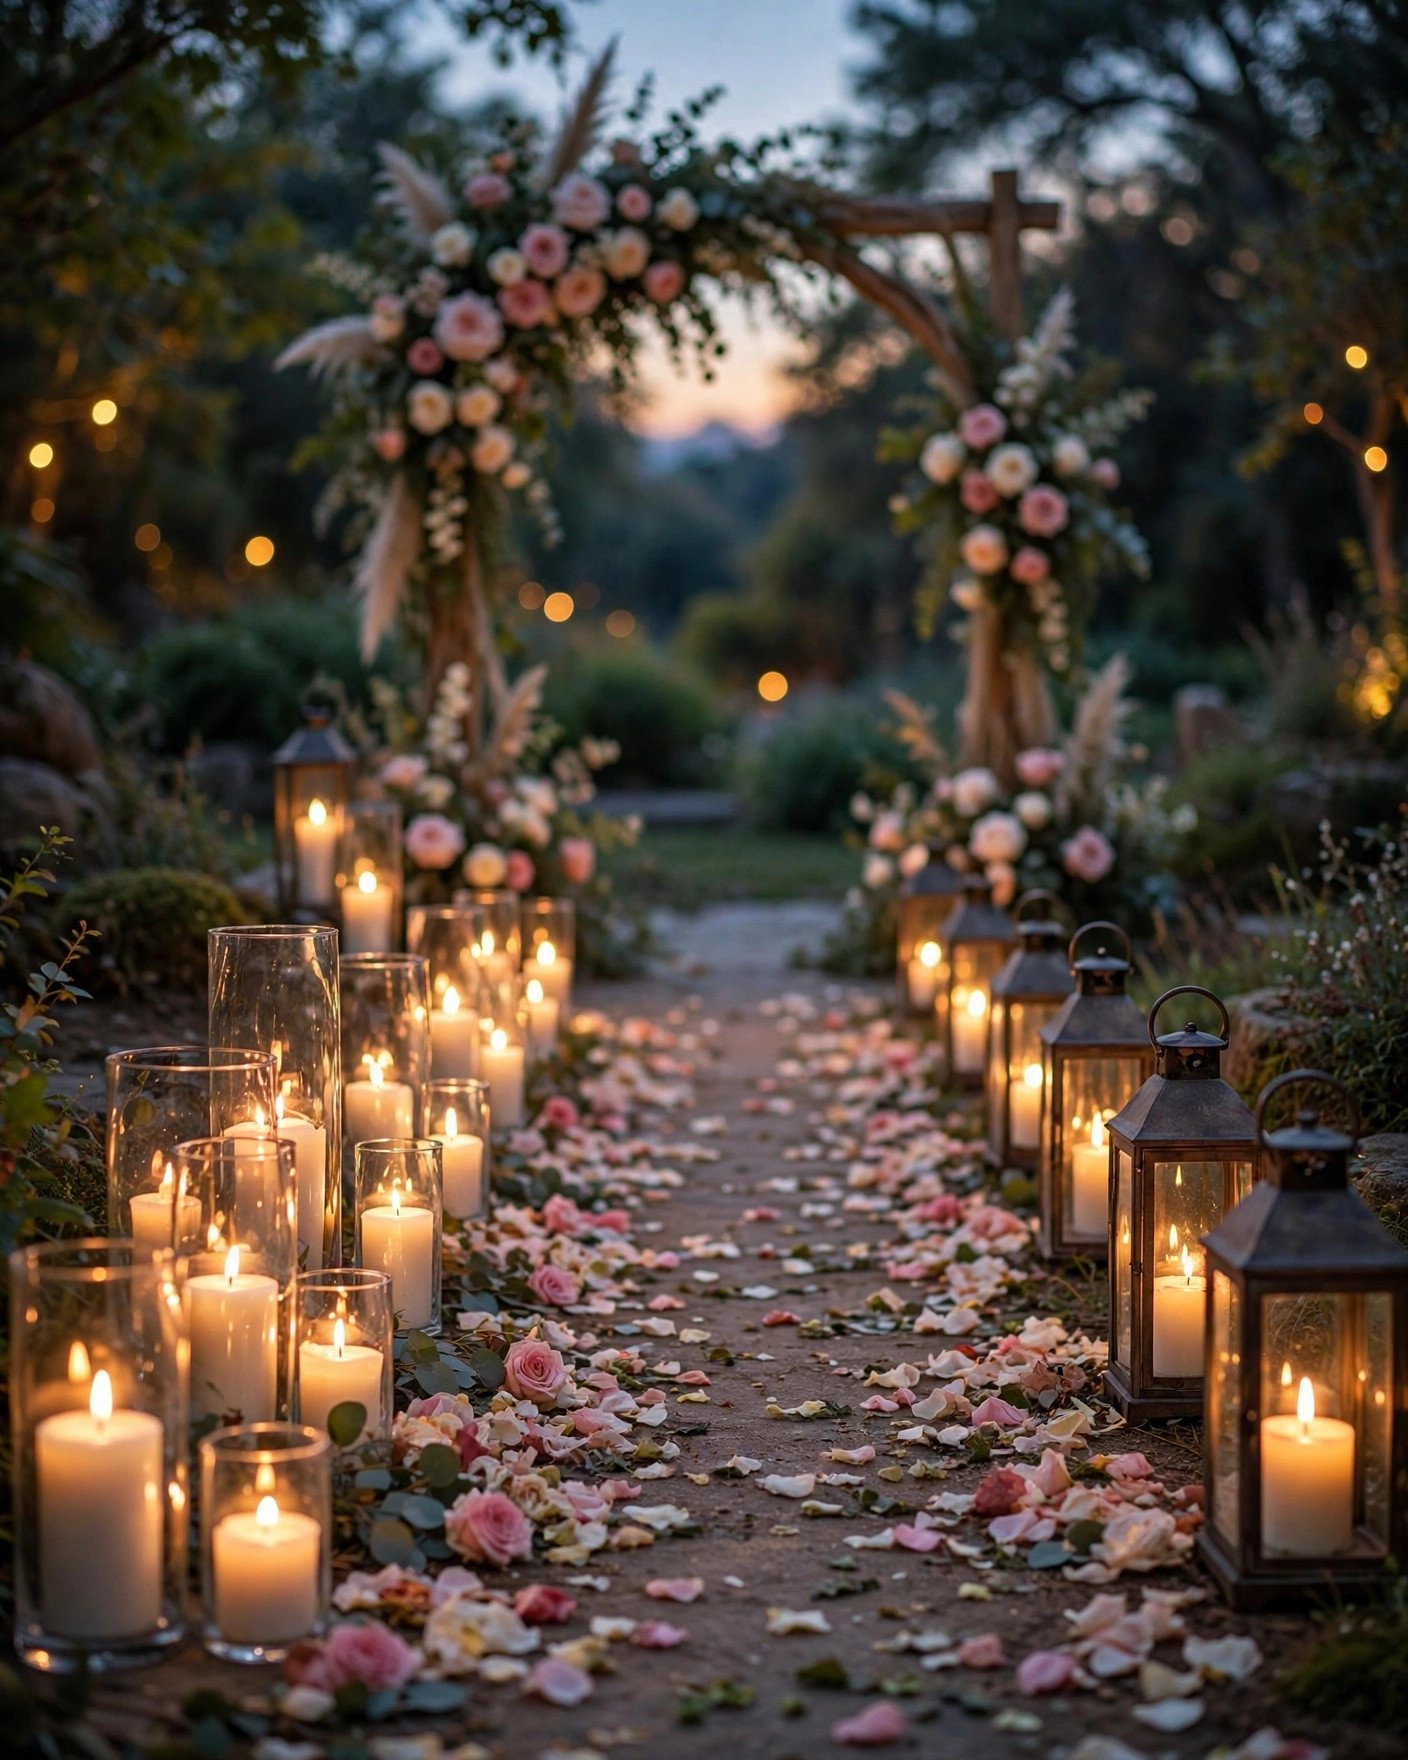
Candle-Lit Aisle
 📌 Save
Rows of glowing candles transform the walk down the aisle into pure cinema.
Steps: Line both sides of the aisle with candles in glass hurricane vases, lanterns or mason jars — mixing heights looks best. Scatter petals between them, and place the lights just outside the aisle runner so dresses pass safely. Light everything 15 minutes before the processional.
Use LED candles if the venue restricts open flames or if it’s windy — modern flameless candles flicker convincingly in photos. For real flames, assign one person to the lighting round.
Read next: 27 Rustic Wedding Decoration Ideas
Rustic Wood Slice Centerpieces
 📌 Save
Wood slices are the rustic centerpiece base that makes everything on top look styled.
Steps: Sand the top face of each wood slice smooth and wipe clean. Arrange a pillar candle, a small flower posy in a bud vase and a few pinecones or petals on top. Vary slice diameters across tables for a natural, collected feel.
Buy slices in bulk online or cut your own from fallen logs (let them dry fully first). They work for barn, woodland and outdoor weddings, and they stack for easy transport.
Read next: 45 Stunning IKEA Wedding Hacks and Ideas
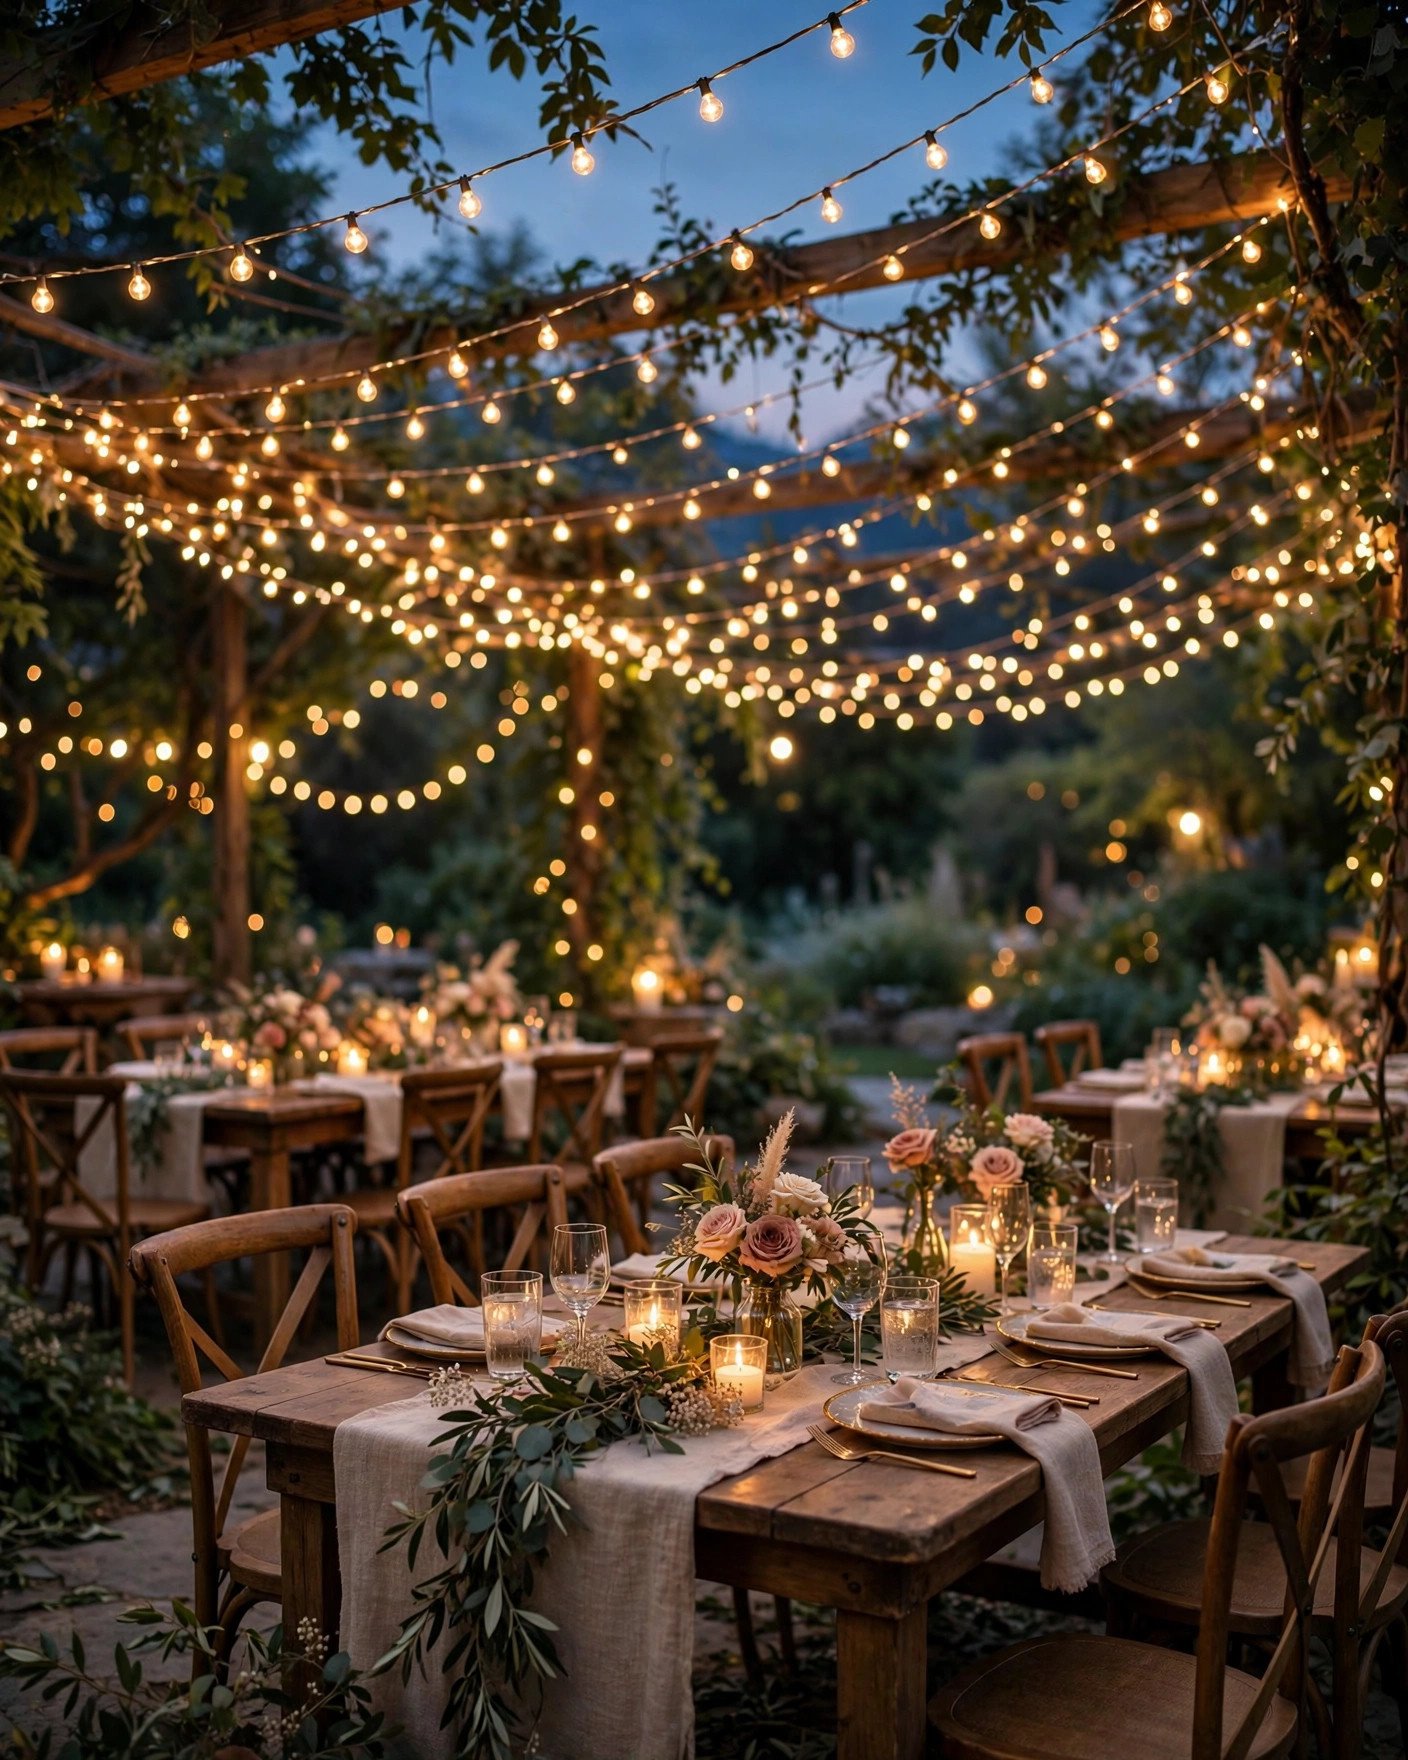
Hanging Fairy Lights
 📌 Save
Strung overhead, fairy lights turn any ceiling, tent or tree canopy into magic.
Steps: Drape warm-white fairy light strands in swags from a central point outward, securing with removable hooks, zip ties or by wrapping around beams. Overlap strands generously — density is what makes a canopy look luxurious rather than sparse. Plug into a timer so they glow on schedule.
For trees, wrap trunks and drape between branches. For tents, run strands along the ridge lines. Battery-operated strands work where outlets don’t reach.
Read next: 10 Budget Outdoor Wedding Decor Ideas
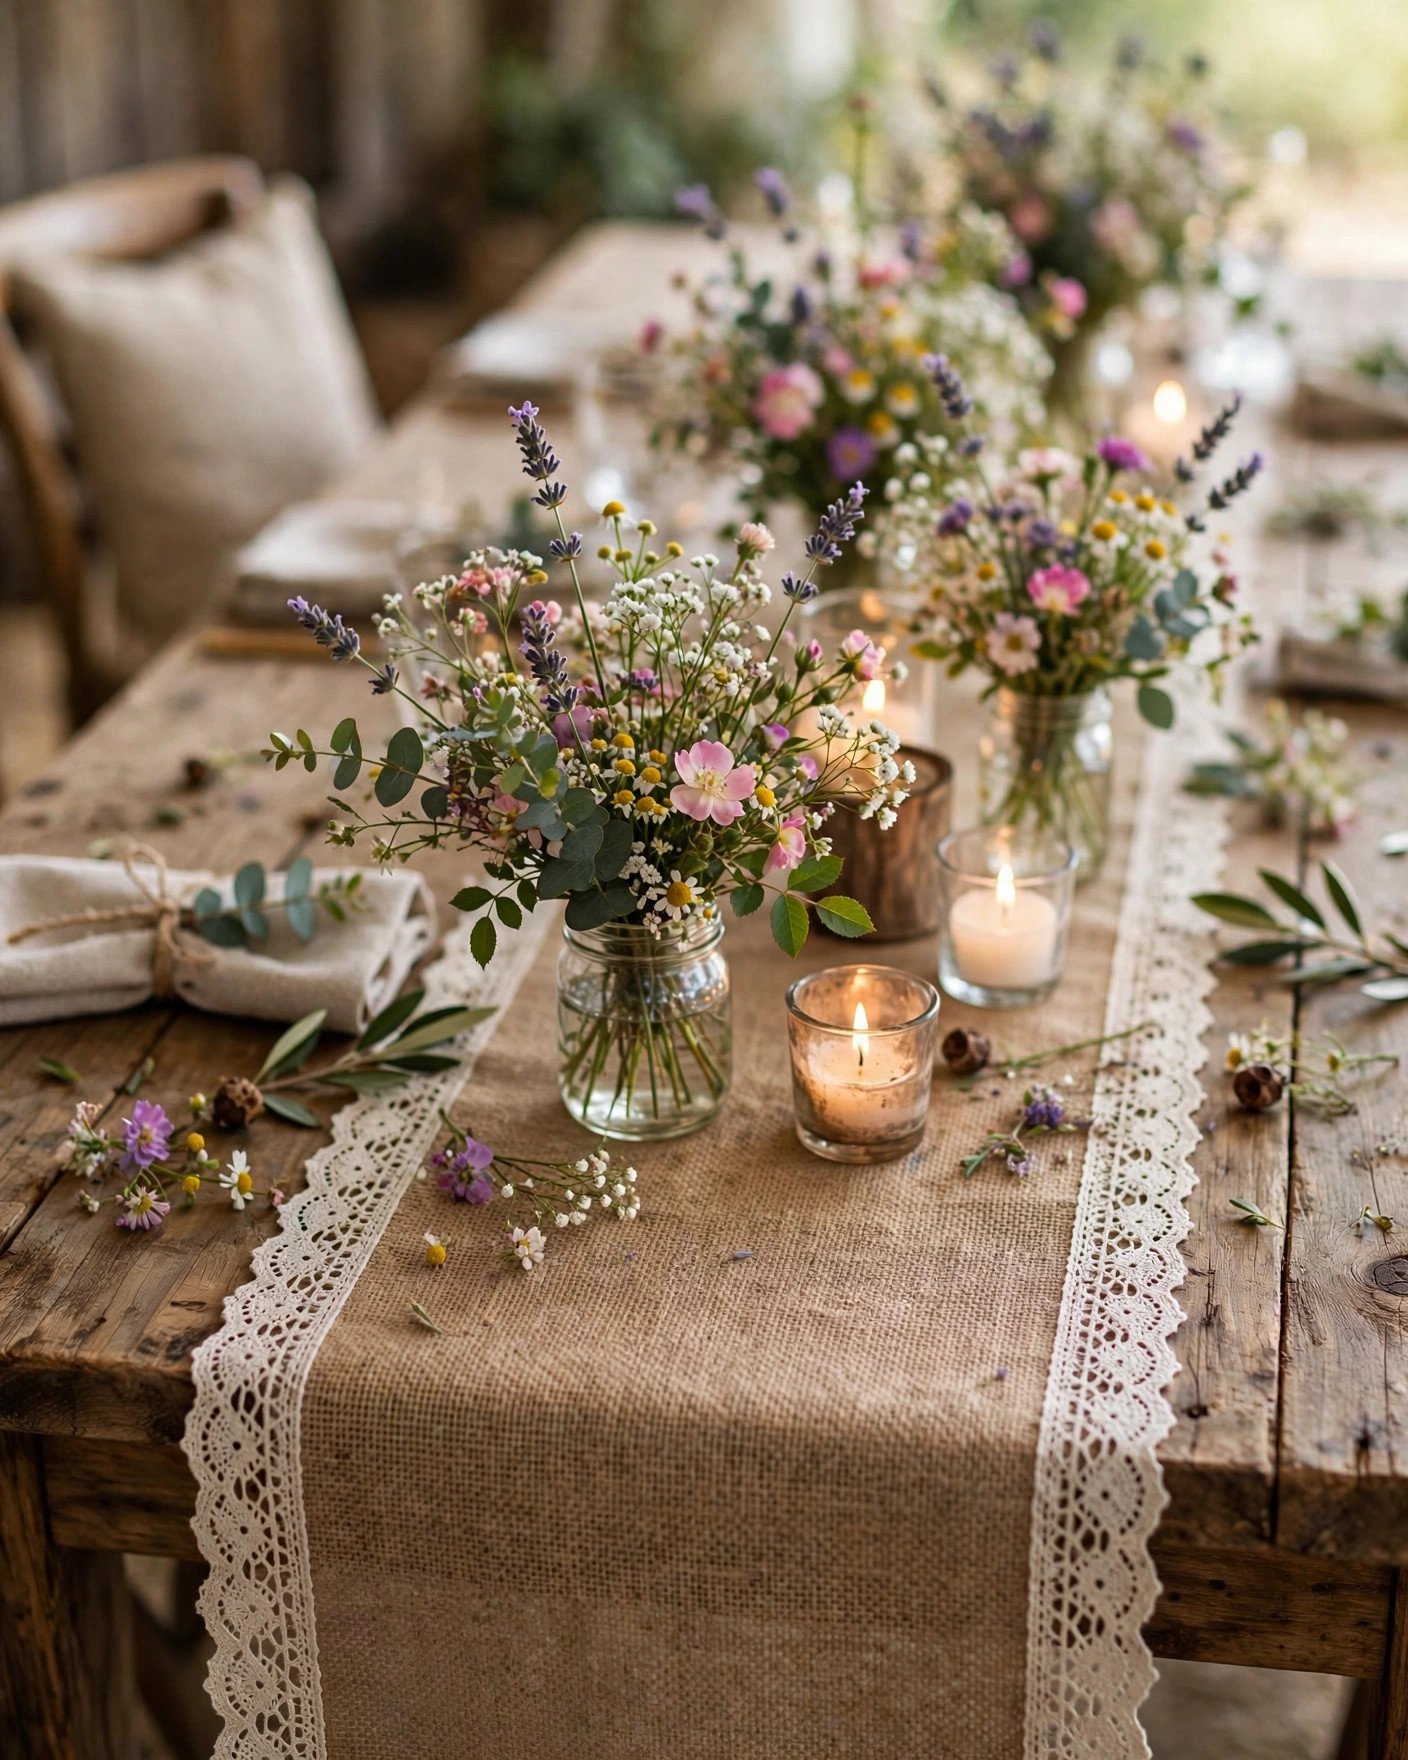
Burlap Table Runners
 📌 Save
A strip of burlap down the table adds farmhouse texture that plain linens can’t.
Steps: Cut burlap to your table length plus a 12-inch overhang at each end. Pull a few threads from each long edge for a soft fringed finish, then layer lace ribbon down the center or stencil a simple pattern with fabric paint. Iron flat before laying.
Burlap sheds, so shake runners out outdoors before bringing them inside. Pair with lace overlays for the classic rustic-elegant combo.
Read next: 27 Rustic Wedding Decoration Ideas
Framed Table Numbers
 📌 Save
Printed numbers in thrifted frames look boutique-bought and cost almost nothing.
Steps: Collect mismatched frames from thrift stores and spray-paint them all one color (gold is classic) for cohesion. Print table numbers in an elegant font on cardstock, trim to fit, and pop them in. Stand each on the table leaning against a small vase or candle.
Uniform frame color is the trick that makes mismatched shapes look intentional. After the wedding, the frames become home decor.
Read next: DIY Dollar Tree Wedding Decor Ideas
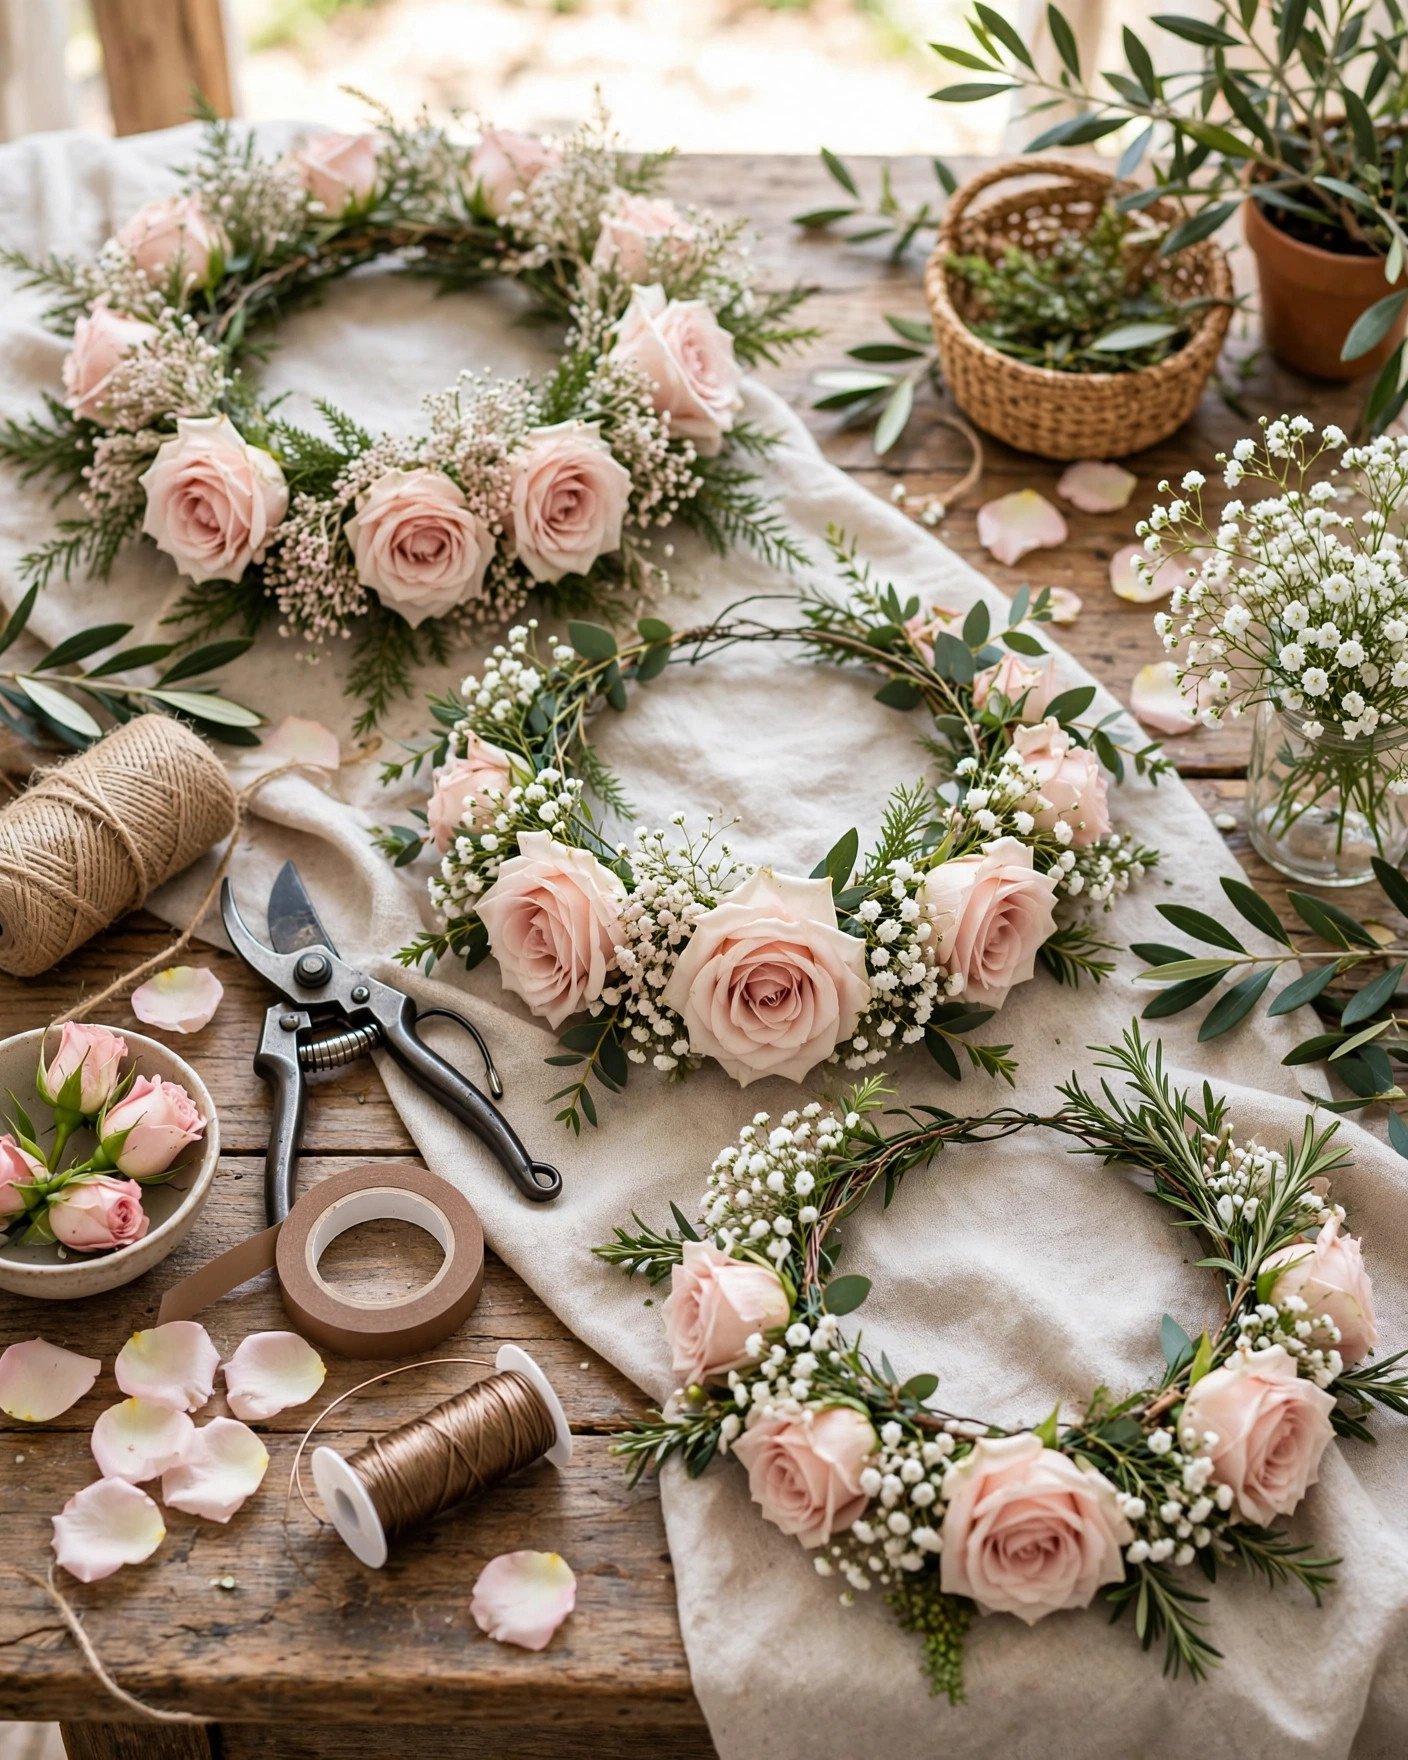
DIY Flower Crowns
 📌 Save
Flower crowns for the bride, bridesmaids and flower girls add whimsy no store-bought accessory can match.
Steps: Measure floral wire to each head and twist into a circle. Wrap the wire with floral tape, then wire on small flower clusters and greenery sprigs, working around the circle. Finish the back with ribbon streamers.
Use sturdy blooms — spray roses, baby’s breath, waxflower — and make them the morning of the wedding. Store finished crowns in the fridge to keep them fresh.
Floating Candle Centerpieces
 📌 Save
Tall vases of water with floating candles create showstopping centerpieces in minutes.
Steps: Fill tall cylindrical vases two-thirds with water. Add a drop of food coloring for tinted water if you like, then scatter a few petals or a sprig of greenery inside. Gently set 2 to 3 floating candles on the surface and light just before guests sit down.
Group vases in threes of varying heights. They’re stunning for evening receptions when the flames reflect off the water and glass.
Read next: 10 Budget Outdoor Wedding Decor Ideas
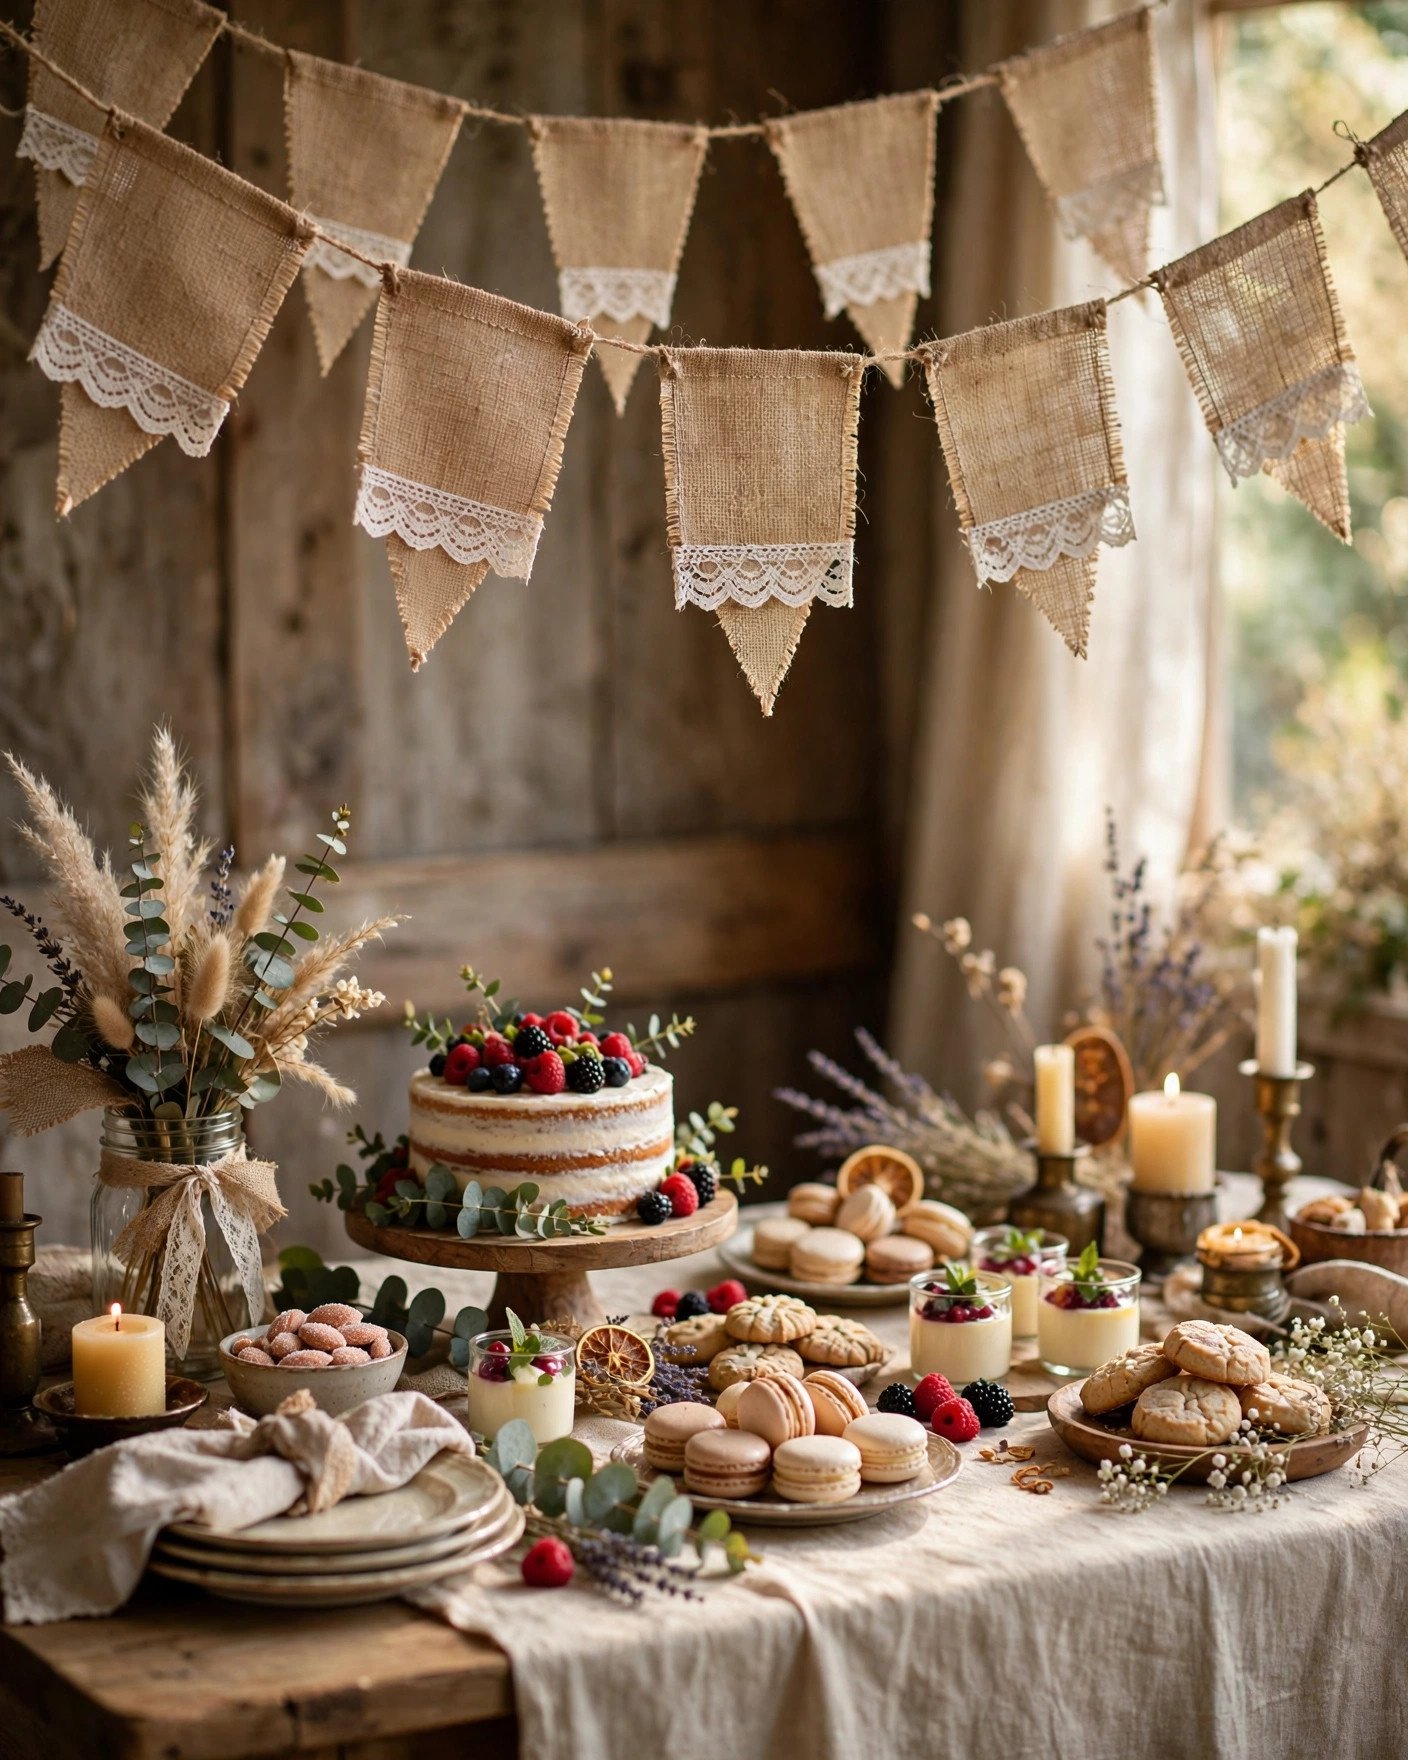
Burlap and Lace Banners
 📌 Save
Burlap triangles strung with lace spell out celebration in the most charming way.
Steps: Cut burlap into triangles and cut lace into matching smaller triangles to layer on top. Glue or stitch the pairs, then attach them along a length of twine with hot glue, spacing evenly. Stencil letters on alternating flags for messages like “LOVE” or “JUST MARRIED.”
Hang across the dessert table, behind the sweetheart table or over the bar. One long banner can be rehung in three spots through the day.
Read next: 27 Rustic Wedding Decoration Ideas
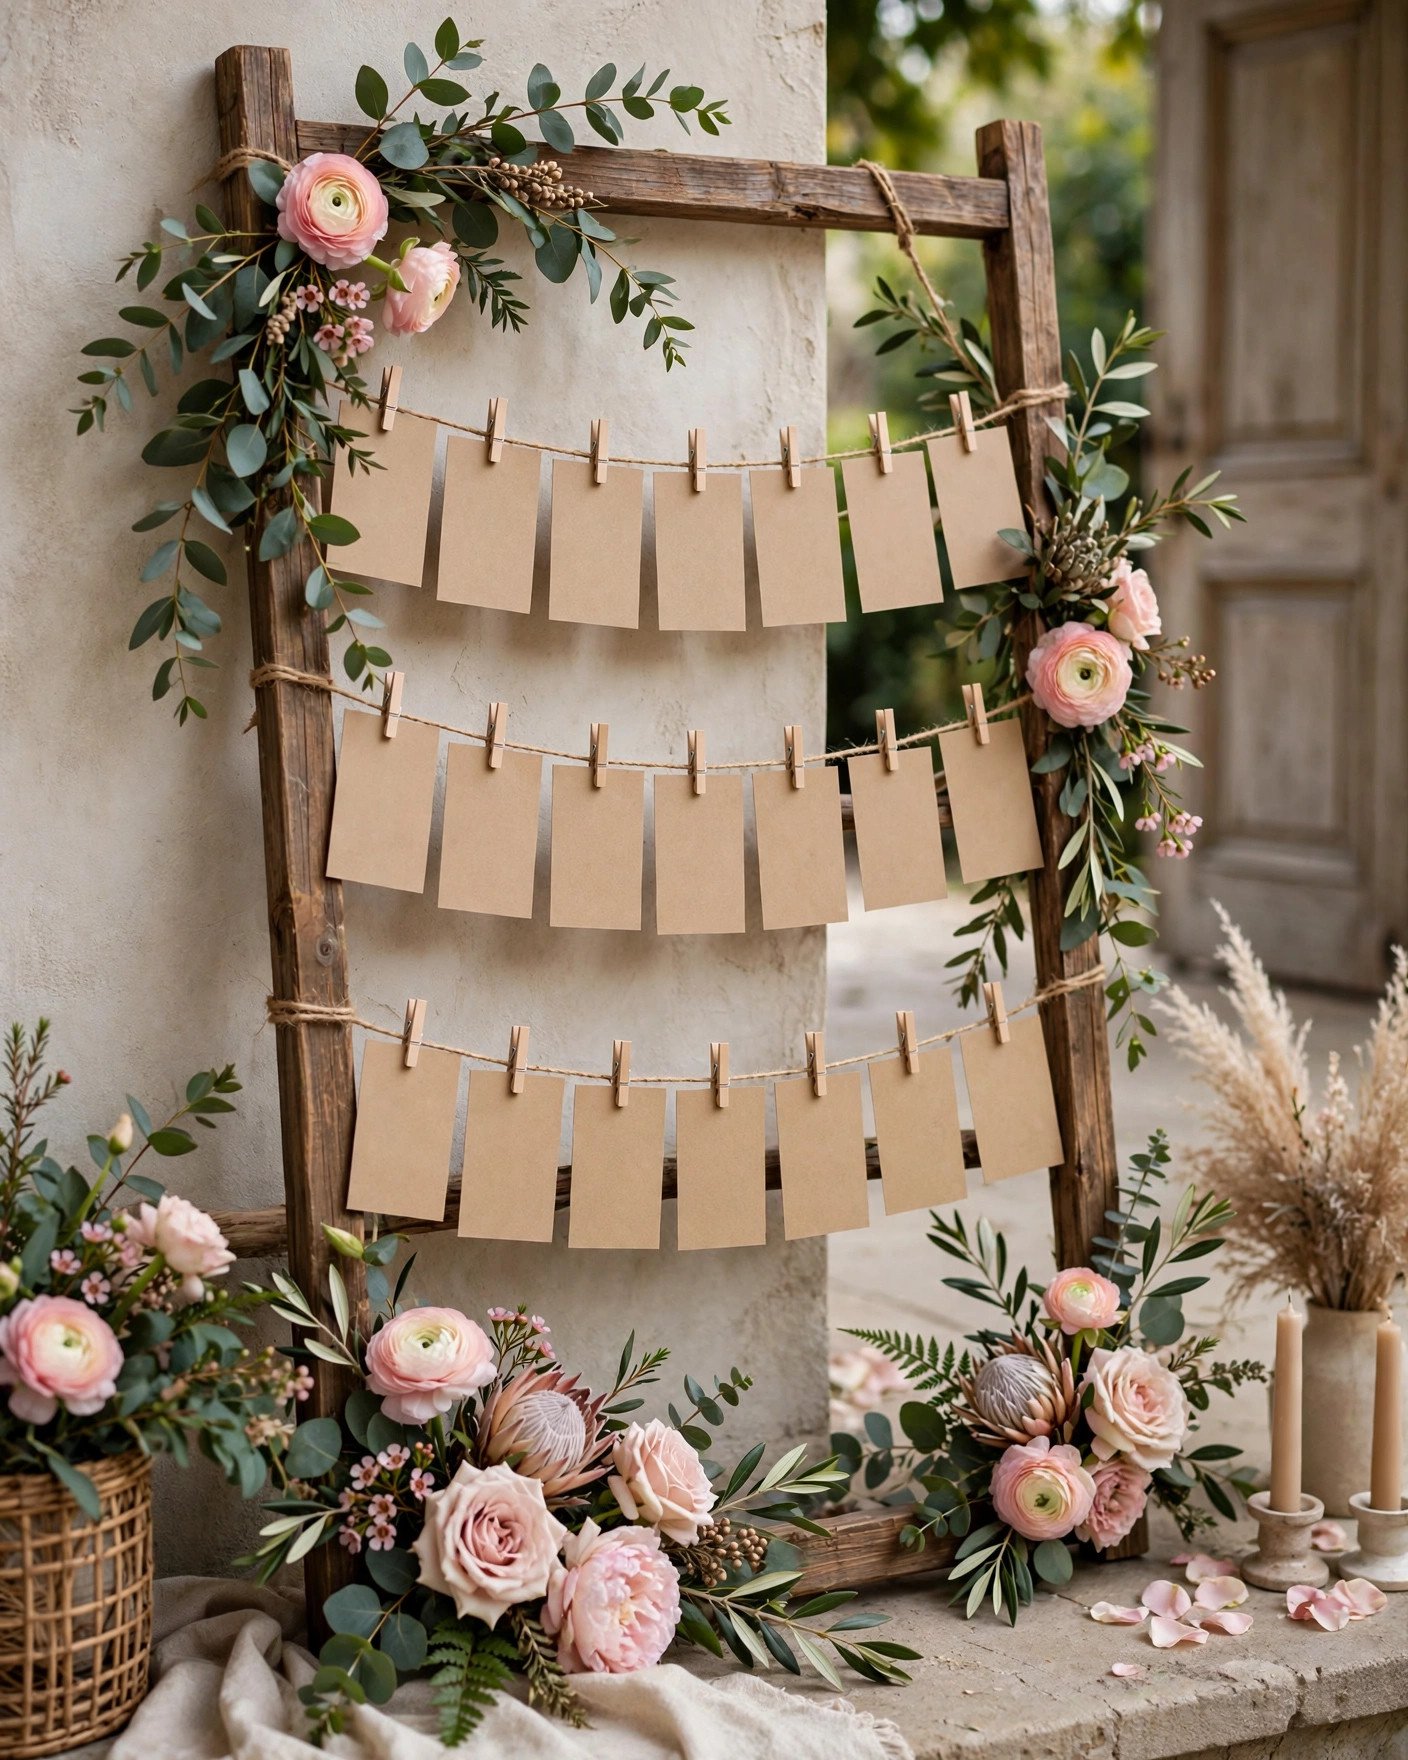
Escort Card Display
 📌 Save
A styled escort card display turns a logistical necessity into reception decor.
Steps: Print or handwrite escort cards with guest names and table numbers. String twine across a wooden frame, vintage window or between two posts, and clip cards on with mini clothespins in neat rows. Decorate the frame with greenery and flowers.
Alphabetize cards so guests find their names fast — nothing kills cocktail hour like a bottleneck at the seating chart. Place the display where guests naturally pass on the way in.
Read next: DIY Dollar Tree Wedding Decor Ideas
Vintage Book Table Decor
 📌 Save
Stacks of vintage books topped with flowers are perfect for book-loving couples.
Steps: Hunt thrift stores for hardcover books with pretty spines — aim for 3 to 5 per table in your palette. Stack them slightly askew, top with a small flower posy or candle, and tie the stack with twine if it needs stability.
Name each table after a favorite book or literary couple for an extra-personal touch. Guests who love to read will adore this detail.
Read next: 45 Stunning IKEA Wedding Hacks and Ideas
DIY Polaroid Guest Book
 📌 Save
An instant camera and a blank book create the most fun, most-kept guest book.
Steps: Set out an instant camera with plenty of film, a blank scrapbook, washi tape, markers and glue sticks. Post simple instructions: snap a photo, stick it in, write a message. Assign a bridesmaid to keep the camera loaded during cocktail hour.
Film is the main cost — budget 2 to 3 shots per guest and buy film in multi-packs. The result beats a traditional signature book a hundred times over.
Read next: 10 Budget Outdoor Wedding Decor Ideas
Ribbon Wall Backdrop
 📌 Save
Long ribbons on a dowel make a photo backdrop with gorgeous movement.
Steps: Cut ribbon in your wedding colors into 6-foot lengths — satin, organza and burlap ribbon mixed together looks richest. Tie each strip to a wooden dowel or curtain rod with a simple lark’s head knot, packing them tightly. Hang the rod from a frame or between two posts.
A gentle breeze makes the wall come alive, so it’s ideal for outdoor photo booths. It packs into a bag and sets up in 15 minutes on the day.
Read next: 27 Rustic Wedding Decoration Ideas
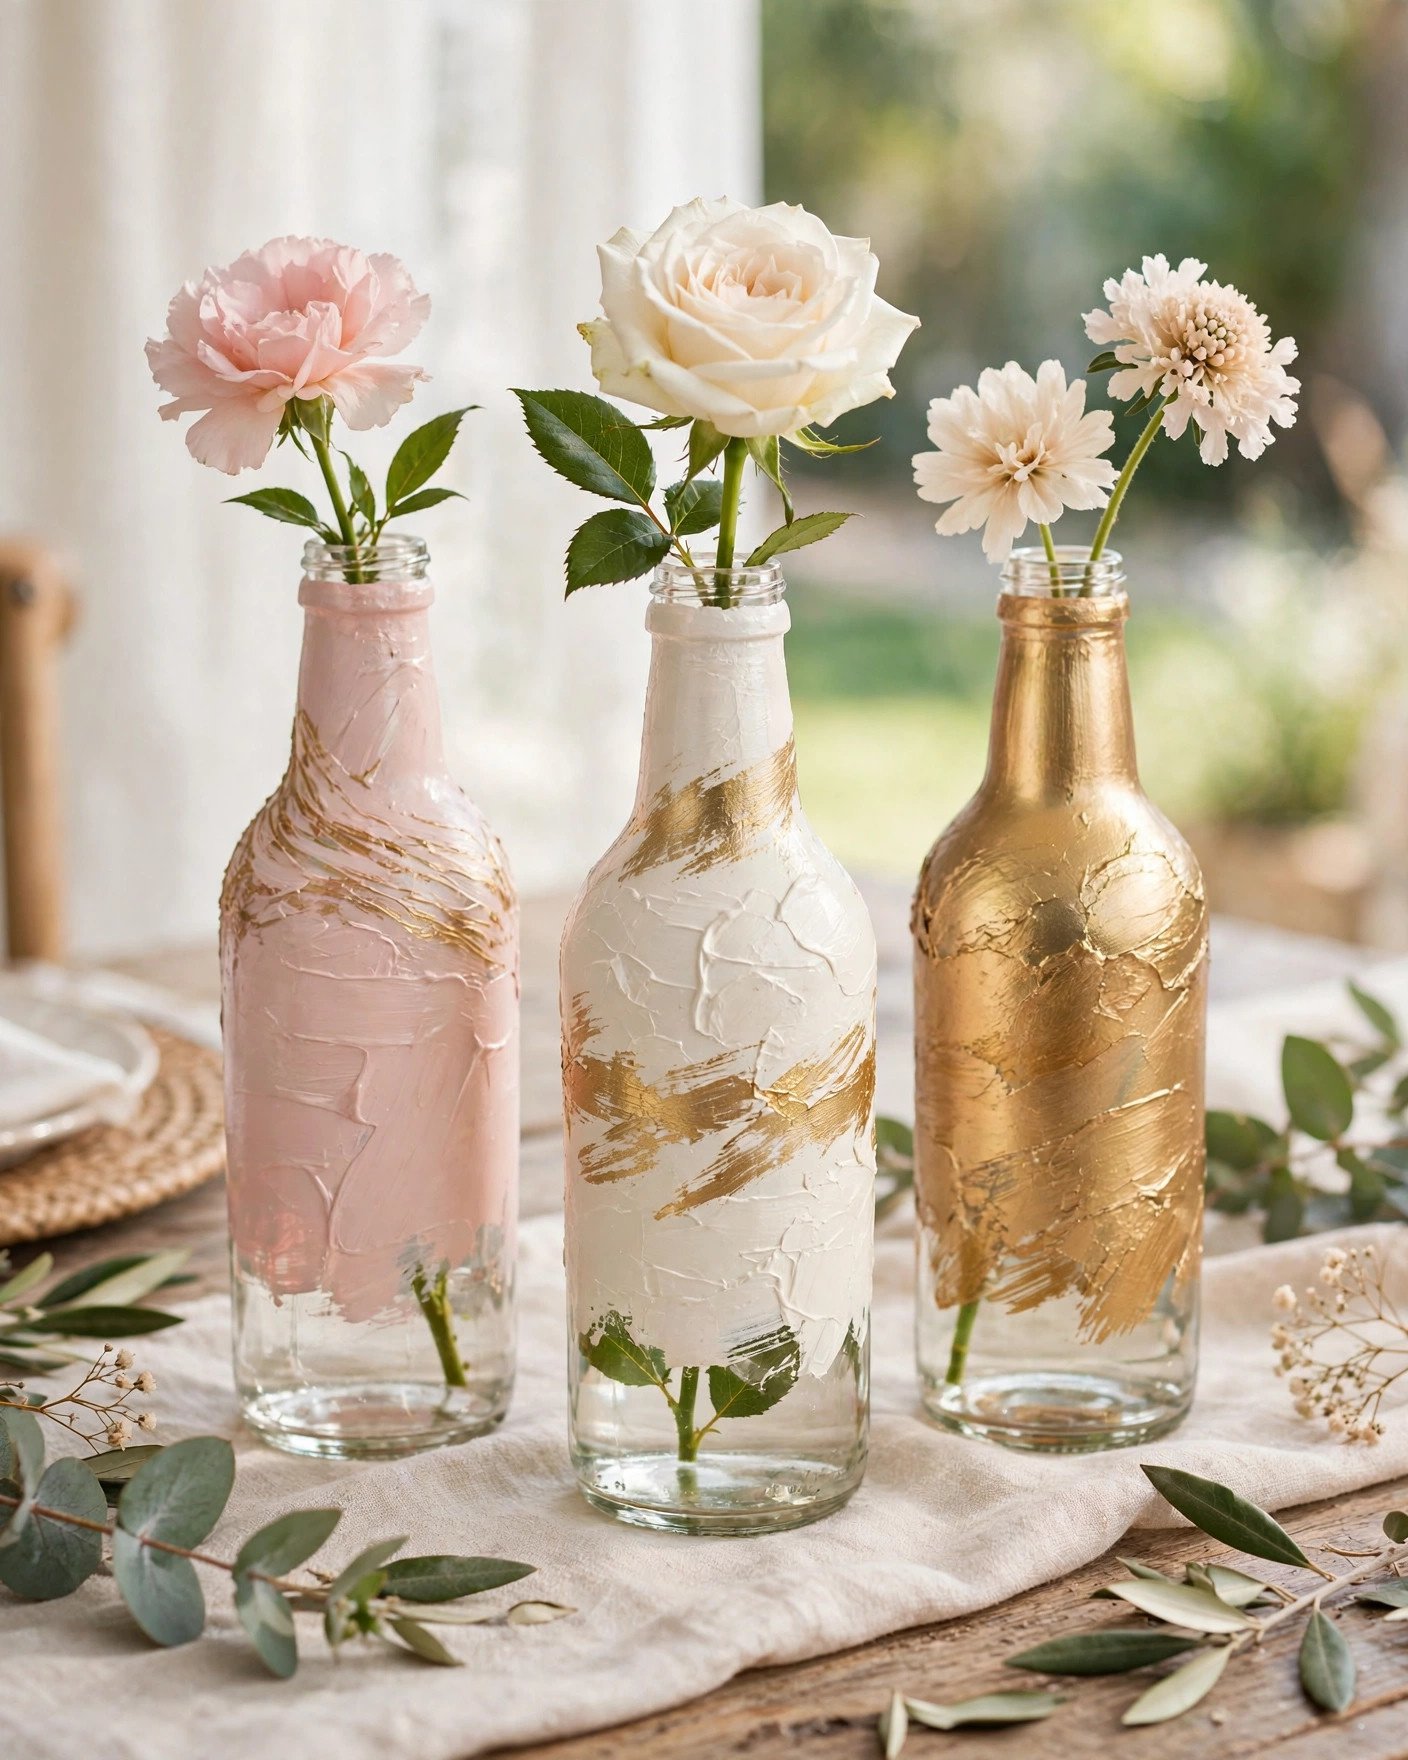
Hand-Painted Glass Bottles
 📌 Save
Clear bottles painted in your colors become custom bud vases with an artisan feel.
Steps: Clean bottles thoroughly and let dry. Apply acrylic or chalk paint with a foam brush in thin, even coats — two coats usually cover. For texture, dab the second coat with a sponge. Seal with clear matte spray once fully dry, then add single stems.
Metallic gold and copper paints look especially luxe against flowers. Group painted bottles with unpainted ones for contrast.
Custom Drink Stir Sticks
 📌 Save
Wooden sticks topped with hearts, flowers or initials personalize every drink.
Steps: Cut small shapes — hearts, flowers, circles with your initials — from cardstock with a craft punch. Glue each to the top of a wooden coffee stirrer or skewer, let dry, and stand them in a glass at the bar.
They’re the cheapest personalized detail at the wedding and they show up in every cocktail photo. Make 20% more than your guest count — they disappear fast.
Read next: DIY Dollar Tree Wedding Decor Ideas
Washi Tape Votive Holders
 📌 Save
Washi tape turns boring glass votives into patterned candlelight in minutes.
Steps: Wrap strips of washi tape around plain glass votives — horizontal stripes, chevrons or random patchwork all work. Smooth out air bubbles as you go, trim the top edge flush, and drop in a tea light.
It’s the ultimate assembly-line craft: put on a movie and knock out 50 in an evening. The tape peels off cleanly, so the votives are reusable afterward.
Read next: 45 Stunning IKEA Wedding Hacks and Ideas
Hanging Greenery Garland
 📌 Save
Long garlands of eucalyptus and ivy bring fresh, lush elegance for very little money.
Steps: Wire greenery stems — eucalyptus, ivy, ruscus — onto a jute twine base, overlapping each bunch to hide the wire. Hang the finished garlands across tables, along the head table, over doorways or from the ceiling. Mist lightly to keep them fresh.
Greenery costs a fraction of flowers and covers far more space. Two or three varieties mixed together look professionally designed.
Read next: 10 Budget Outdoor Wedding Decor Ideas
Photo Booth Props
 📌 Save
Cardboard props on sticks are the cheapest entertainment at the wedding.
Steps: Print or draw prop shapes — mustaches, lips, glasses, hats, speech bubbles with phrases like “I Do” and “Team Bride.” Cut them from sturdy cardstock, glue each to a wooden dowel or skewer, and stand them in a decorated box or jar at the photo booth.
Personalize a few props with inside jokes about the couple — those get the biggest laughs. Laminate the props if the booth is outdoors.
Read next: 27 Rustic Wedding Decoration Ideas
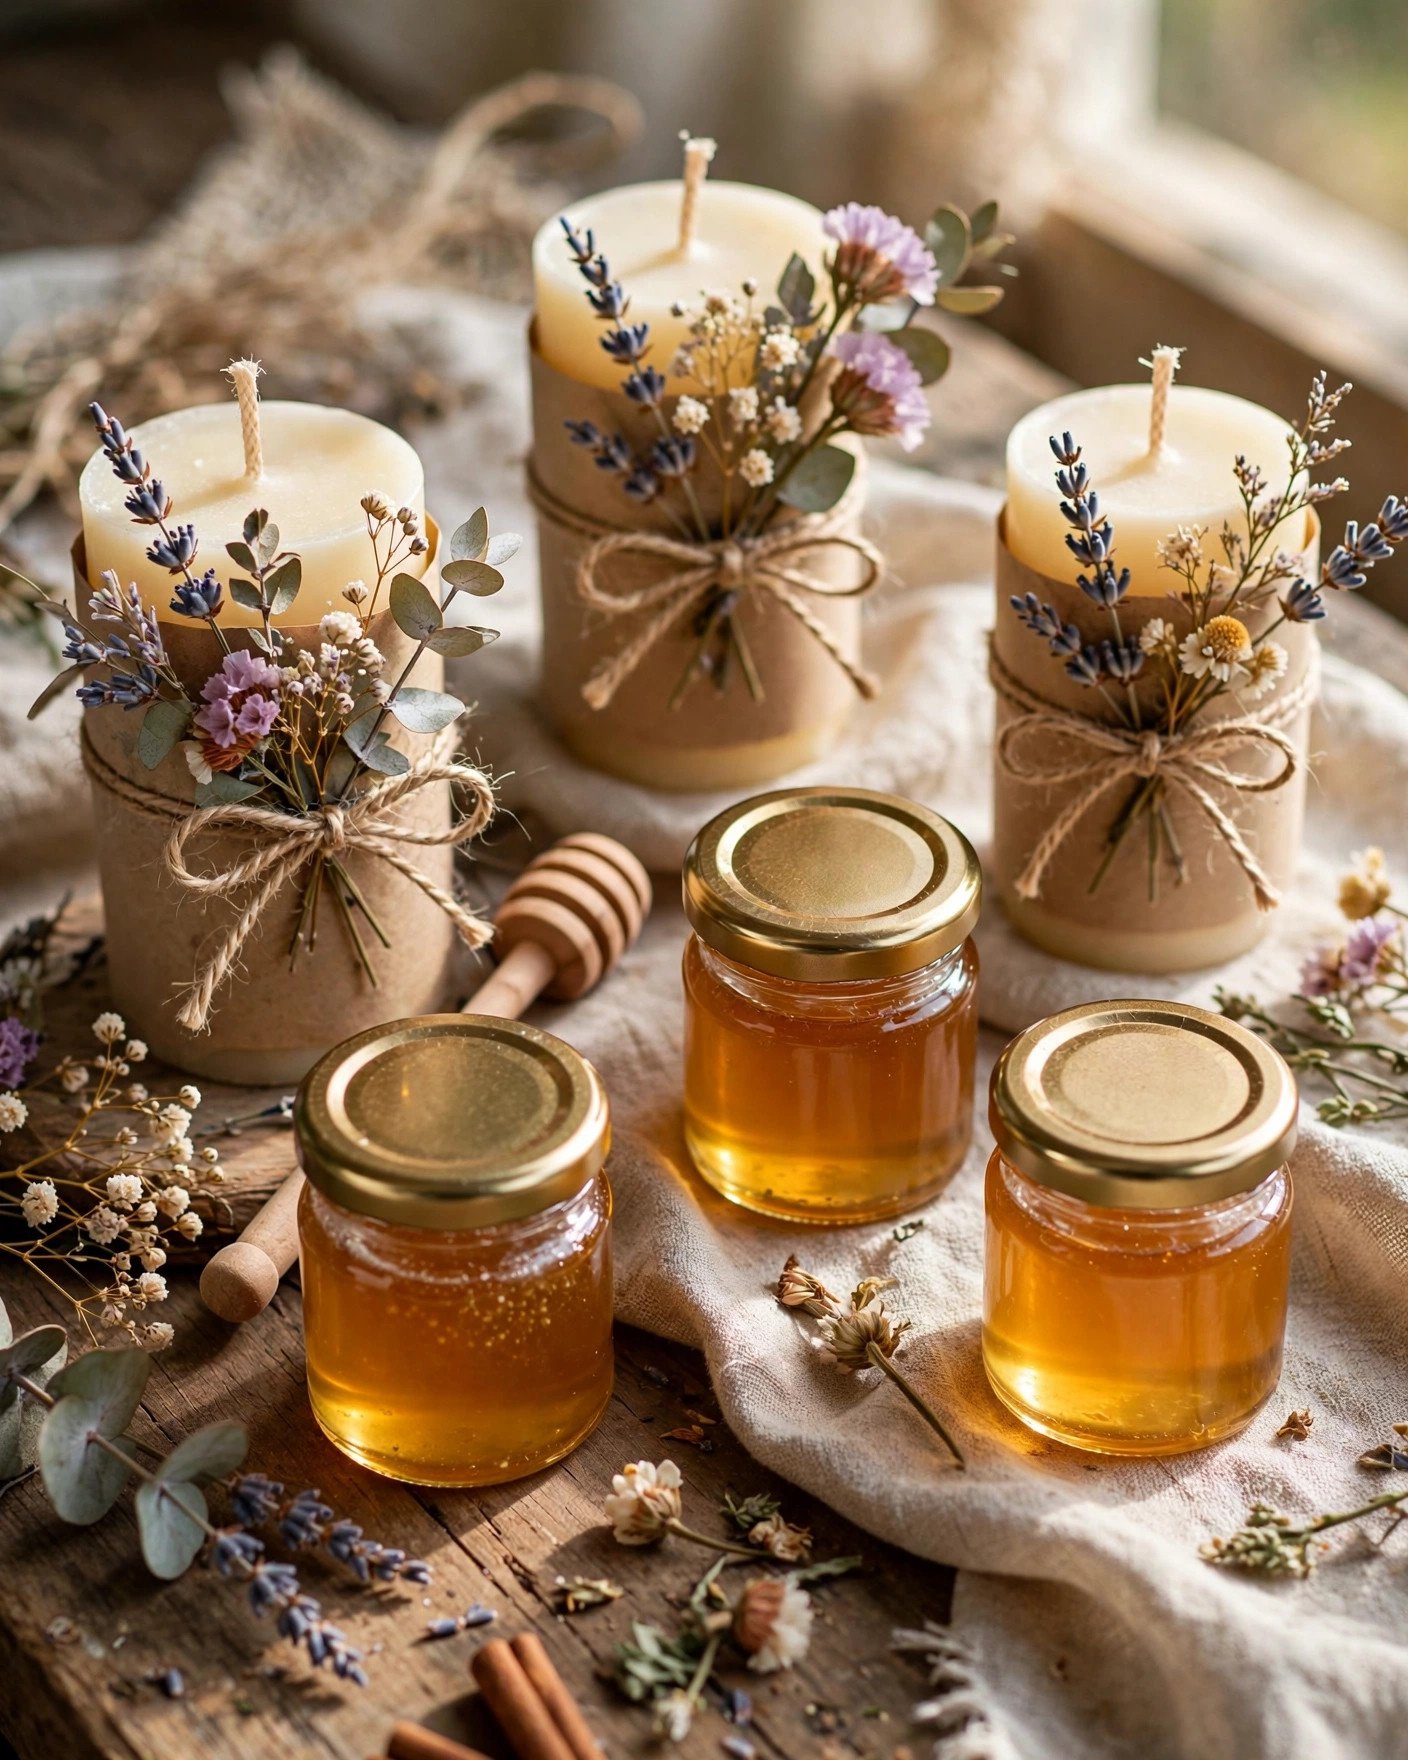
Personalized Wedding Favors
 📌 Save
Small jars of honey, handmade candles or seed packets show thoughtfulness no store-bought favor can.
Steps: Buy mini jars in bulk and fill with local honey, or pour simple soy candles in tins. Wrap each in kraft paper or fabric, tie with twine, add a dried flower sprig and a personalized tag with your names and wedding date.
Edible and plantable favors get used — decorative trinkets get left behind. Display favors as part of the table decor so they pull double duty.
Ladder Display for Photos and Decor
 📌 Save
A small wooden ladder leaning against a wall becomes vertical display space for anything.
Steps: Sand and stain or paint a small wooden ladder to match your palette. Lean it securely against a wall and decorate the rungs: drape flowers and greenery, hang framed couple photos, set candles on the steps, or display favors and escort cards on each rung.
It’s endlessly versatile — use it at the entrance for photos, then move it to the reception for favors. Secure the top to the wall so it can’t slip.
Read next: DIY Dollar Tree Wedding Decor Ideas
Frequently Asked Questions
How far in advance should I start DIY wedding decorations?
Start 2 to 3 months before the wedding. That gives you time to gather supplies, build one prototype of each project to perfect your technique, and assemble everything in relaxed batches instead of a stressful final week.
How much money can DIY wedding decor really save?
Professional wedding decor often costs $2,000 to $5,000. Doing centerpieces, signage, backdrops and table details yourself typically brings that down to $300 to $800 — savings of thousands, with a more personal result.
What are the easiest DIY wedding decorations for beginners?
Mason jar centerpieces, washi tape votives, confetti cones, drink stir sticks and burlap runners need no special skills — just scissors, glue and an afternoon. Start with these to build confidence before tackling backdrops.
How do I transport DIY decorations to the venue?
Pack in labeled plastic bins by zone (ceremony, tables, photo booth), pad fragile items with towels, and assemble anything tall on-site. Recruit two helpers for setup day and bring a printed layout map so nothing gets placed wrong.
Which DIY decorations photograph best?
Backdrops (paper flowers, ribbon walls, pallet walls), candle-lit aisles and hanging installations photograph best because they fill the frame behind people. Prioritize one strong photo backdrop over a dozen small details.
✨ Key Takeaways
- Group your DIYs by decor zone — centerpieces, backdrops, signage, tables, ceremony, photo fun and favors — so nothing gets forgotten.
- Start 2 to 3 months out and prototype each project once; the first attempt teaches you everything.
- One strong photo backdrop beats a dozen small details — prioritize what fills the camera frame.
- Buy supplies in bulk and borrow tools; the per-piece cost drops dramatically at wedding quantities.
- Recruit your crew early — assembly-line crafting with friends is faster, cheaper and genuinely fun.
Final Thoughts
Thirty-five DIYs might sound like a lot, but you don’t need all of them — pick one or two favorites from each zone and you’ll have a wedding that looks entirely, unmistakably yours. The imperfections are the point: every slightly crooked banner and hand-painted sign carries your fingerprints, and that’s what guests remember long after 2027. Happy crafting, and congratulations.