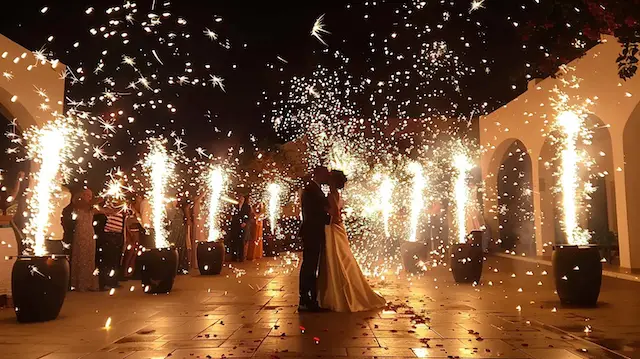
Budget Friendly DIY Wedding Decorations On A Dime
Introduction
Planning your wedding decorations on a budget doesn’t mean you have to compromise on style or charm. DIY wedding decorations allow you to express your creativity and tailor the wedding ambiance exactly to your taste. On top of that, from personalized centerpieces to handcrafted signage, there are endless options for charming details you can produce yourself. countless couples choose to create their own wedding decorations to add a personal touch while keeping costs low.
Budget friendly DIY wedding decorations focus on using affordable materials and clever techniques to achieve stunning results. On top of that, discover practical tips and actionable ideas to design stunning décor without stretching your budget. What decorations will reflect your style and create your wedding day memorable? By exploring cost-effective ideas and organizing your projects well in advance, you can craft decorations that suit your theme and venue.
Getting Started with DIY Wedding Decorations
Also Visit: 45 Stunning Ikea Wedding Hacks and Ideas [Updated 2026]
Begin by setting a clear budget for your wedding decorations. Decide a style or theme that matches both your personalities and the overall wedding vibe. Will your wedding be rustic, modern, vintage, or something else? This choice will guide your decoration plans and keep everything consistent. Knowing how much you can spend prevents overspending and helps prioritize your projects.
Think about which items to create yourself and which to buy. Plus, others, like table linens or large floral arrangements, might be better purchased to save time. Plus, some decorations, like centerpieces or signage, work well as DIY projects.
begin planning early to avoid stress. This way, you’ll track progress and not leave things to the last minute. What parts of your wedding décor excite you the most to craft? Knowing this helps you focus your energy and resources efficiently. Organize your ideas, materials, and timeline in one place.
Setting a Budget and Defining Your Style
Decide how much money to set aside for decorations based on your total wedding budget. Tracking these amounts keeps spending under control. Break this amount into smaller sections for items like venue décor, table settings, and ceremony backdrops.
Look for inspiration in magazines, social media, or past weddings that feel right for you. Pinpoint patterns and materials that fit your theme. This ensures everything resonates with your style. Collect images or color swatches that speak to your vision.
Be realistic about your financial and time limits. Matching expectations helps prevent frustration and burnout. How much time can you realistically spend on crafting each week? If you have two months, avoid complicated projects that take weeks.
Deciding What to DIY
Choose decorations to create yourself based on how much skill or time they need. More complex pieces like elaborate floral arrangements may be better left to pros. Simple projects such as paper garlands or painted signs are excellent starting points.
Consider sentimental value. Think about tiny gifts for guests or personalized table markers. Handmade items that display your personal touch can create your wedding feel more special.
Ask if the project fits your schedule. Balance what is meaningful with what is manageable. Where do you want to add your unique touch without overcommitting? Will making twenty place cards stress you out, or inspire you?
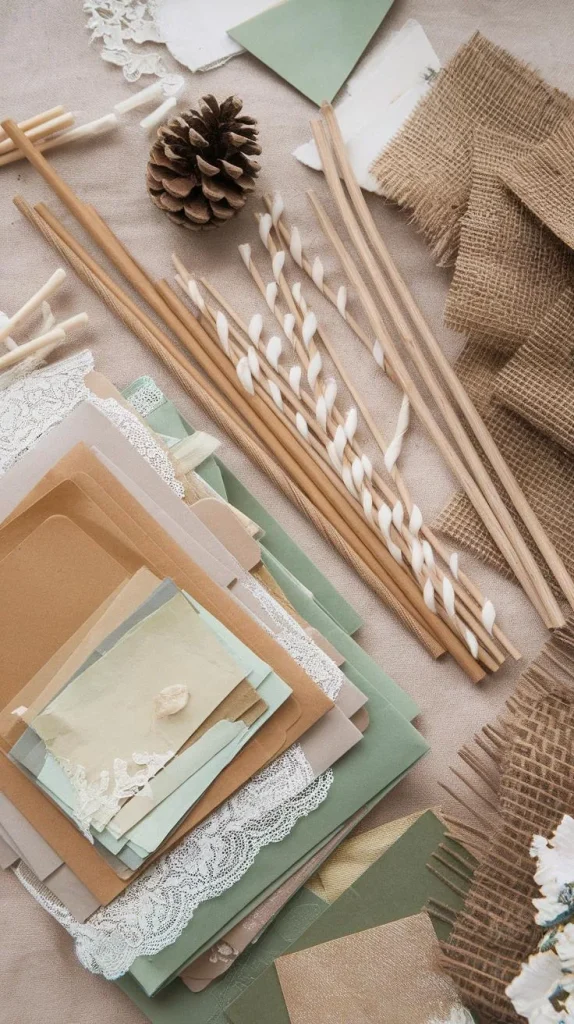
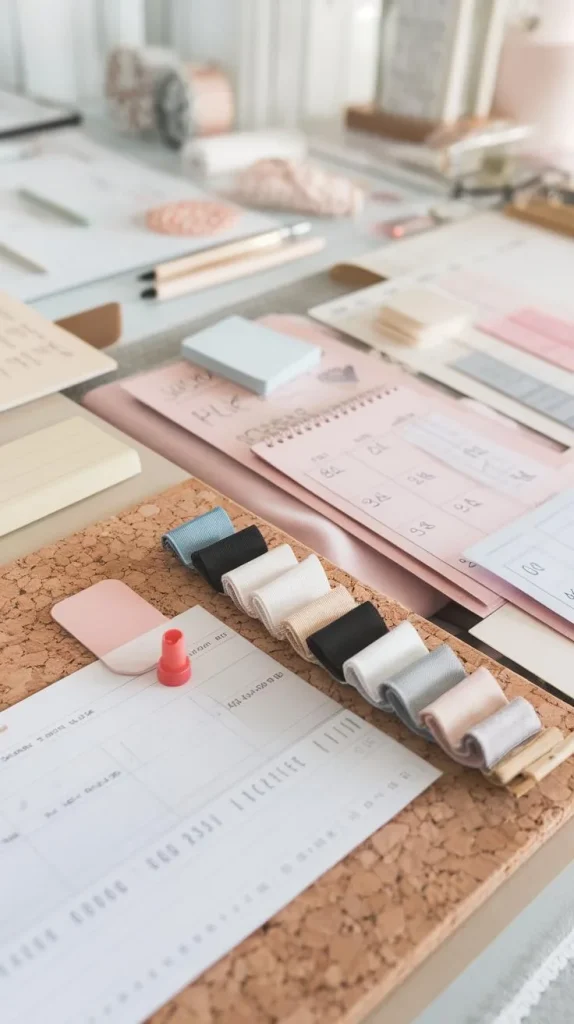
Affordable Materials for DIY Wedding Decorations
Also Visit: 15+ Beautiful Backyard Wedding Ideas
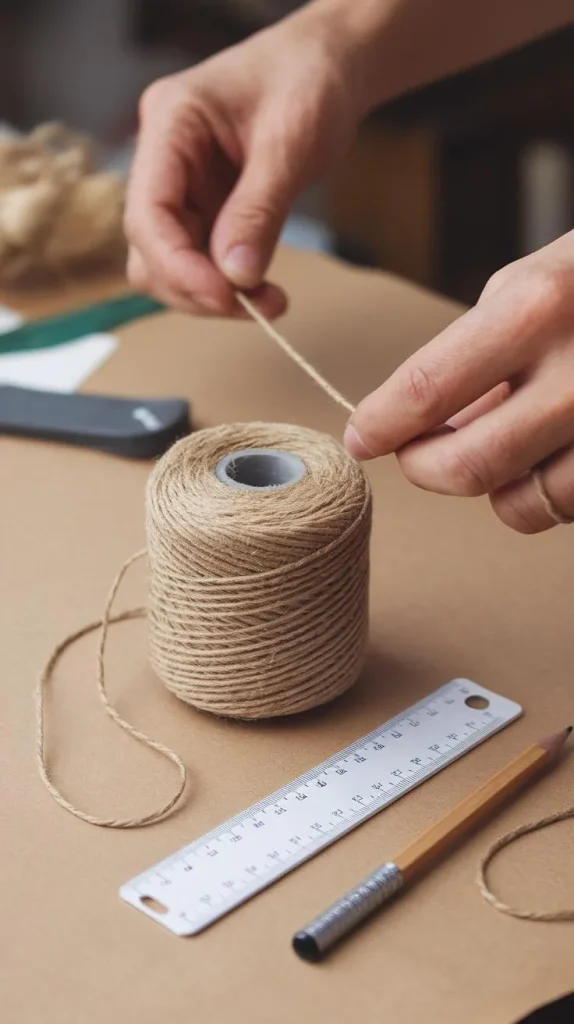
Finding the right materials without overspending can craft your DIY wedding decorations stand out while keeping your budget intact. employ colored, textured, or even recycled paper to create banners, garlands, or delicate paper flowers that suit your theme. Fabric scraps offer chances to add soft, personal touches think tied bows, table runners, or hand-sewn napkins. Old jars and bottles become charming holders for candles or flowers with a bit of paint or twine. Natural elements like branches, leaves, or wildflowers bring life to your decorations without extra cost. Paper is a versatile and affordable option.
Where can you find these materials affordably? Walk local parks for fallen branches and seasonal greenery. Visit craft stores during sales or clearance sections, and consider buying paper in bulk. Combining common, inexpensive items creatively lets you build stunning décor without stretching your budget. Collect fabric scraps from leftover sewing projects or ask friends and family if they can spare some.
Reusing and Repurposing Materials
You may already have hidden gems at home that can become part of your wedding décor. What’s more, empty picture frames can become unique signage or photo displays. Stacks of old books create interesting centerpieces or cake stands. Repurposing patterned fabric as table covers or napkins prevents waste and adds personality. Old wine bottles craft excellent candle holders or vases with minimal effort.
Before you toss any item, ask if it holds potential for transformation. Turning household items into decorations gives your wedding a personal story. What everyday objects in your home could inspire your décor? Trying this approach can reduce last-minute shopping and support you stay organized. This not only saves money yet furthermore cuts down waste.
Where to Find Budget Materials
Knowing where to hunt for affordable or free décor supplies can craft your project easier and cheaper. Thrift shops hold hidden treasures from glassware to linens that you can repurpose. Craft stores often run clearance sales or have discount bins worth exploring. Dollar stores offer a range of simple items like candles, vases, and crafting supplies perfect for weddings.
Online marketplaces and community groups provide secondhand materials or leftover stock from other crafters. Don’t overlook friends or family who might have unused decorations or supplies. Asking around can uncover resources you didn’t expect. Search for fabric scraps, jars, or vintage items in these spaces.
Creating Centerpieces on a Budget
Also Visit: 27 Rustic Wedding Decoration Ideas
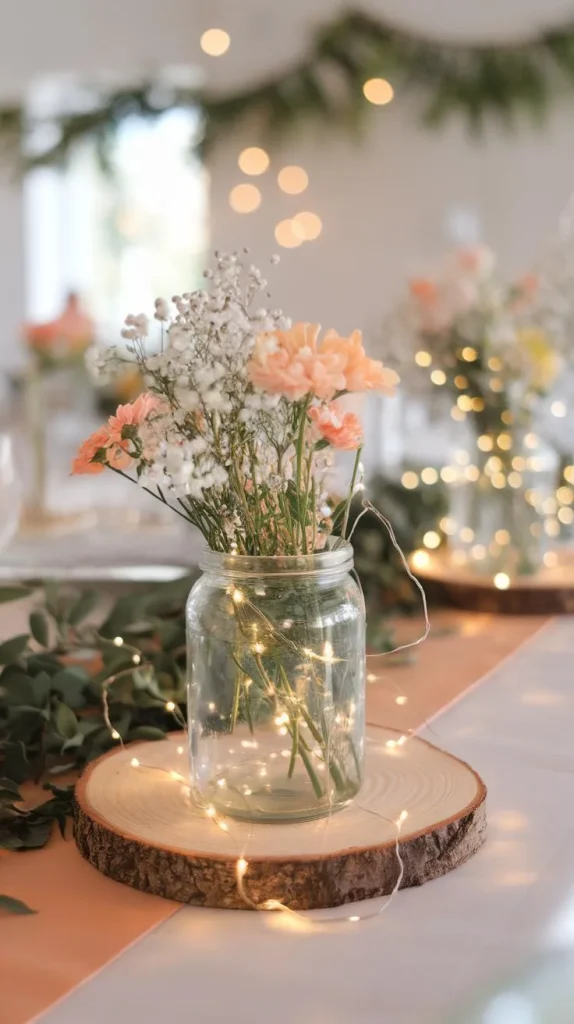
Designing your own wedding centerpieces saves money and brings a personal touch to your tables. Clean and paint them to match your wedding colors. Next, gather supplies like flowers, candles, and greenery that suit your theme. kick off by choosing containers like mason jars, tin cans, or compact vases you already have or find cheaply.
For a rustic theme, utilize twine or burlap around jars and fill them with wildflowers or greenery. Mix different heights by combining tall candles with shorter flower arrangements to create visual interest. For an elegant look, place white candles in clear jars and surround them with eucalyptus leaves.
Think about how your centerpieces will fit your venue and table shape. Ask yourself what mood you want to set: cozy, romantic, or fresh? Round tables benefit from circular arrangements, while long tables shine with linear designs.
Floral Centerpiece Ideas
Fresh flowers can be affordable when bought in bulk or at farmers’ markets. Mix smaller flowers with greenery like ferns or ivy to add volume without extra cost. Combine different flower sizes and textures to create depth. Choose seasonal blooms that fit your color scheme.
If fresh flowers feel out of reach, dried or paper flowers offer lasting beauty. Paper flowers let you pick any color and add unique shapes. Secure blooms with floral tape or wire, and employ floral foam inside containers to hold stems in place. Dried lavender or baby’s breath creates a vintage feel and can be prepared weeks ahead.
Try mixing flower types to prevent a flat look. Adding greenery fills gaps naturally and stretches your flower supply. On top of that, what flower style fits your personality and wedding theme? Plus, for example, pair roses with wildflowers or daisies with eucalyptus.
Non-Floral Centerpieces
You can skip flowers entirely and still have stunning centerpieces. On top of that, lanterns with candles add warmth and work well in outdoor or rustic settings. Stack vintage books tied with ribbon for a classic, literary touch. Think about items that reveal who you are as a couple.
Succulents provide greenery with low maintenance. Collect objects that match your hobby or story, like seashells for beach weddings or mini instruments for music lovers. Plant modest succulents in painted tin cans or glass jars for modern, eco-friendly decor.
Consider adding fairy lights in clear jars or bowls filled with colored stones or sand. How can your centerpieces reflect your story without using flowers? These ideas cost less than fresh flowers and last longer, giving your decor a unique feel.
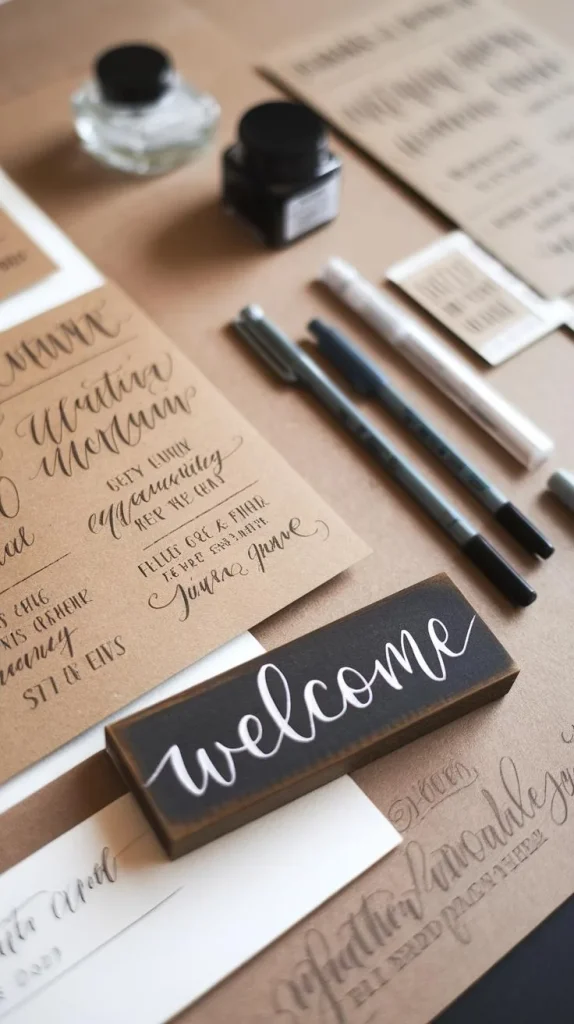
DIY Wedding Signage and Invitations
You wedding and style signs personalized and your methods create DIY that using can simple fit invitations budget.
Hand-lettering offers a unique, personal touch. If hand-lettering isn’t your strength, stencils provide clean, consistent lettering with less effort. Another thing: leverage these on chalkboards, wood boards, or paper. Grab a brush pen or calligraphy marker and practice your favorite fonts on paper or wood.
Printables give you flexibility to design on your computer, then print multiple copies at home or a local print shop. It helps guests by clearly showing directions and vital event details. Coordinating all signs, from welcome messages to seating charts, builds a smooth, polished environment.
Using guests look signage feel even for ties your making both they and cared invitations and before your together, and matching personality colors for fonts wedding showing arrive.
Designing Your Own Signs
You don’t need fancy tools to create stunning wedding signs. Consider old wooden boards as bases for welcome signs or directions they add rustic charm. Basic art supplies like paint, markers, and brushes work well on wood, chalkboards, or cardstock.
If you prefer digital methods, software like Canva or free programs offer straightforward templates you can customize. Print your designs and attach them to sturdy bases, or display them on easels.
Keep your message short and clear. Adding embellishments like flowers, washi tape, or twine can personalize each sign without extra cost. For example, “Welcome,” “Ceremony this way,” or a simple seating chart.
Affordable Invitation Options
Designing and printing invitations yourself saves money and lets you add personal details. Another thing: print at home on quality cardstock or lightweight paper for a professional look. employ online templates to edit fonts and colors to match your theme.
Another thing: add simple DIY touches like tying a ribbon around the invitation or stamping an emblem on the envelope. These modest details impress guests and cost incredibly little.
Try printing RSVP cards with prepaid return addresses to encourage quick replies. These steps keep your invitations special yet don’t increase your budget. You can even handwrite guest names for a personal feel.
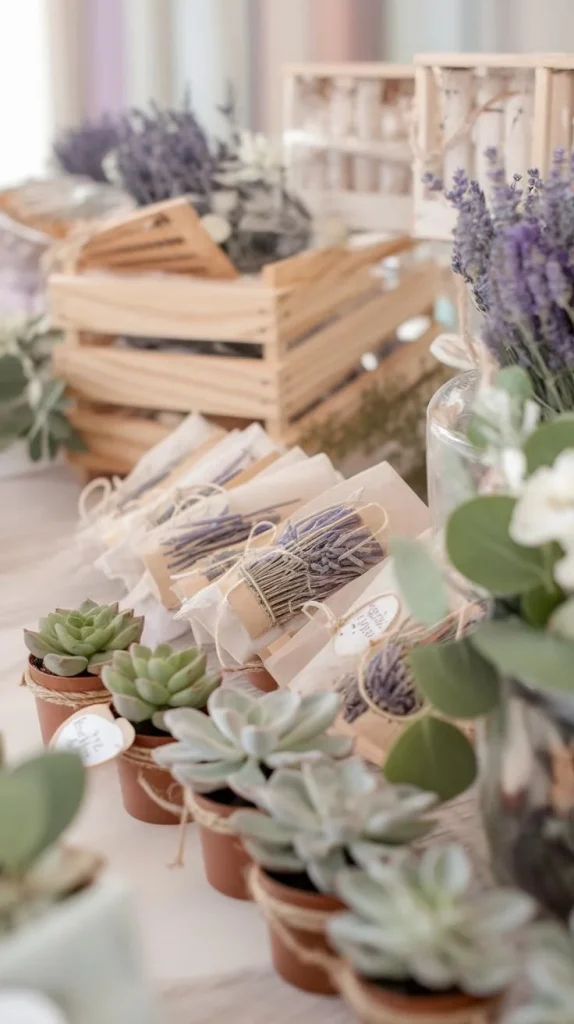
Handmade Wedding Favors That Impress
Wedding favors offer a chance to thank guests with a personal touch. You can create meaningful gifts without spending much.
Try making homemade treats like cookies, mini jars of jam, or infused oils. Baking or preparing in compact batches keeps costs low. These are simple and reveal care.
tiny plants, such as succulents or herbs, plus work well. Choose effortless-to-grow varieties that anyone can enjoy at home. They bring freshness to the table and last longer than edible options.
Crafted keepsakes like personalized tags, simple candle holders, or handmade soap bars add a creative flair. employ affordable materials like recycled jars, twine, or paper to stay within budget.
Packaging impacts how guests see your favors. Add labels you design yourself on your computer or by hand. Think about tying everything with ribbon or twine to keep costs down yet elegant. leverage kraft paper bags, compact boxes, or mason jars.
What memories do you want your favor to evoke? Keeping practical utilize and personal style in mind will assist you create a gift guests truly appreciate.
Edible Wedding Favors
Simple edible favors bring warmth and sweetness to your wedding. Baking cookies or making tiny jars of jam requires little money yet delivers much joy.
Plus, infused oils, such as garlic or chili, create unique gifts that guests can leverage long after your event. Select excellent-quality glass containers from dollar stores to keep your presentation neat.
Label each favor clearly with ingredients and your wedding date for a personal touch. Another thing: presentation matters, even on a tight budget. leverage printable labels or handwritten tags tied with twine.
Keep edible favors fresh by making them close to the wedding date. These details display care and attention without extra expense. Wrap cookies in clear cellophane or seal jam jars tightly.
Have you considered matching flavors with your wedding theme or season? Seasonal fruits or herbs will add meaning and a special touch to your favors.
Crafted Keepsakes and Practical Gifts
Non-edible as or favors lasting soaps, serve like tags for candles, personalized your reminders guests.
Try making soy candles in compact containers. Decorating jars with lace or twine creates a charming look without extra cost. On top of that, bulk candle wax is inexpensive, and you can customize scent and color.
Hand-poured soaps come in several shapes and scents. Wrap soaps with tissue paper or simple paper bands. You can buy soap bases and melt them down, adding colors or dried flowers for uniqueness.
Personalized tags are straightforward to produce. Thoughtful details create simple gifts special. Print or handwrite guests’ names and tie them around favors or napkins.
How can you turn inexpensive craft materials into memorable keepsakes? Creativity helps you stretch every dollar. Experiment with items you already have at home before buying supplies.
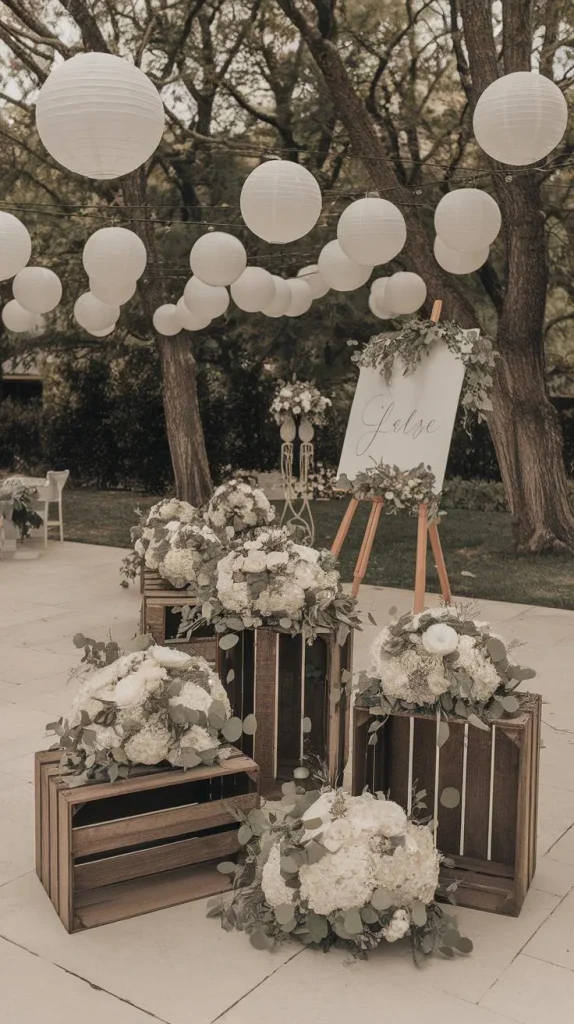
Decorating the Ceremony Space Creatively
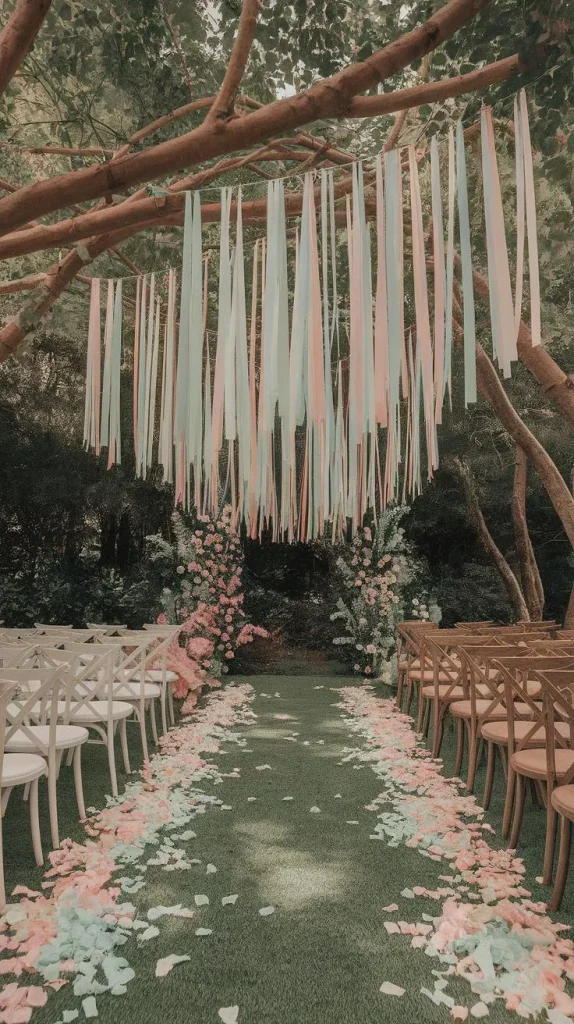
Decorating your ceremony space doesn’t have to drain your budget. You can find affordable or even leftover fabrics to hang around the altar or entrance. Paper flowers add color without the cost of fresh blooms. These can be made in advance using tissue paper or cardstock. Consider aisle markers made from ribbons tied to chairs or mason jars filled with fairy lights or modest flowers. Natural elements such as branches, pinecones, or collected stones can bring texture and charm without spending much. The key is to match decoration style to your venue. A rustic barn calls for natural tones and raw materials, while a garden wedding may suit soft fabrics and light colors. Think about what suits your site’s personality to Simple fabric drapes can transform a plain area into something special.
Simple Aisle and Altar Decorations
Adding charm to your aisle and altar area doesn’t require numerous items. Lanterns with battery-operated candles can line the aisle, offering warm light that’s safe and reusable. Floral garlands don’t need to be made of fresh flowers to look gorgeous. Paper or silk flower garlands can be draped along the altar or overhead. Another idea is to employ greenery from your yard or local park to produce simple garlands or swags. These touches fill the space with personality while keeping expenses low. Could you utilize colorful ribbons matching your theme to add flair without extra purchases? Ribbon accents tied to chairs or tied around compact bouquets create an elegant look for little cost.
Utilizing Natural Venue Features
Think about the venue’s existing features when planning your decorations. String lights wrapped around tree trunks create a cozy atmosphere without buying high-end fixtures. Look for branches to hang lightweight ornaments or lanterns. Walls can be dressed up with fabric banners or clusters of paper flowers. If your site has a water feature or garden, utilize these spots to hold part of your ceremony or photos. Plus, incorporating what’s already there lowers your costs and highlights the venue’s charm. What unique features does your location have that you haven’t thought about using yet? Trees, walls, or stone paths often create natural backdrops that don’t need much extra décor.
DIY Reception Decorating Tips
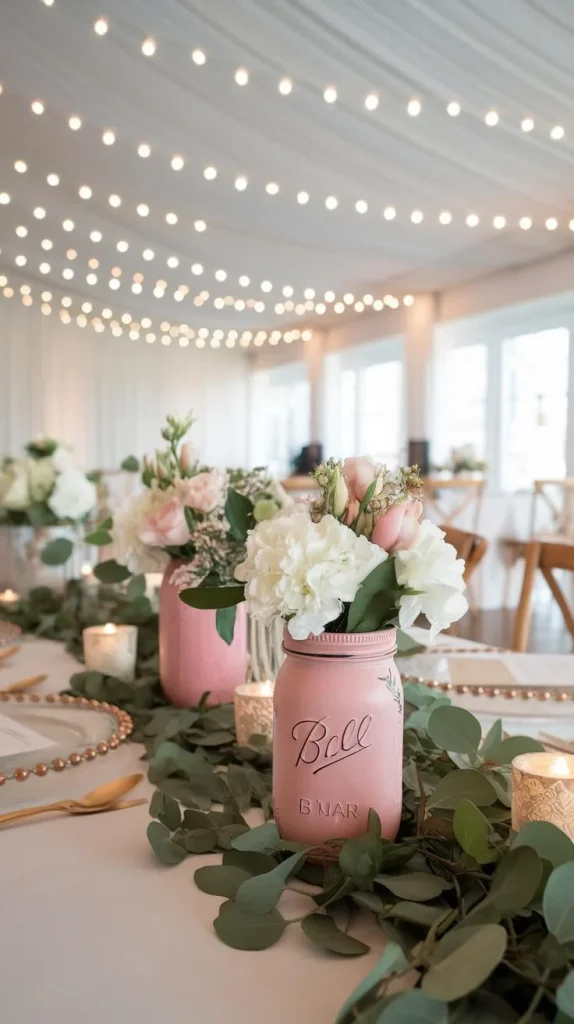
Consider how every detail at the reception adds to your wedding’s feel. commence with your tables simple touches like handmade napkin rings from twine or ribbons give a personal flair. Create place cards by cutting cardstock into unique shapes and hand-lettering guests’ names. For centerpieces, look for items around your home: mason jars filled with seasonal flowers or candles placed on wooden slices work well and cost little. You can create a strong impact with simple DIY projects that tie your theme together.
Lighting transforms the atmosphere without high expense. employ plain glass containers as candle holders to multiply light effects. Cluster several candles of different heights on each table for warmth and style. Ask yourself what atmosphere you want guests to feel. Cozy and intimate? Bright and energetic? Your lighting choices assist shape that mood. String fairy lights above tables or along walls to add soft glow.
Table Settings and Lighting
Napkin holders do not have to be costly. Place cards can be printed at home or cut from scrap paper; add a sticker or compact hand-drawn image for flair. Try folding napkins into creative shapes or secure them with rosemary sprigs or dried orange slices for a natural look.
Centerpieces thrive on simplicity. Fill with wildflowers or greenery for fresh appeal. Fairy lights are inexpensive and flexible. Hang them overhead, wind them through centerpieces, or wrap them around pillars to brighten dark corners. Collect glass jars or bottles, paint or decorate them with lace or twine.
Candles add soft light. Have you considered battery-operated candles? They eliminate risk and last through the evening. Tea lights or votive candles placed in thrifted holders create charm without spending much.
Photo Displays and Guest Interaction
Welcome guests with a DIY photo wall. This creates a conversation starter and adds a personal touch. Frame old Polaroids or printed snapshots for variety. utilize string and clothespins to hang pictures of you and your partner or memories with friends and family.
What’s more, craft a guest book station more fun by offering materials for guests to write notes or decorate pages instead of just signing names. A simple scrapbook paired with colorful pens fuels creativity.
Interactive stations offer memorable experiences. Or set out craft supplies for guests to create compact keepsakes. How might your décor boost guest involvement and create everyone feel part of your celebration? Try a “wishing tree” where guests write advice or well-wishes on tags to hang.
Managing Your DIY Wedding Decoration Projects
Keeping multiple DIY wedding decoration projects on track takes planning. Group similar tasks, like cutting paper or painting signs, to save time. Set realistic deadlines for each step of your projects and write them down. Plus, kick off by listing every decoration you want to create.
Gather all the supplies before you begin. What’s more, produce sure you have extras of essential items like glue, scissors, and twine. These tiny details prevent last-minute trips that add stress. Running to the store multiple times wastes both money and energy.
Ask yourself how much time you can commit each week. If you hit a snag, adjust your schedule instead of skipping steps. How can you create this process enjoyable rather than overwhelming? Aim to spread out the work to avoid feeling rushed.
Involve friends or family who enjoy crafting. Clear communication about roles and deadlines helps everyone stay on the same page. When you plan carefully, you reduce stress and create room for creative moments. Dividing tasks lightens your load while making the experience social.
Creating a Work Schedule
Breaking down decoration projects into clear steps simplifies your work. Plus, assign a deadline to each step using a calendar or planner. For example, if you are making centerpieces, divide the task into buying materials, assembling parts, and adding finishing touches.
commence your schedule months before the wedding to allow wiggle room. Check your progress weekly and ask, “Am I ahead or behind?” This helps you stay on track. Early planning means you can spot problems early and adjust without pressure.
Be open to adjusting your plans. Moving tasks around keeps your schedule flexible and realistic. What tiny steps can you do today to move closer to your goal? Projects often take longer or shorter than expected.
Involving Friends and Family
Another thing: inviting friends and family to support brings energy and speeds up your work. Choose a comfortable space with plenty of light and supplies ready to go. Host simple crafting sessions where everyone tackles a part of the project.
Assign roles based on each person’s skills or interests. Talk about the timelines clearly, therefore everyone knows what to finish by when. Keeping sessions fun with music and snacks creates a positive atmosphere. Someone who likes detailed work can focus on delicate decorations.
create your helpers feel appreciated. Would your group enjoy a reward after completing certain tasks? Such moments keep motivation strong and produce your wedding preparations a shared memory. Thank them often, and celebrate milestones together, like finishing a batch of decorations.
Final Touches and Display Strategies
The last moments before the wedding are ideal for adding the final touches to your DIY decorations. Consider grouping smaller decorations to create focal points that catch guests’ attention. create sure each piece complements the overall theme and flows naturally across the venue.
Another thing: work closely with your venue staff to understand any rules for displaying your decor. employ stands or hooks provided by the venue to showcase hanging decorations neatly. On top of that, they can guide you on where to place items safely and suggest sturdy surfaces for fragile pieces.
On top of that, think about how lighting will affect your decorations. You might place battery-operated candles inside glass jars to avoid fire risks. Position candles, lanterns, or fairy lights where they enhance colors and textures without causing hazards.
Does each decoration serve a purpose beyond beauty? Human traffic flow matters for both comfort and safety. Tables need centerpieces that don’t block views, and signs should be placed where guests can easily spot them.
Ask yourself if your display allows space for photos and mingling. Simple arrangements that fit easily into the venue’s layout save time on setup and removal, keeping the focus on your special day.
Transporting Decorations Safely
Packaging your DIY decorations carefully prevents damage and loss. For example, group paper lanterns separately from glass vases. employ labeled boxes to keep similar items together and speed up unloading.
Wrap fragile pieces in bubble wrap, tissue paper, or soft cloth. Consider plastic bins with lids for sturdier protection during travel. Layer heavier items at the bottom and lighter ones on top to avoid crushing.
employ modest zip bags for tiny components like ribbons, pins, or floral tape. Attach a clear checklist on each box describing its contents to support helpers unload swiftly and avoid confusion.
Think about the vehicle you’ll utilize. Padding between boxes adds extra security. Ask yourself what’s the best way to keep decorations upright if needed. Place boxes therefore they won’t shift while driving.
Would it aid to pack a compact emergency kit? A bag with extra tape, scissors, glue, and twine can solve last-minute problems before the massive event.
Setting Up on the Wedding Day
kick off setup early to avoid rushing. Designate someone to oversee timelines, thus things stay on track. Plus, divide tasks among your helpers based on their skills.
utilize a checklist created before the day to confirm all decorations are placed. modest details craft a large difference. Check for loose ends like tape showing or wires sticking out.
Coordinate with the venue staff to understand areas where you can set up without interfering with other vendors. Ask if you can keep containers or tools stored nearby for quick fixes.
Keep communication clear and simple. Another thing: this approach prevents missed spots or duplicated efforts. Tell your team exactly where each piece goes and review progress at intervals.
How will you organize cleanup after the event? Efficient setup leads to less stress and more time enjoying your wedding day. Planning this with your helpers in advance saves energy for the celebration itself.
Conclusions
Creating your own wedding decorations can be a rewarding experience that brings lasting memories along with savings. Prioritizing which decorations to DIY and which to buy helps manage time and budget effectively. By planning ahead and focusing on simple yet impactful designs, you can achieve a lovely setting that complements your wedding theme.
Budget friendly DIY decorations offer a way to celebrate your love story in a unique and personal way. Your wedding day will be both meaningful and memorable with decorations crafted with care and thoughtfulness. Another thing: these decorations can reflect your values and creativity while involving friends and family in the process.
![45 Stunning Ikea Wedding Hacks and Ideas [Updated 2026]](https://thewedsvibe.com/wp-content/uploads/2026/04/Dyed-Ribbon-Backdrop-Hack-1.jpg)