
20 Wedding Craft Ideas for Low Budgets
By zainzari • Published April 2026 • Updated October 11, 2026
 📌 Save
The highest-value wedding crafts for low budgets are paper, signage and favors: DIY welcome signs, seating charts, table numbers, programs, menus, photo booth props, favor bags, seed packets, thank-you cards and send-off cones. Each costs $0.30–$1 per piece versus $3–$8 bought, needs only basic supplies, and can be batch-made in an afternoon with printable templates.
Here’s the truth about wedding DIY: decor crafts are fun, but paper and favor crafts are where the real money hides. A stationer charges $3–$8 per piece for programs, menus and place cards; you can make them for under a dollar. And unlike floral arranging or carpentry, paper crafts need zero talent — just a printer, a paper trimmer, and one patient afternoon.
This guide gives you twenty tutorials in ten chapters — two projects per chapter, each with materials, steps and the bought-vs-DIY price. Start 2–3 months out, batch your work, and finish everything two weeks before the wedding.
At a Glance: Project, Time & DIY Savings
| Project Chapter | Time Per Piece | DIY Cost | Bought Cost |
|---|---|---|---|
| Welcome signs & seating charts | 1–2 hrs total | $5–15 | $60–150 |
| Table numbers & place cards | 3 min | $0.30 | $3–5 |
| Programs & menus | 5 min | $0.40 | $3–6 |
| Photo booth props | 10 min | $0.50 | $2–4 |
| Favor bags & boxes | 5 min | $0.50–$1 | $4–8 |
| Seed packets & sweet jars | 5 min | $0.60–$1 | $3–6 |
| Envelopes & thank-yous | 4 min | $0.30 | $2–4 |
| Wish cards & guest books | 2 min | $0.20 | $2–3 |
| Cake toppers & banners | 30–60 min | $3–8 | $25–60 |
| Confetti pops & cones | 3 min | $0.30 | $1.50–3 |
Batch rule: cut everything in one session, assemble in the next — switching between cutting and gluing doubles your time.
Welcome Signs & Seating Charts
 📌 Save
Two tutorials: a chalkboard welcome sign with your names and date, and a kraft-paper seating chart on foam board.
Welcome sign: buy a framed chalkboard ($10–$15), sketch your design in pencil first, then trace with liquid chalk markers in your wedding font. Add your names, date, and one line (“Pick a seat, not a side”). Seating chart: print table assignments on kraft paper strips, mount them in neat rows on a foam board, and frame it with eucalyptus. Both look custom because the lettering is yours — and inconsistent lettering is the charm.
Do the seating chart last, after final RSVPs. Keep a few blank strips and a marker at the venue for day-of changes.
Read next: Ultimate Wedding Planning Checklist
Table Numbers & Place Cards
 📌 Save
Two tutorials: tented table numbers in your palette, and calligraphy-style place cards with one pen.
Table numbers: design one template in a free design tool, print on cardstock, score and fold into tents. One design, printed 15 times, done in an hour. Place cards: buy a brush pen ($3) and practice one alphabet for a week — “faux calligraphy” (thick downstrokes, thin upstrokes) looks professional after surprisingly little practice. Write each guest’s name, let dry flat, done.
Print 10% extra of everything. Someone’s name will be misspelled, someone will be added late — extras save the day.
Read next: Wedding Centerpieces on a Budget: 10 Creative Ideas
Paper Programs & Menus
 📌 Save
Two tutorials: folded ceremony programs with your order of events, and matching menu cards for each table.
Design one template — your names, one motif, one font pairing — and reuse it for both. Programs: a single letter sheet folded in half, order of events inside, wedding party names on the back. Menus: a 4×6 card per table (not per guest — one per table saves 80% of printing). Print at home on quality cardstock or use a local print shop’s self-serve machines for pennies per page.
Proofread with fresh eyes the next morning, not the same night you designed them. Have one other person read every word.
Read next: How to Do Wedding Food on a Budget: A Complete Guide
Photo Booth Props & Frames
 📌 Save
Two tutorials: printable props on dowels (lips, glasses, speech bubbles), and an oversized empty frame for group shots.
Props: download free printable templates, print on cardstock, cut out, and hot-glue to wooden dowels. Make 15–20 — they get bent, and variety keeps the booth busy. The frame: buy a large empty picture frame from a thrift store, spray-paint it gold, remove the glass, and lean it against the backdrop. Guests hold it up for photos like a living portrait — it’s the most-used prop at every wedding.
Laminate the props if your wedding is outdoors — humidity and excited hands destroy plain cardstock fast.
Favor Bags & Keepsake Boxes
 📌 Save
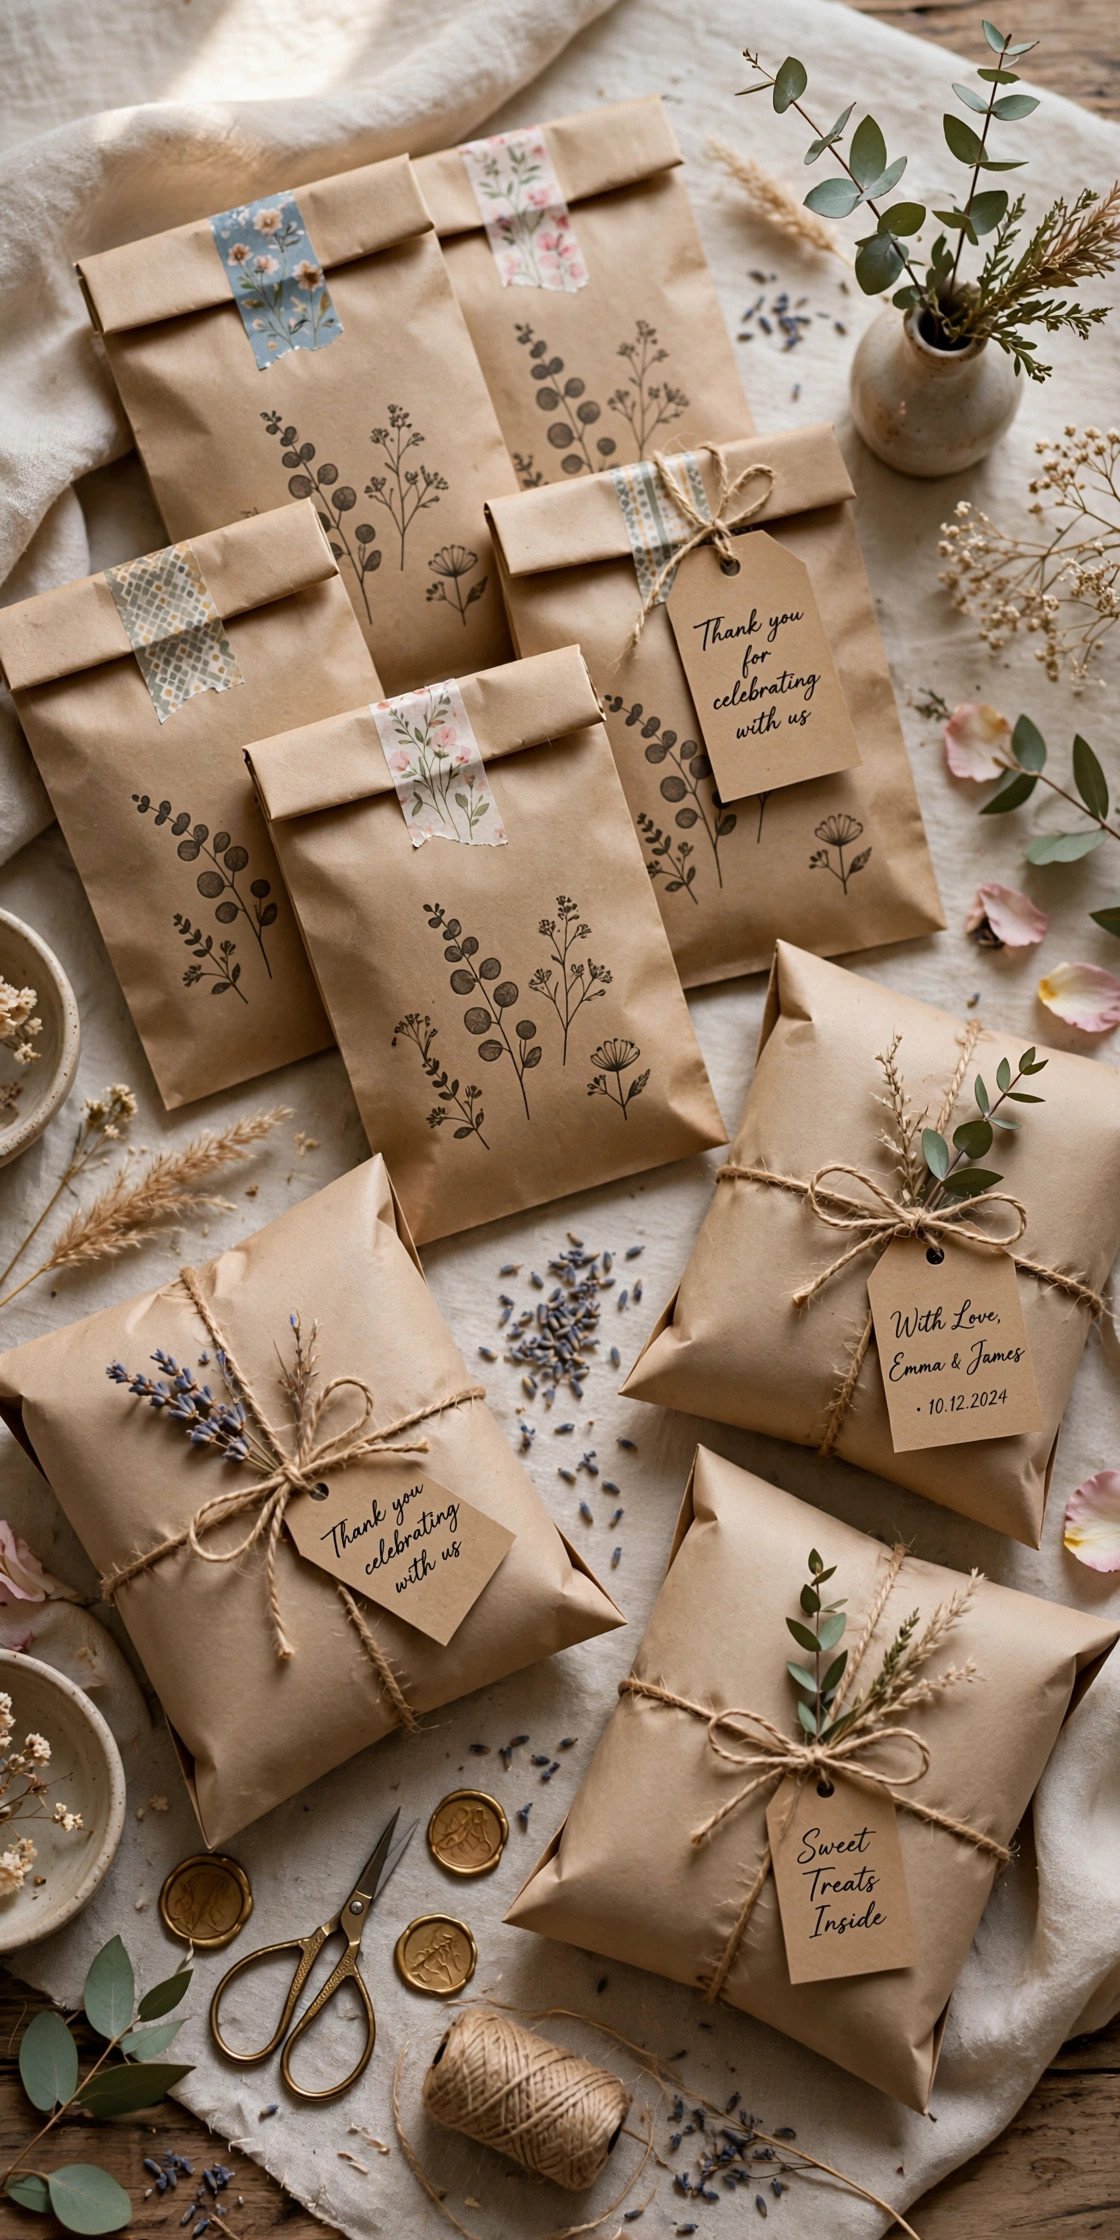
Two tutorials: stamped kraft favor bags with custom tags, and fold-flat pillow boxes for candy or small gifts.
Kraft bags: buy in bulk ($0.15 each), stamp with a custom rubber stamp of your names and date ($12 one-time), fill with candy or cookies, fold the top and seal with washi tape. Pillow boxes: buy flat templates, fold along scored lines (no glue needed), fill, and tie with twine and a tag. Both assemble in under five minutes each once you find your rhythm — perfect for a favor-assembly party.
Fill favors the week of the wedding, not earlier — candy goes stale and cookies go soft. Store assembled empties in sealed bins.
Seed Packets & Sweet Jars
 📌 Save
Two tutorials: custom seed packets with your names (“let love grow”), and mini candy jars with printed labels.
Seed packets: buy bulk wildflower seeds, make small envelopes from kraft paper using a template, fill with a tablespoon of seeds, and seal with a printed label. Total cost: about $0.60 each, and guests genuinely plant them. Candy jars: buy 2oz mini jars in bulk, fill with mints or wrapped candy, top with a circle label under the lid. They double as table decor before guests take them home.
Choose seeds suited to your region and wedding season — guests in apartments need windowsill-friendly varieties like herbs.
Read next: 20 Mason Jar Wedding Centerpiece Ideas
Envelopes & Thank-You Stationery
 📌 Save
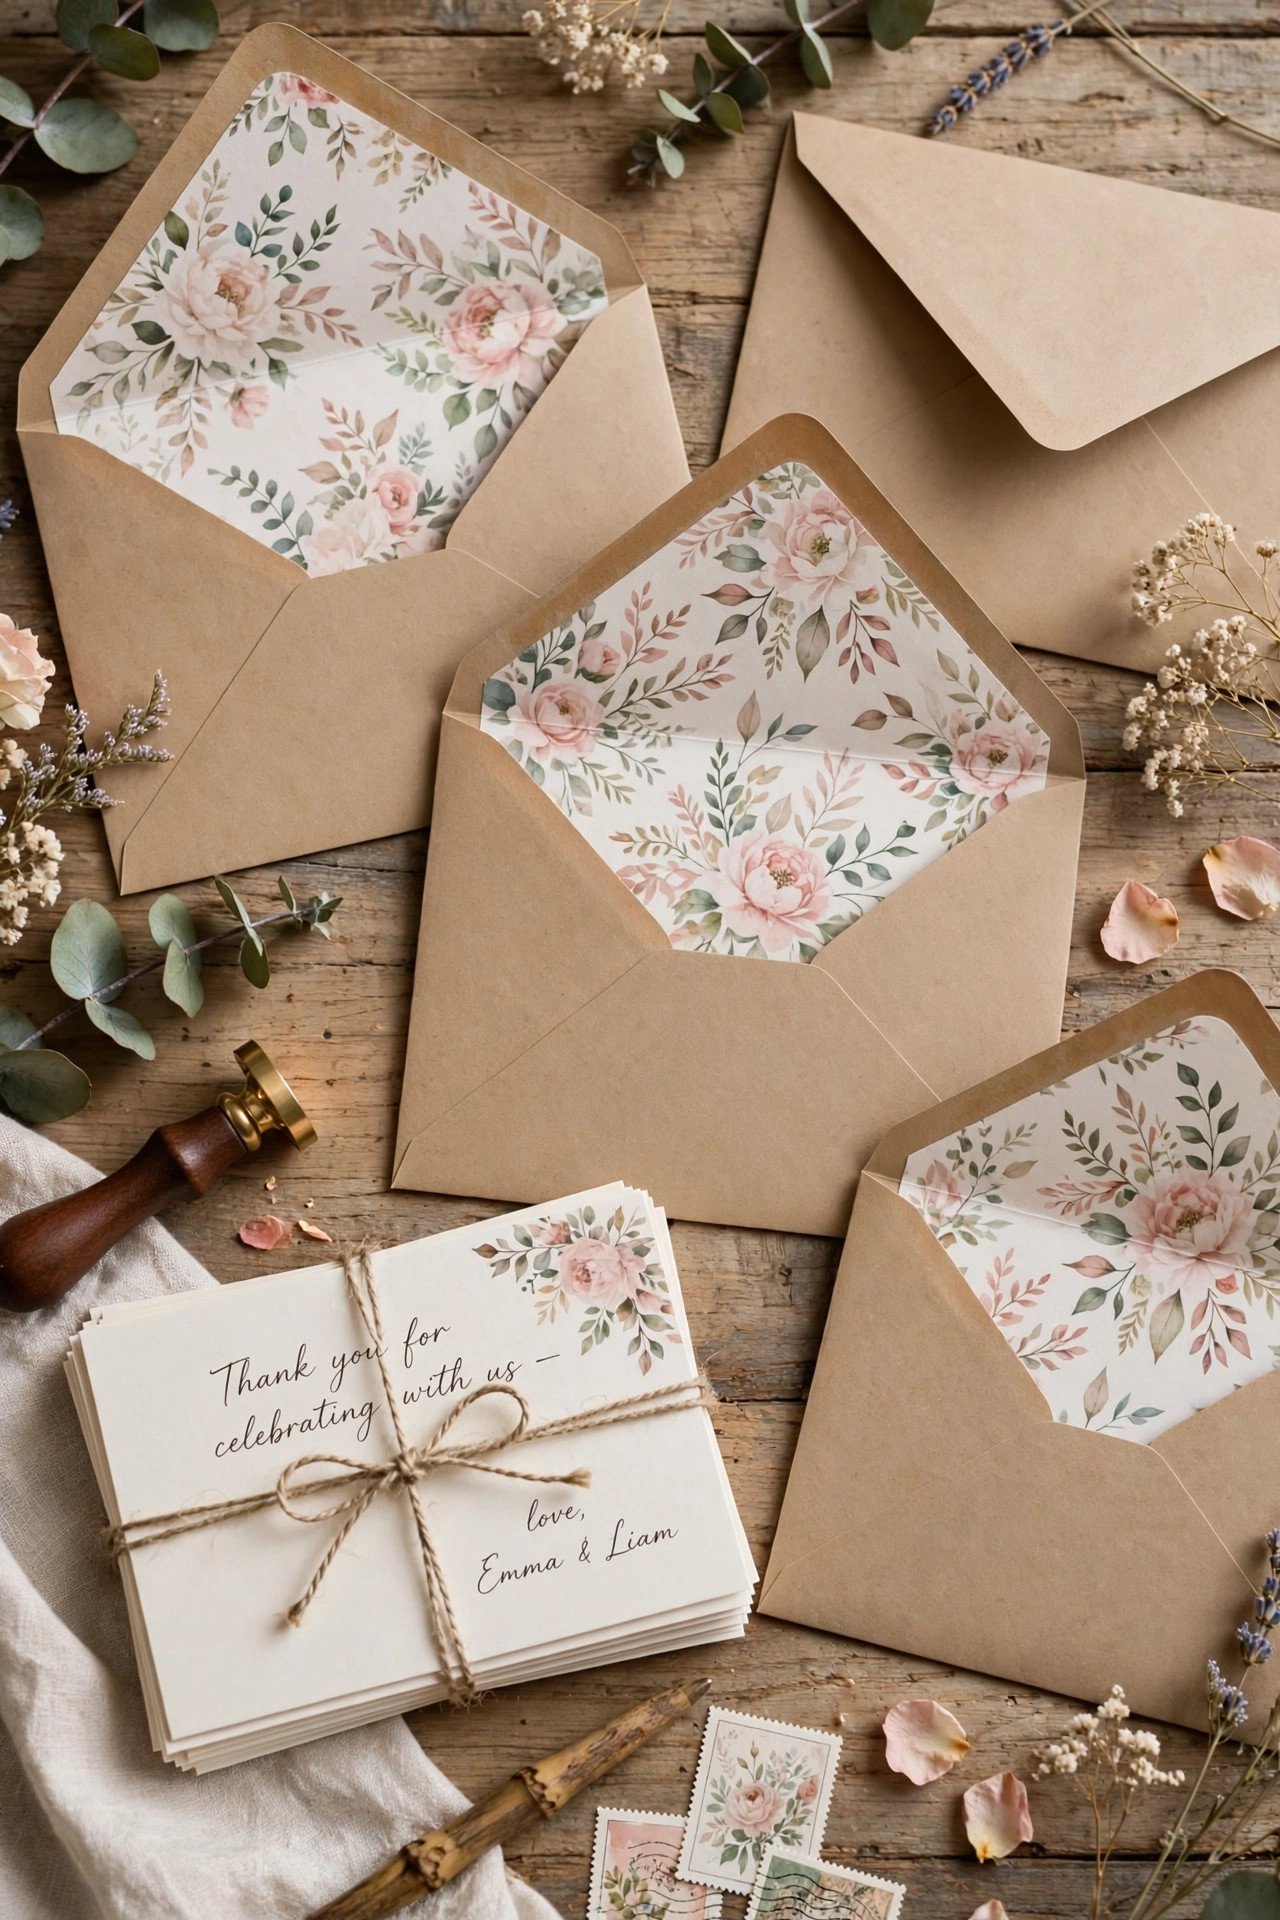
Two tutorials: envelope liners from wrapping paper, and matching thank-you cards using your invitation template.
Envelope liners: trace your envelope flap onto pretty wrapping paper or scrapbook paper, cut, and glue inside the flap — it turns a plain white envelope into a stationery suite. Thank-you cards: reuse your invitation design template, swap the text for a thank-you message, print on the same cardstock, and hand-write a line on each after the wedding. Matching paper across invitations, liners and thank-yous looks incredibly polished.
Address envelopes with the same pen you’ll use for place cards — consistency is what makes DIY look professional.
Read next: How to Plan Your Dream Wedding Under $5,000
Wish Cards & Guest Book Alternatives
 📌 Save
Two tutorials: printed wish cards with prompts for a keepsake box, and a fingerprint tree poster guests complete together.
Wish cards: print 4×6 cards with a prompt (“Our wish for you two…”, “Date night idea…”), set out with pens and a decorated box. Guests fill them in minutes, and you read them for years. Fingerprint tree: print a bare tree poster, set out ink pads in your wedding colors, and invite each guest to add a fingerprint “leaf” and sign beside it. It becomes wall art — infinitely better than a signed book on a shelf.
Use washable ink pads and have wipes nearby — nobody wants ink on their outfit, and they’ll skip the tree without them.
Read next: 10 Things a New Bride Needs From Her Mother
Cake Toppers & Celebration Banners
 📌 Save
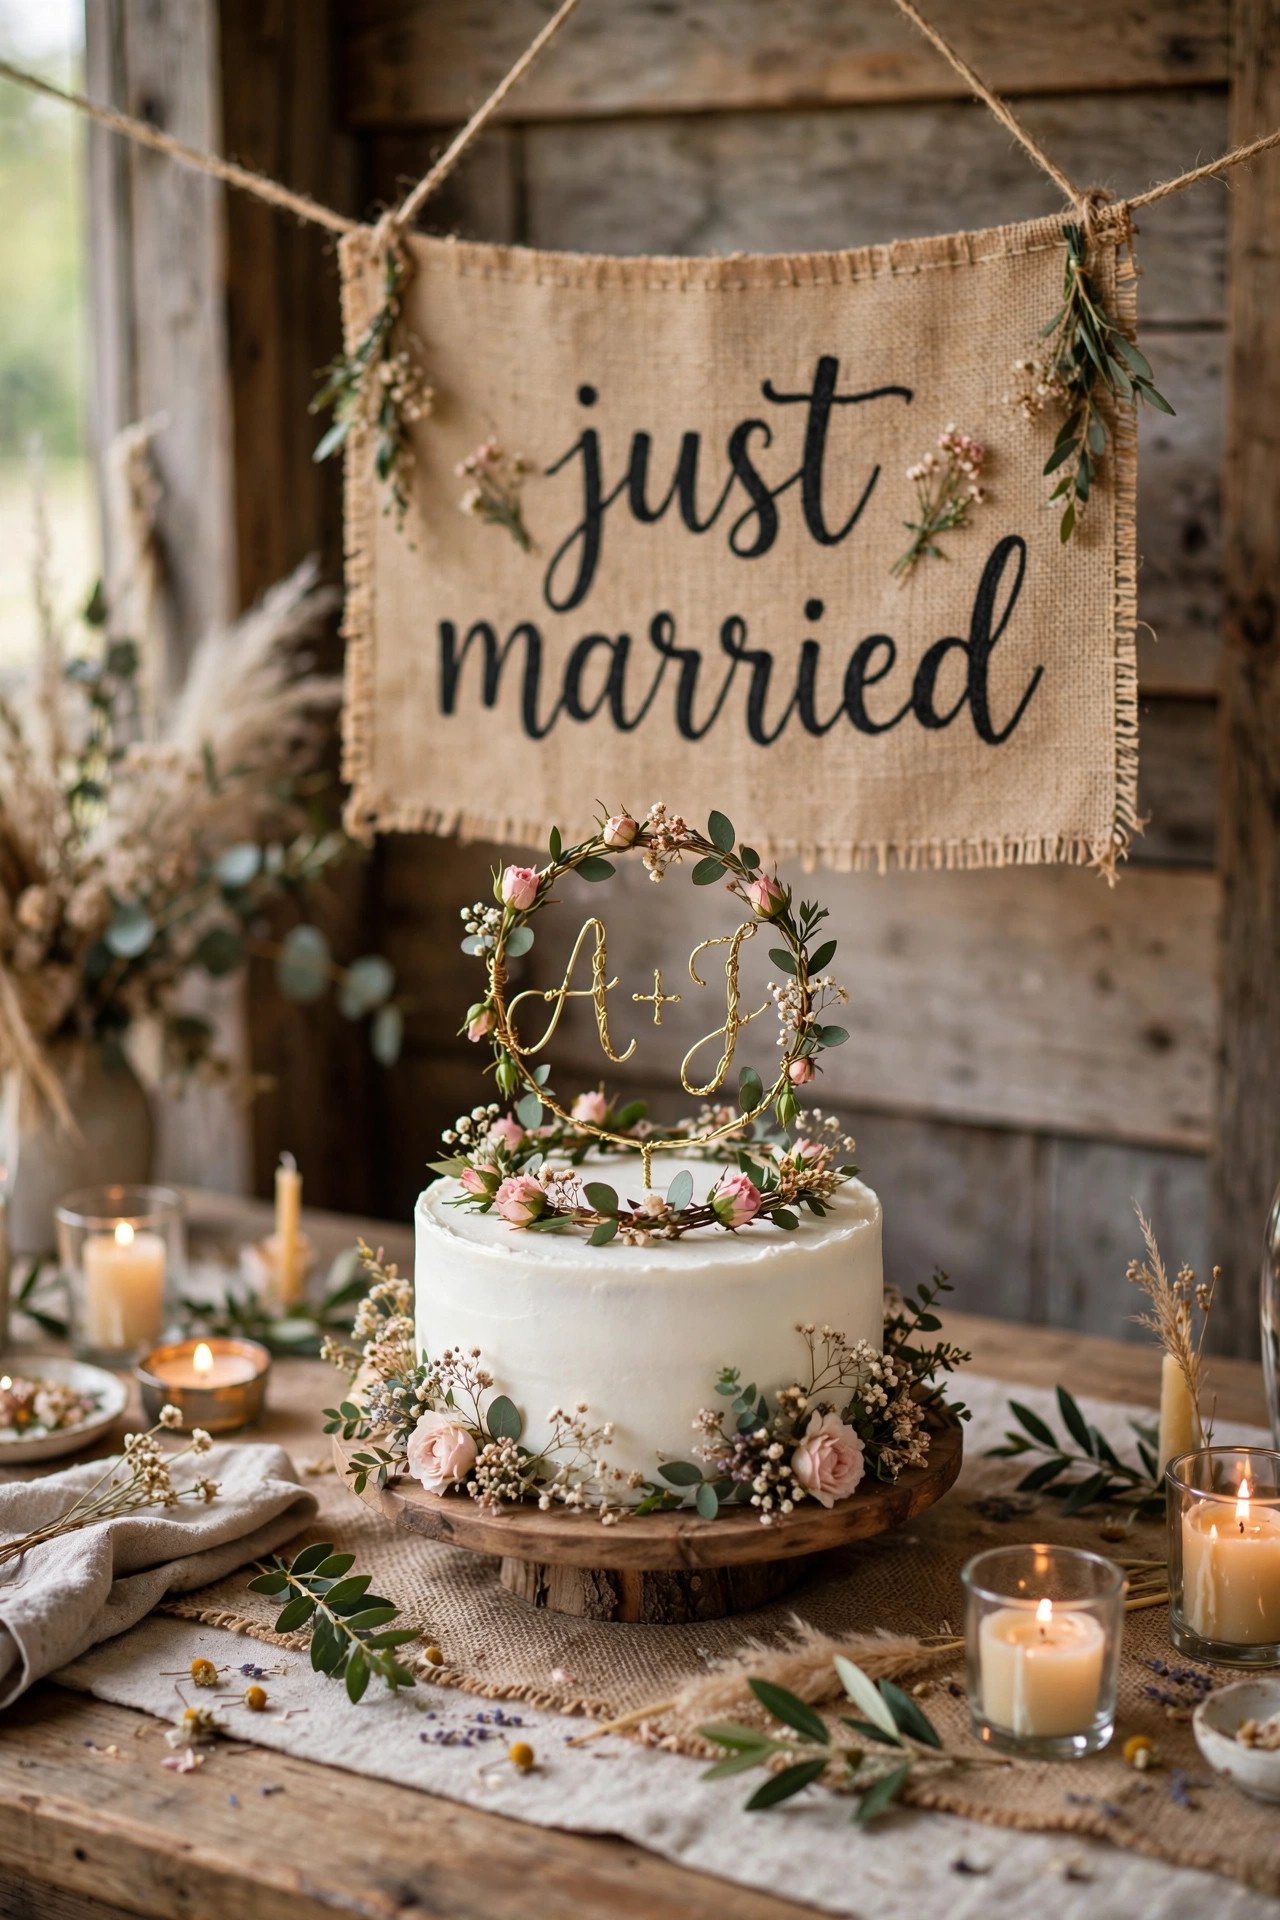
Two tutorials: a wire-and-floral cake topper with your initials, and a “Just Married” burlap banner for the sweetheart table.
Cake topper: bend craft wire into your initials or “Mr & Mrs,” wrap with floral tape, and tuck in small faux flowers. Mount on two skewers and it stands in any cake — total cost under $5 versus $30–$60 bought. Banner: cut burlap triangles, stencil letters with craft paint, string on twine, and hang behind your table. Both photograph constantly because they sit in every key photo.
Test the topper in a foam block first to check balance — a leaning topper in cake photos is heartbreaking.
Read next: 27 Rustic Wedding Decoration Ideas
Confetti Pops & Send-Off Cones
 📌 Save
Two tutorials: push-pop confetti tubes guests launch at your exit, and paper cones filled with petals or lavender.
Confetti pops: buy clear push-pop containers in bulk, fill with biodegradable confetti in your colors, cap them, and add a tag with launch instructions. Cones: roll decorative paper into cones, secure with double-sided tape, fill with dried petals or lavender buds, and display in a basket at the ceremony exit. Both cost under $0.50 each and create the send-off photos you’ll frame.
Check your venue’s rules first — many ban real confetti but allow biodegradable petals or bubbles. Never assume.
Read next: DIY Dollar Tree Wedding Decor Ideas
Frequently Asked Questions
How far in advance should I start wedding crafts?
Start paper crafts 2–3 months out and finish everything 2 weeks before the wedding. Work in batches — cut everything one weekend, assemble the next. Never leave crafts for the final week; that’s when stress peaks and mistakes multiply.
What basic supplies do I need for wedding paper crafts?
A paper trimmer, a glue gun, double-sided tape, cardstock in your colors, kraft paper, twine, and a good printer cover 90% of wedding paper crafts. Add chalk markers and a set of fine-tip pens for lettering. Buy in bulk — you’ll use more than you think.
Are DIY wedding crafts actually cheaper?
For paper goods and favors, yes — dramatically. DIY programs cost $0.30 each versus $3 printed; handmade favor bags run $0.50 versus $4 bought. The savings shrink for complex builds, so DIY the simple high-quantity items and buy the rest.
How do I make DIY wedding crafts look professional?
Consistency is everything: one font family, one color palette, one paper type across all crafts. Use templates and batch-cut with a trimmer instead of scissors. And proofread everything twice — nothing cheapens DIY faster than a typo.
Can I do wedding crafts if I’m not crafty?
Absolutely — this guide focuses on paper, signage and favor crafts that need no artistic skill, just patience. Printable templates do the design work for you. Recruit one detail-oriented friend for an assembly party and you’ll finish in an afternoon.
✨ Key Takeaways
- Paper, signage and favor crafts offer the biggest DIY savings — $0.30–$1 vs $3–$8 bought.
- Start 2–3 months out; batch cut one weekend, assemble the next; finish 2 weeks before.
- One font, one palette, one paper type across everything = professional look.
- Printable templates eliminate the need for artistic skill — patience is enough.
- Always make 10% extra and proofread with fresh eyes before printing in bulk.
Final Thoughts
The best wedding crafts aren’t the most impressive ones — they’re the ones that saved you hundreds of dollars and still made guests ask “where did you get these?” Pick three or four chapters from this guide, gather your supplies, and make it a party. Your wedding will look custom because, well, it will be.




One Comment