Budget-Friendly DIY Wedding Decorations on a Dime
By zainzari • Published April 2026 • Updated October 11, 2026
 📌 Save
The best budget-friendly DIY wedding decorations are real projects with materials lists: paper flower wall backdrops, mason jar lantern centerpieces, hand-painted wooden welcome signs, dried-flower table runners, photo clothesline memory walls, candle cluster table settings, chalkboard seating charts, fabric scrap garlands, mini bouquet place cards, and balloon-and-greenery arches. Most cost $10–$40 in materials and take one weekend each.
Plenty of articles list “DIY decor ideas.” This one gives you the actual projects — materials, steps, costs and honest time estimates — so you can start crafting this weekend.
Each of the ten tutorials below is a complete, buildable project rated by skill level. Start 2–3 months out, tackle one per weekend, and rope in crafty friends (pizza and playlists make everything faster). Your total decor bill: a few hundred dollars, not a few thousand.
At a Glance: Project, Materials, Time & Skill
| Project | Key Materials | Time | Skill |
|---|---|---|---|
| Paper Flower Wall | Cardstock, hot glue, foam board | 2 weekends | Easy |
| Mason Jar Lanterns | Jars, twine, LED candles | 1–2 hours | Easy |
| Wooden Welcome Sign | Pallet wood, paint, stencil | Half a day | Easy |
| Dried-Flower Runner | Dried blooms, twine, ribbon | 2–3 hours | Easy |
| Photo Clothesline | Twine, mini pegs, prints | 1–2 hours | Easy |
| Candle Clusters | Pillar candles, trays, greenery | 1 hour | Easy |
| Chalkboard Seating Chart | Chalkboard, chalk pens | 2–3 hours | Medium |
| Fabric Scrap Garland | Fabric scraps, twine | 2–3 hours | Easy |
| Mini Bouquet Place Cards | Small blooms, kraft tags | 2 hours | Easy |
| Balloon & Greenery Arch | Balloons, arch frame, greenery | Half a day | Medium |
Costs assume basic craft supplies on hand (scissors, glue gun); each project’s materials run $10–$40.
Paper Flower Wall Backdrop
 📌 Save
Materials: cardstock in 2–3 palette colors, hot glue gun, scissors, foam board or pegboard panels, command strips. Cost: ~$25–35.
Cut petal templates (free patterns are everywhere online) in three sizes, curl each petal around a pencil for dimension, and glue layers from large to small around a center. Make 15–25 blooms in varying sizes — big ones (12″+) for impact, mediums to fill. Arrange on foam board panels starting from the center outward, mixing sizes and colors, then mount panels together.
This is a two-weekend project if you craft a little each evening — perfect for doing with bridesmaids. Transport flat between blankets; assemble panels on-site in 20 minutes.
Read next: 45 Stunning IKEA Wedding Hacks and Ideas
Mason Jar Lantern Centerpieces
 📌 Save
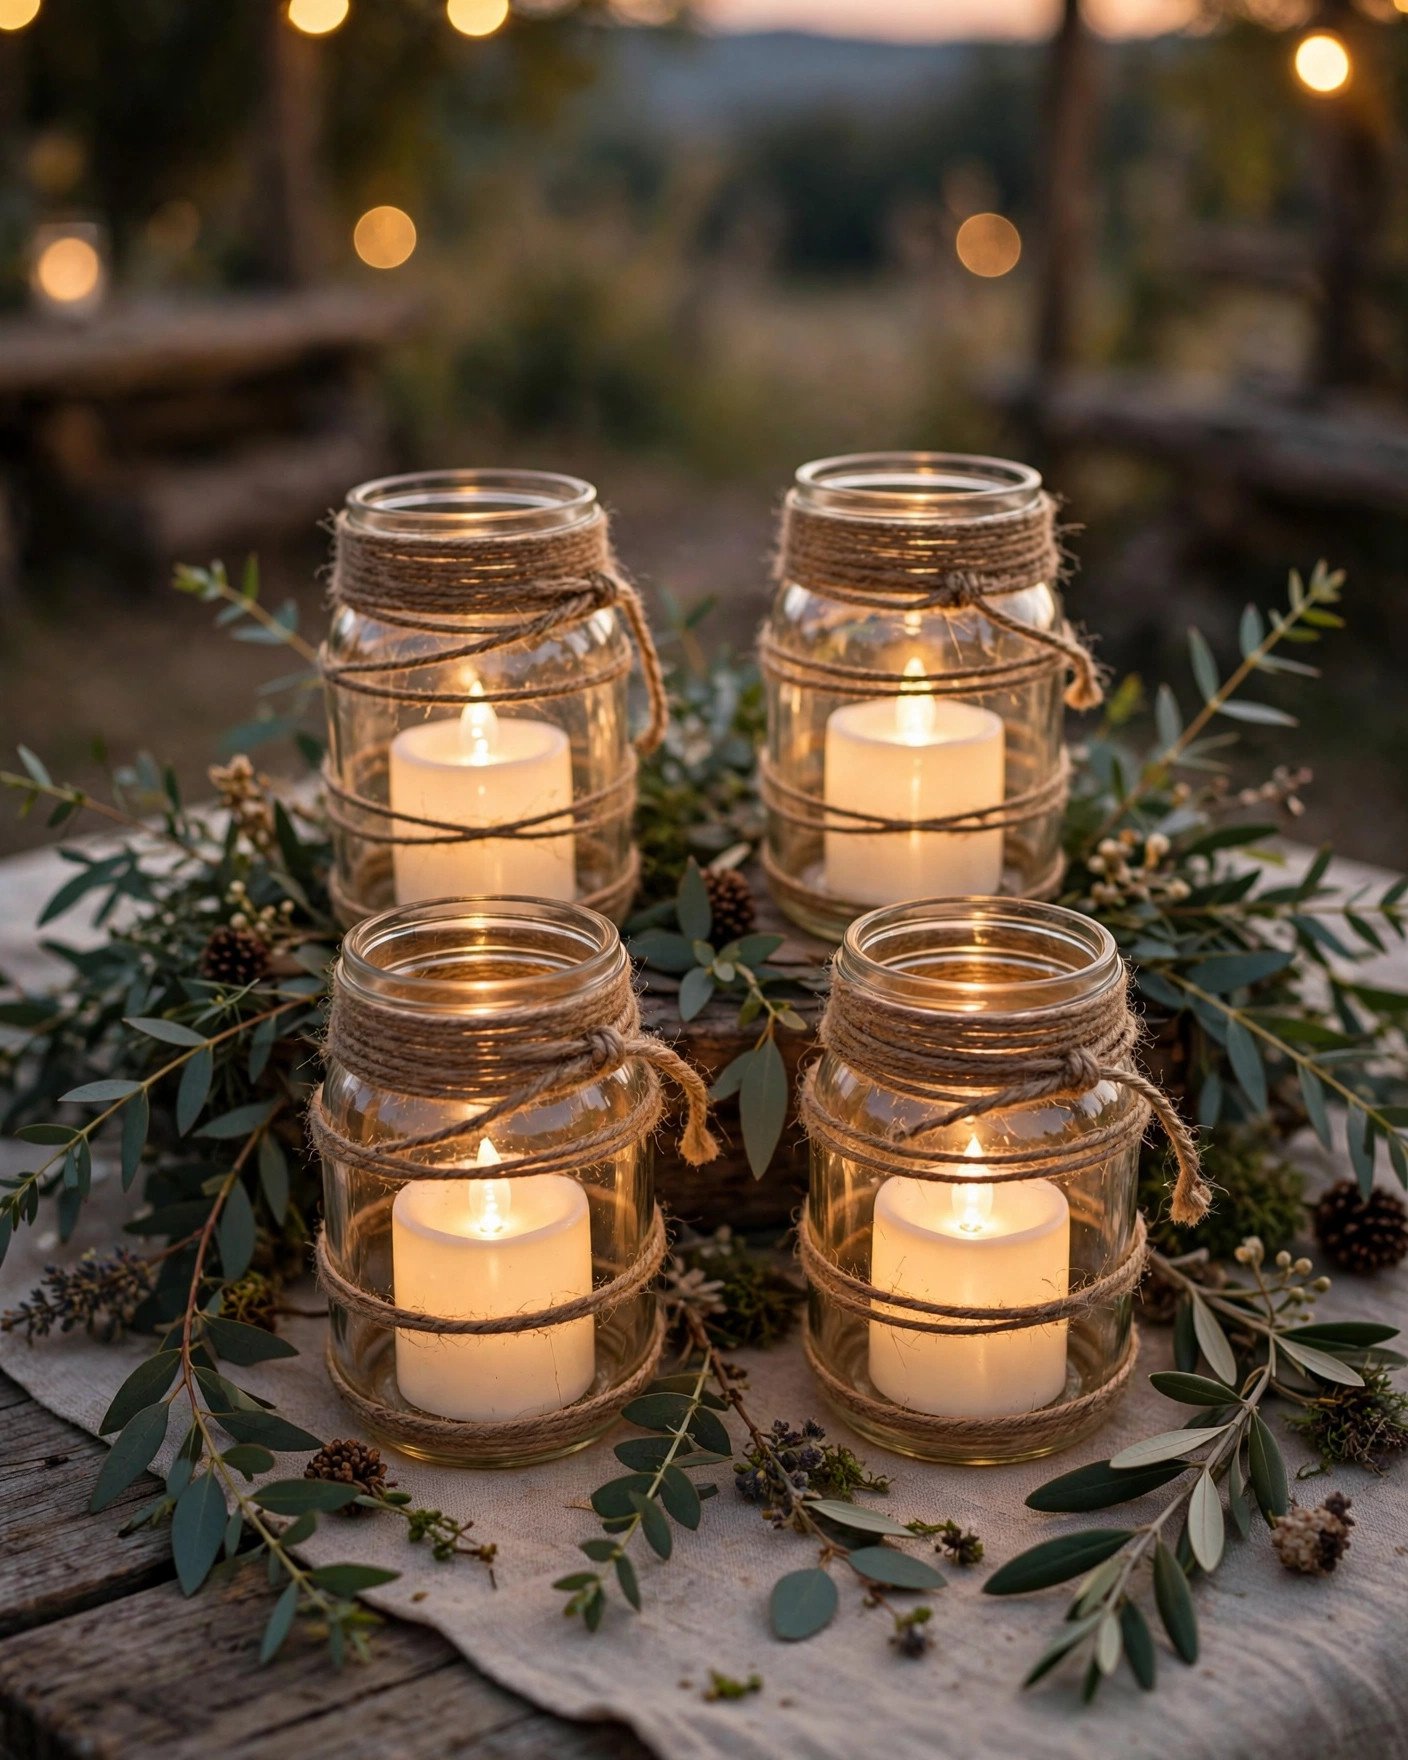
Materials: mason jars (thrifted or bulk), jute twine, LED tea lights or votives, optional lace ribbon. Cost: ~$15–25 for 10 jars.
Wrap twine three times around each jar’s neck and tie a bow (or wrap the whole jar in a spiral for a fuller look). Drop in an LED tea light — flameless means zero venue fire issues and zero wax mess. For variety, make three heights: plain jars, jars on small wood slices, and jars hung from shepherd’s hooks for the aisle.
Add a sprig of eucalyptus or baby’s breath tied into the bow for the ceremony, then remove for the reception if you want a cleaner look. One evening of crafting covers 15–20 tables.
Read next: 15 Dollar Tree Wedding Flower Hacks That Look Stunning
Hand-Painted Wooden Welcome Sign
 📌 Save
Materials: pallet wood board or plywood (hardware store offcuts work), white acrylic paint, letter stencils, foam brush, sandpaper. Cost: ~$10–20.
Sand the board smooth, apply a stain or leave natural, then stencil your wording (“Welcome to our wedding,” names, date) in white paint using a foam brush with light dabbing — never brush strokes, which bleed under stencils. Peel stencils while paint is slightly tacky for crisp edges. Distress lightly with sandpaper for rustic charm.
Prop on an easel with greenery tucked around the base. The same technique makes seating signs, bar menus and “unplugged ceremony” signs — one method, endless signage.
Read next: 45 Stunning IKEA Wedding Hacks and Ideas
Dried-Flower Table Runner
 📌 Save
Materials: dried pampas grass, dried lavender/bunny tails/wheat, jute twine, optional cheesecloth runner base. Cost: ~$20–30 per long table.
Lay a cheesecloth or linen runner down the table center. Bundle small bunches of dried stems (5–7 stems each), tie with twine, and lay them head-to-tail along the runner, alternating directions so it looks continuous. Tuck in a few fresh eucalyptus sprigs on the day for scent and color contrast.
Dried flowers are the ultimate make-ahead decor — build runners weeks early and store flat. They don’t wilt, don’t need water, and photograph with gorgeous texture.
Read next: 15 Dollar Tree Wedding Flower Hacks That Look Stunning
Photo Clothesline Memory Wall
 📌 Save
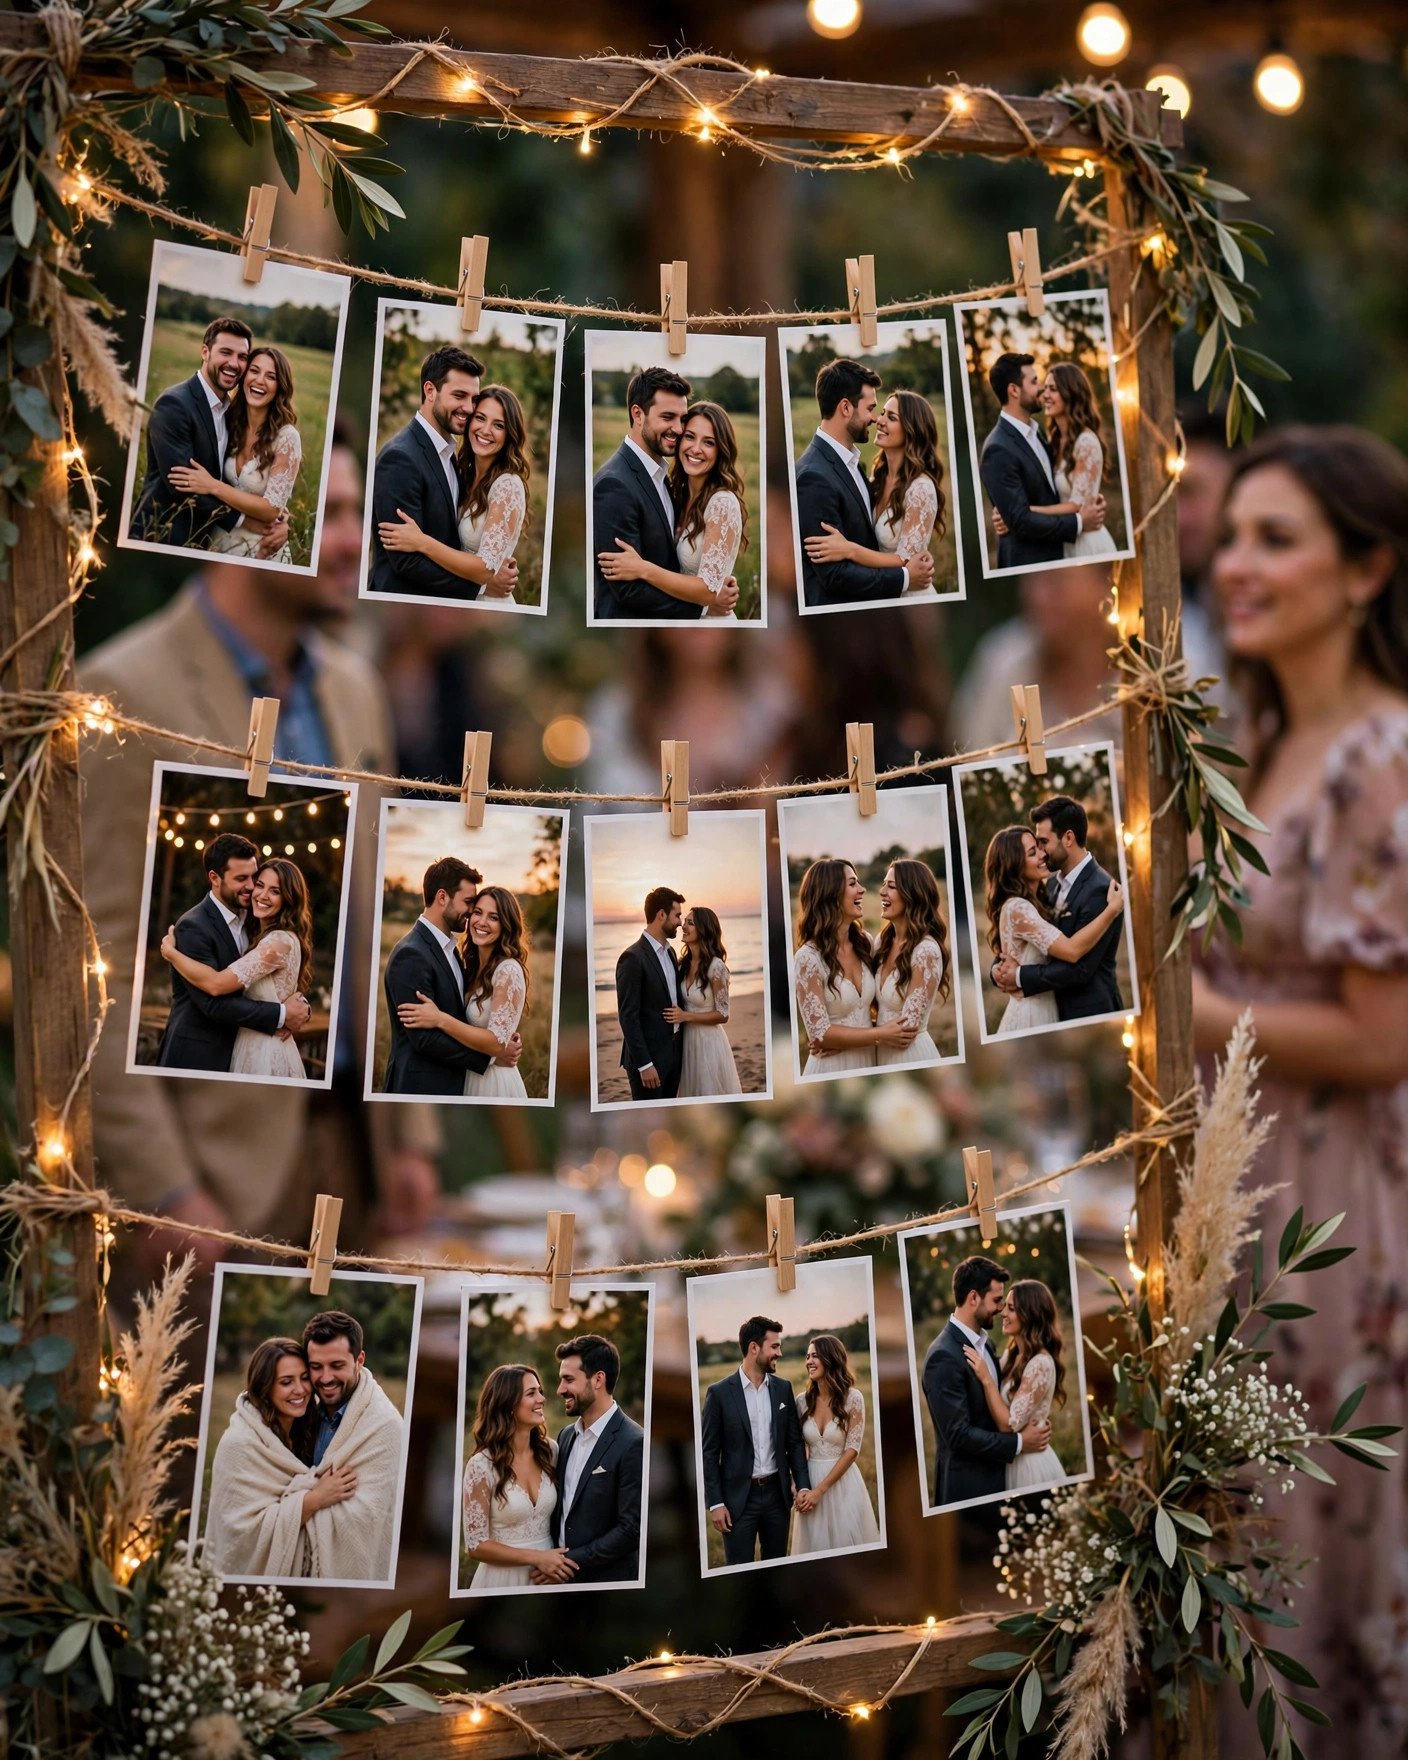
Materials: jute twine, mini wooden pegs, 30–50 printed photos, fairy lights, two stands or wall hooks. Cost: ~$15–25.
Print photos chronicling your story (childhood, dating, proposal — ask both families for gems). String twine in 2–3 horizontal lines on a wall, between stands, or across a frame; clip photos chronologically with mini pegs. Weave fairy lights through for evening glow.
Place it where guests queue or mingle — near the bar is perfect. It decorates, entertains and sparks conversations between families who’ve never met. After the wedding, it becomes home art.
Read next: 45 Stunning IKEA Wedding Hacks and Ideas
Candle Cluster Table Settings
 📌 Save
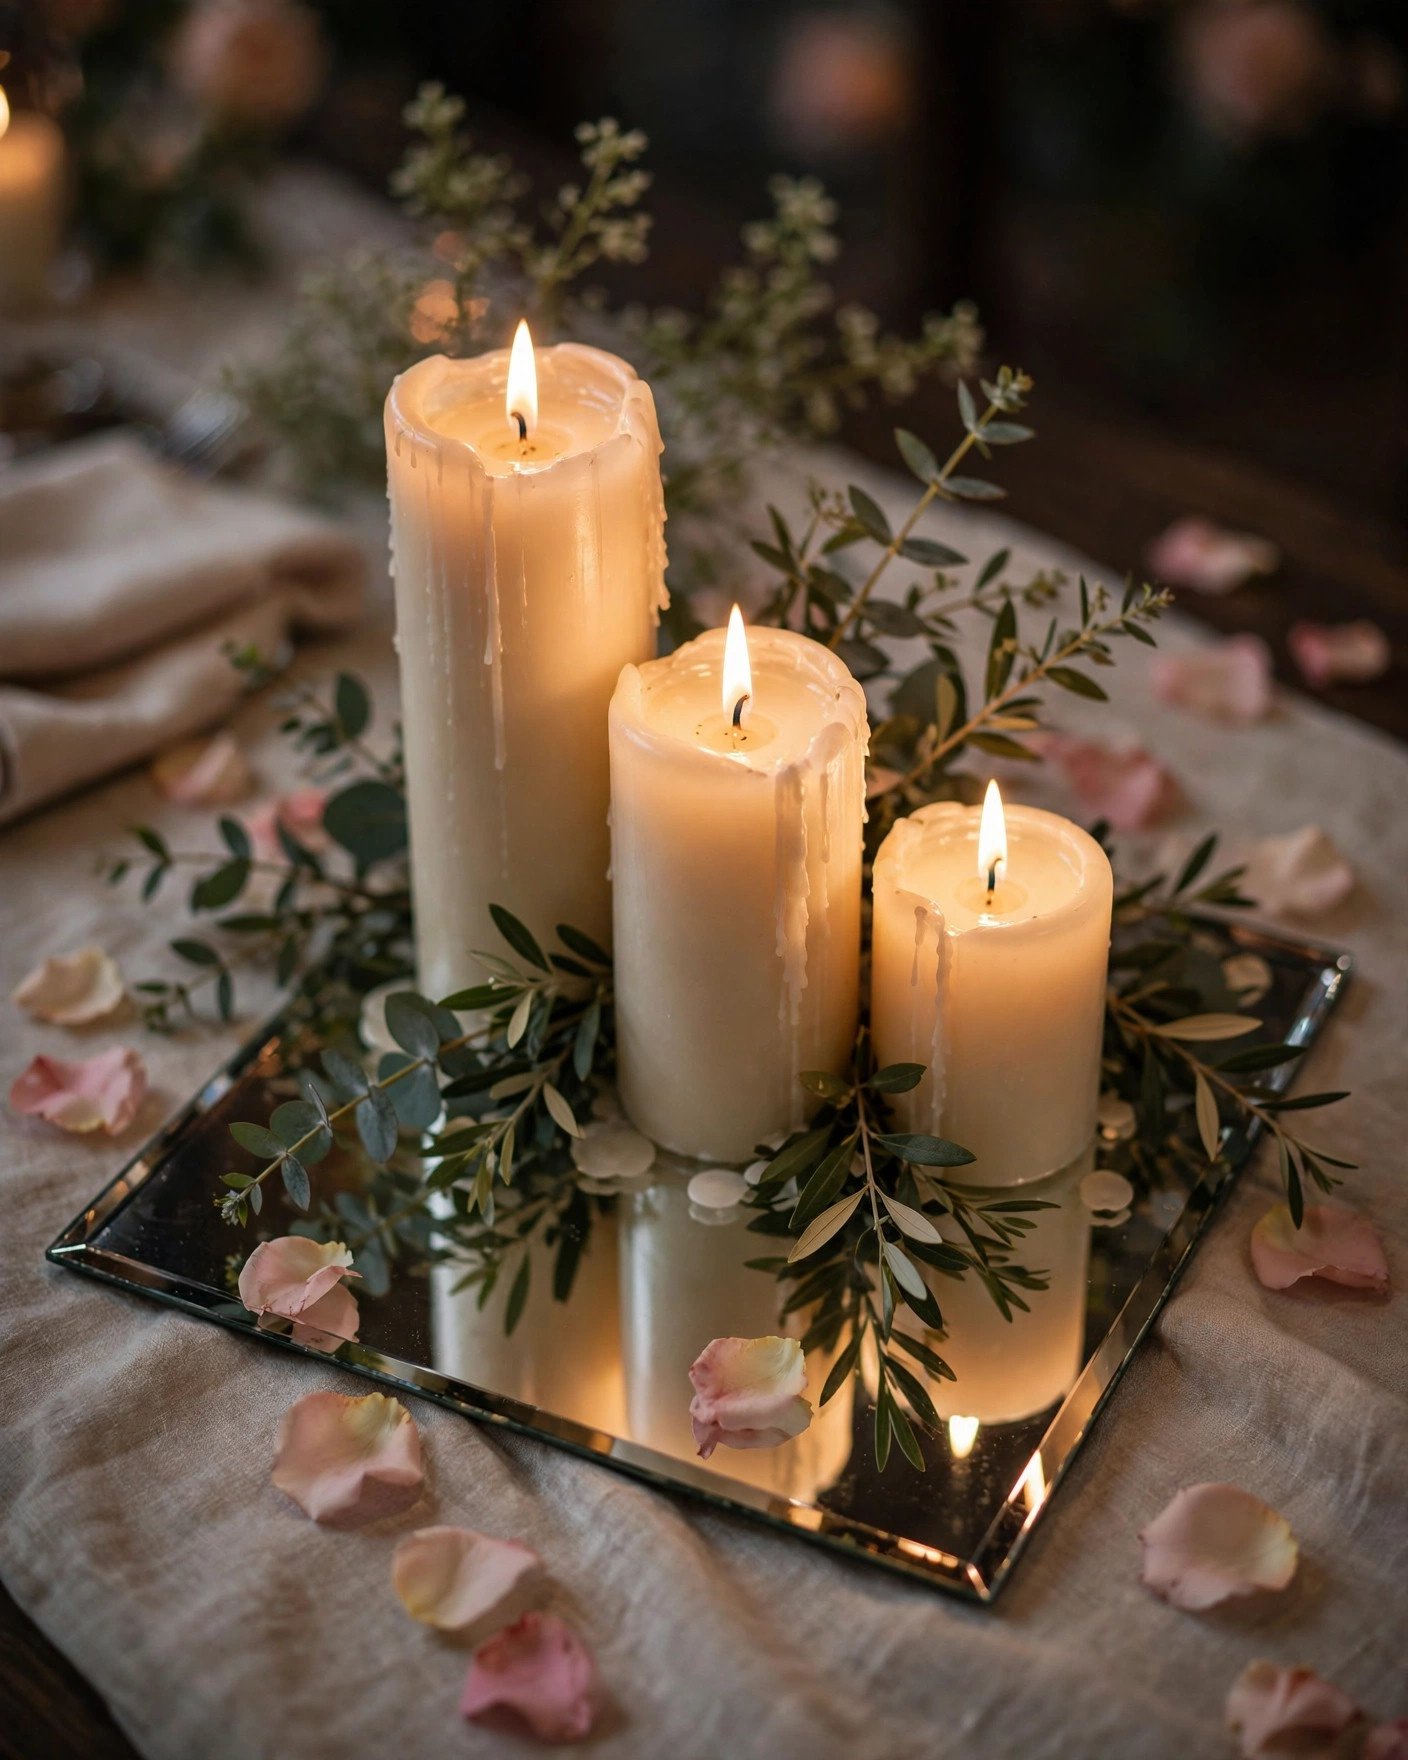
Materials: pillar candles in 3 heights, a tray or mirror base per table, faux or fresh greenery sprigs, LED tea lights as backup. Cost: ~$12–20 per table.
Group candles in odd numbers (3 or 5) on a tray or mirror tile — the mirror doubles the glow. Vary heights for dimension, tuck greenery sprigs between candles, and scatter a few petals around the base. That’s the whole project; it takes minutes per table once you have the supplies.
For venues banning open flame, quality LED pillars look identical in photos. Either way, dim the overhead lights at dinner — candlelight does the rest.
Read next: 15 Dollar Tree Wedding Flower Hacks That Look Stunning
Chalkboard Seating Chart
 📌 Save
Materials: large chalkboard (thrifted frame + chalkboard paint works), chalk pens (not chalk — no dust), ruler, pencil. Cost: ~$15–25.
Sketch your layout in pencil first: title at top, tables in columns, names alphabetical within each table. Trace over with chalk pens — they write like markers but look like chalk, with zero smudging once dry. Add flourishes: a greenery garland across the top, table numbers in a script font.
Give yourself 2–3 hours and good lighting; hand-lettering rewards patience. Photograph the finished board — if anything smudges in transport, you have the reference to fix it on-site.
Read next: 45 Stunning IKEA Wedding Hacks and Ideas
Fabric Scrap Garland
 📌 Save
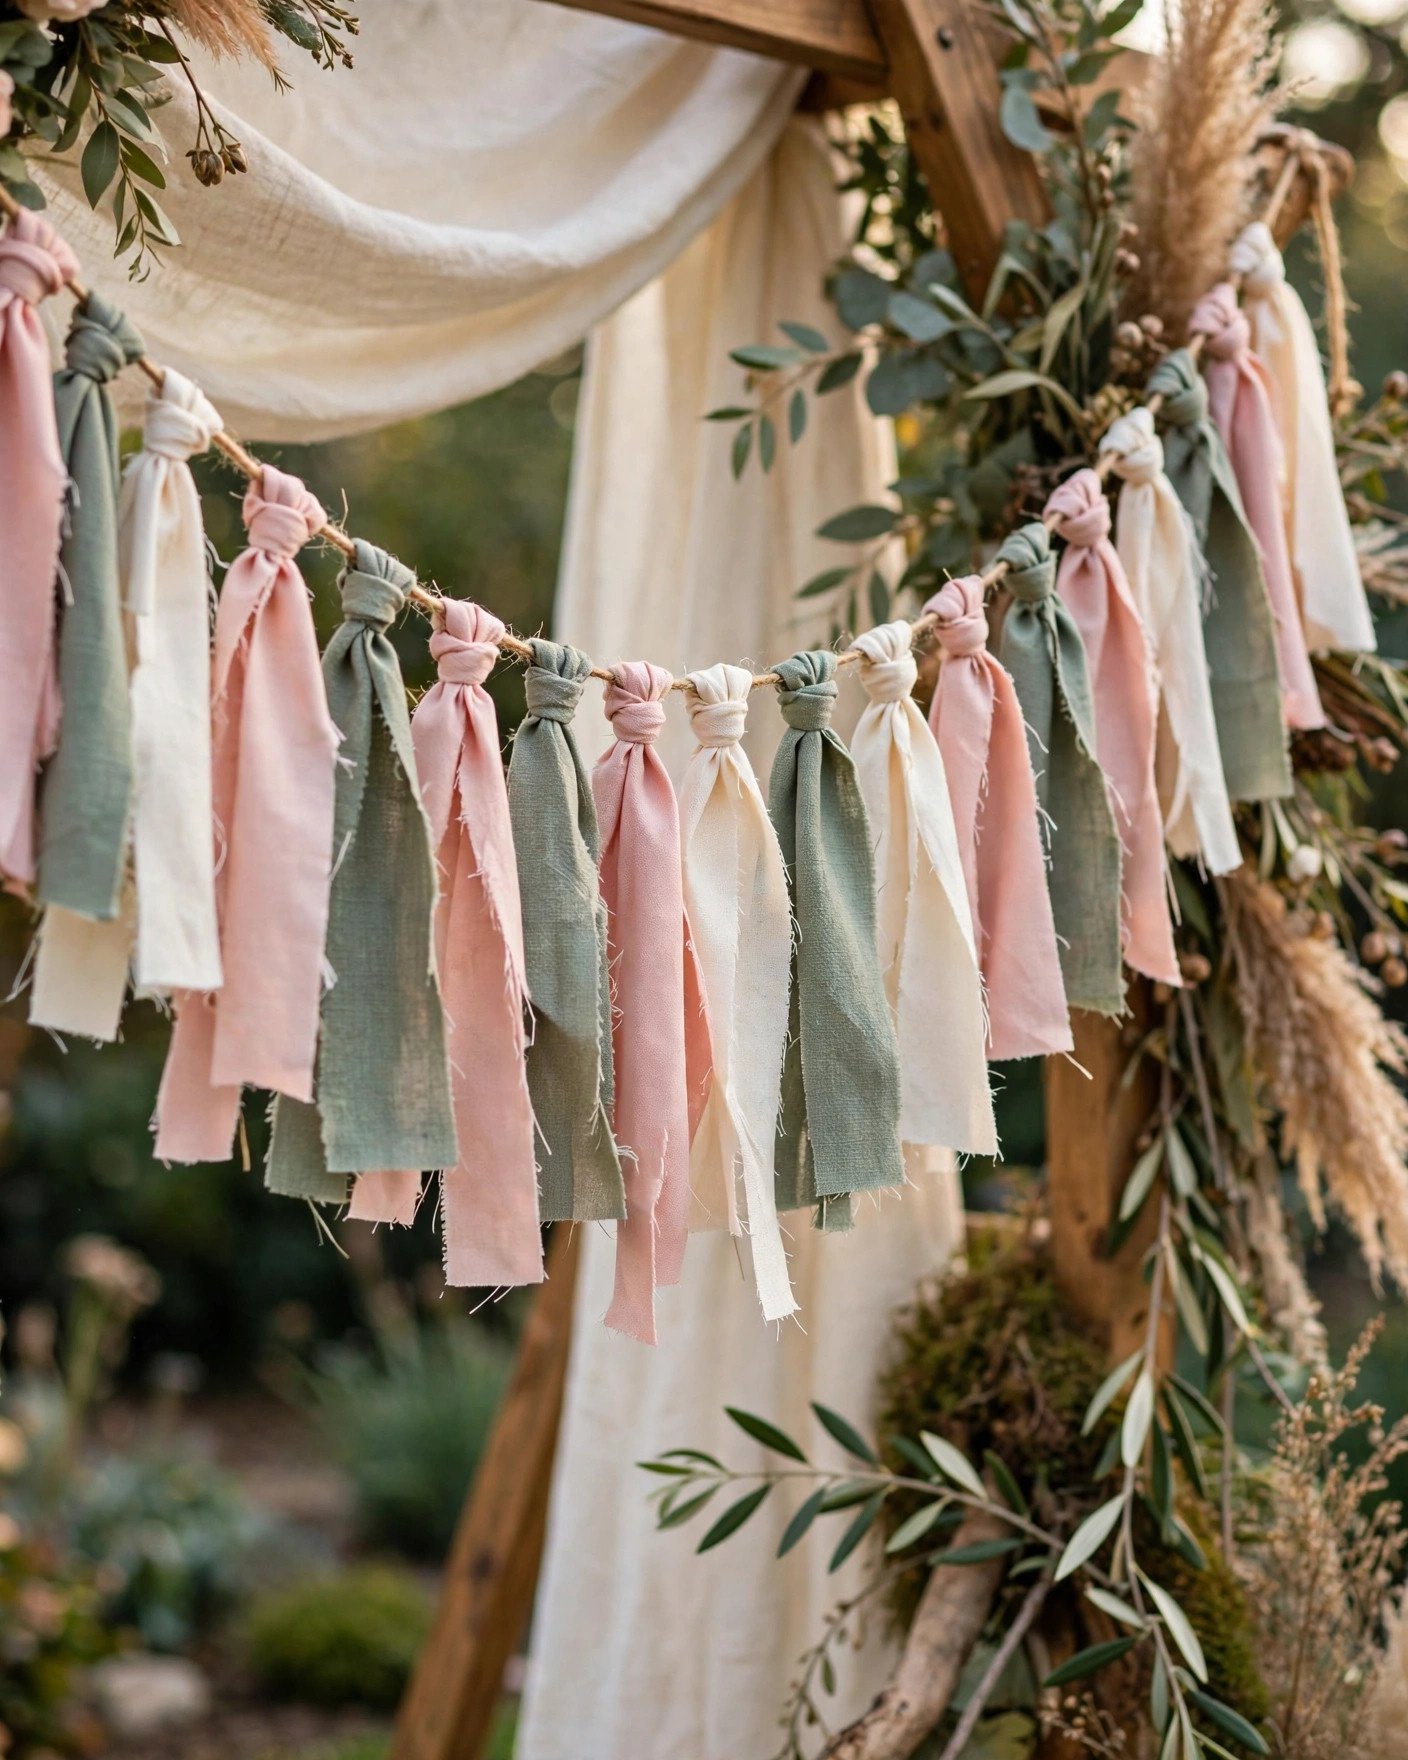
Materials: fabric scraps or old linens in palette colors, jute twine, scissors. Cost: ~$5–10 (often free).
Cut fabric into 1.5″ × 10″ strips — no need for straight lines, the ragged look is the charm. Tie strips onto twine with simple knots, alternating colors and textures, packing them close for fullness. One 10-foot garland takes about an hour once you’re in rhythm.
Hang garlands across the ceremony backdrop, along reception tables, or in doorways. They pack flat, weigh nothing, and add more color-per-dollar than any other decoration on this list.
Read next: 15 Dollar Tree Wedding Flower Hacks That Look Stunning
Mini Bouquet Place Cards
 📌 Save
Materials: small faux or dried blooms, kraft tags, twine, fine-tip pen. Cost: ~$0.50–1 per guest.
Bundle 3–5 small stems per guest, tie with twine, and attach a kraft tag with each name handwritten. Lay one at every place setting — they decorate the table, guide guests to seats, and go home as favors. Use dried lavender, baby’s breath or small faux wildflowers so they keep indefinitely.
Make them the week before (dried/faux only — fresh minis wilt). Alphabetize finished bouquets in a box for fast table setup on the day.
Read next: 45 Stunning IKEA Wedding Hacks and Ideas
Balloon and Greenery Arch
 📌 Save
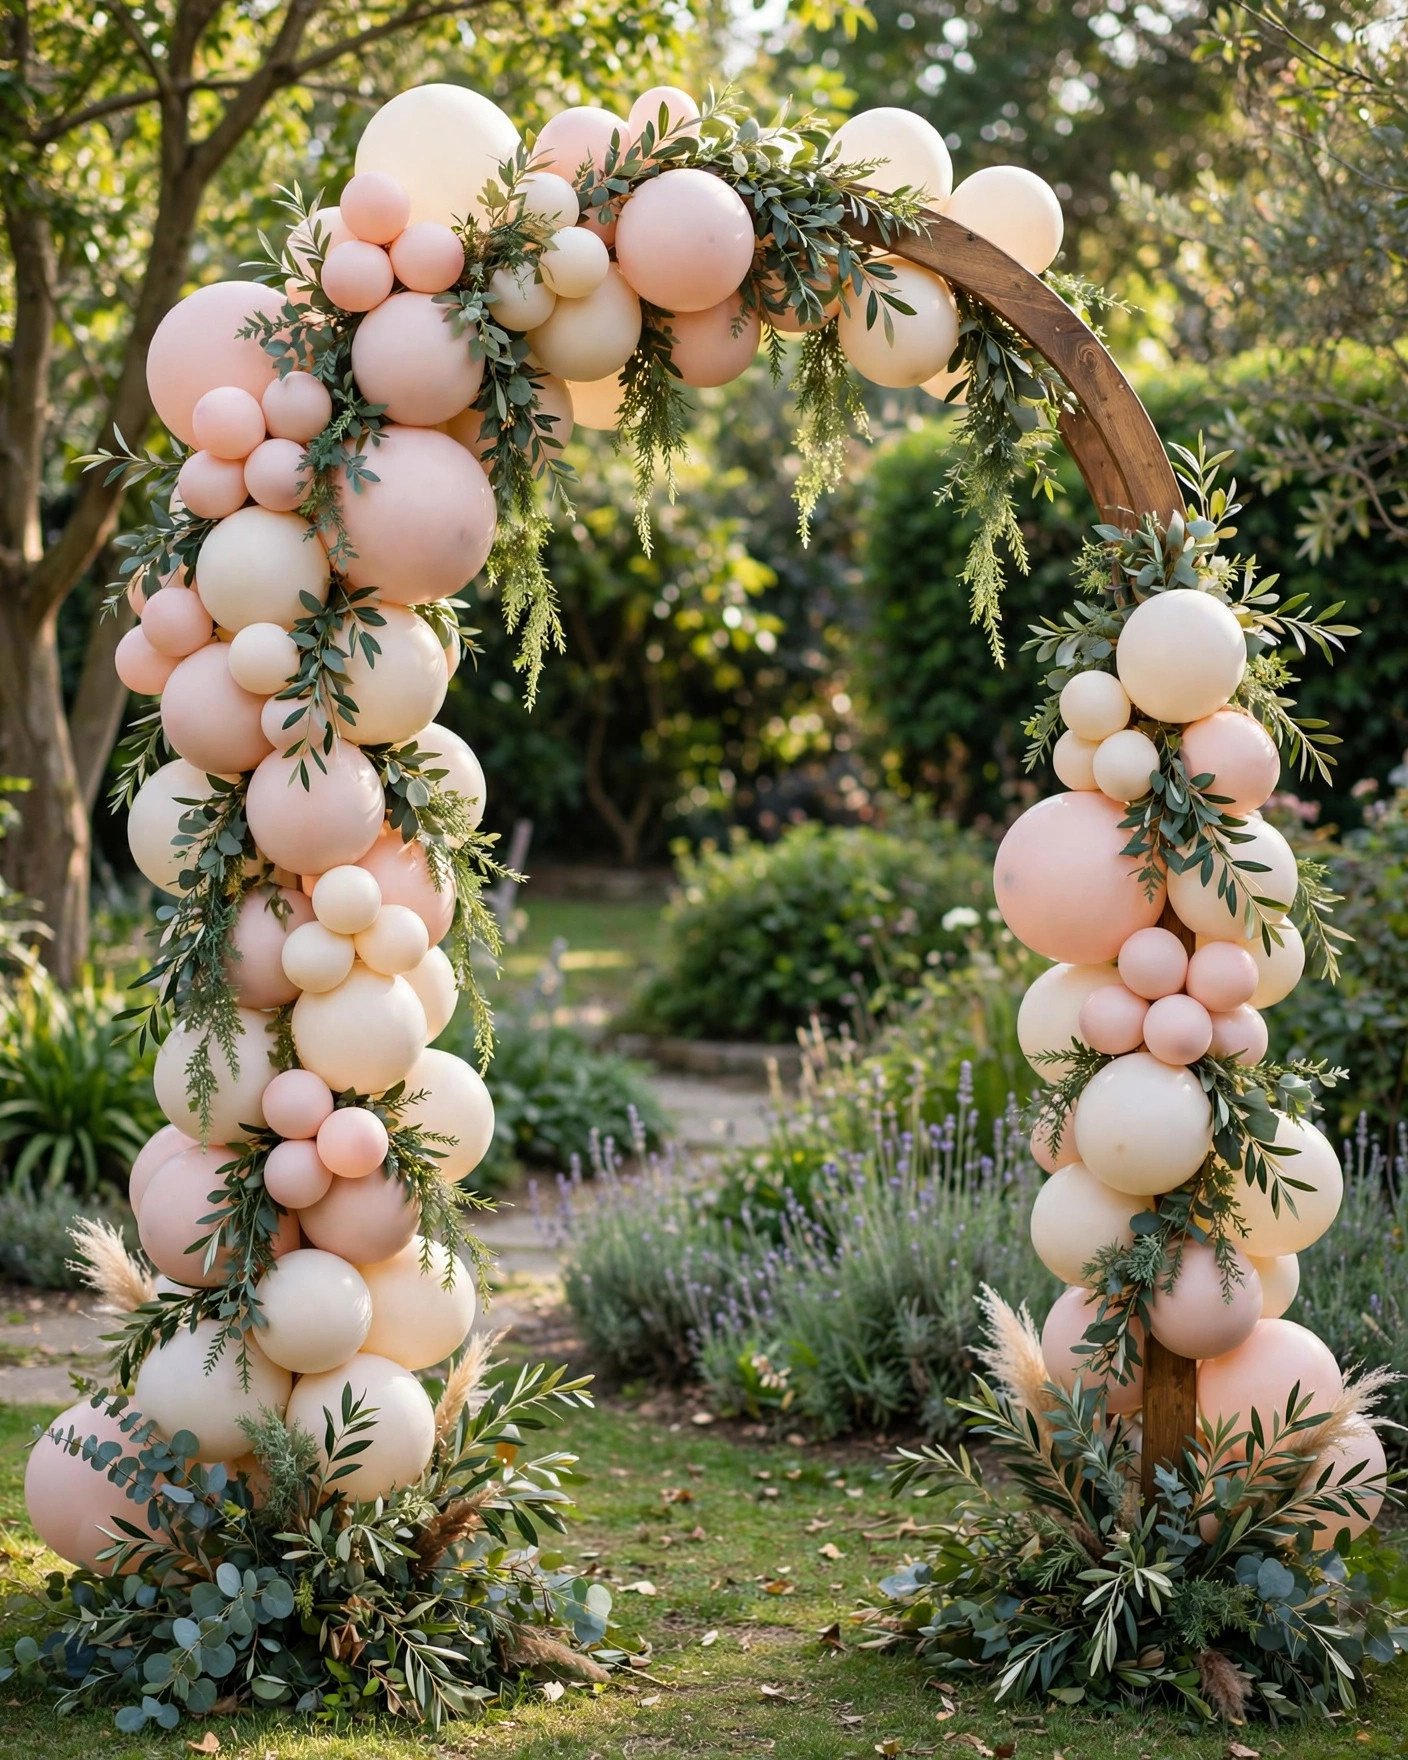
Materials: balloon arch strip or frame, 60–100 balloons in 2–3 colors, hand pump, faux greenery garlands, zip ties. Cost: ~$25–40.
Inflate balloons in varied sizes (the size mix is what looks professional), clip them into the arch strip alternating colors, then weave faux greenery garlands through the gaps. Build it the morning of — balloons look best within 12 hours. Anchor the base with weights or tie to sturdy stands; wind is the enemy.
Place it as the ceremony backdrop, photo booth frame or entrance statement. One arch, photographed all day, earns its keep many times over.
Read next: 15 Dollar Tree Wedding Flower Hacks That Look Stunning
Frequently Asked Questions
What are the easiest DIY wedding decorations to make?
Mason jar lanterns, photo clotheslines, fabric garlands and candle clusters — all need basic supplies, under two hours, and no special skills. Start with these if you’ve never crafted before.
How much do DIY wedding decorations really cost?
Most projects in this guide cost $10–$40 each in materials. A full DIY decor scheme for 100 guests typically runs $200–$500 total — versus $2,000+ for professional decor.
How early should I start DIY wedding decor projects?
Start 2–3 months out, doing one project per weekend. Paper flowers and signs keep indefinitely; assemble anything with fresh elements in the final week (dried flowers are fine anytime).
Which wedding decorations should I DIY vs. buy?
DIY: signs, garlands, jar centerpieces, photo displays, favors. Buy: table linens, large floral installations, anything requiring power tools or structural engineering. Your time has value too.
How do I transport DIY decorations to the venue?
Pack by zone in labeled boxes (one box per table for centerpieces), wrap glass in towels, and transport flat pieces like signs between blankets. Bring a setup kit: tape, scissors, glue gun, twine and touch-up paint.
✨ Key Takeaways
- Start 2–3 months out and build one project per weekend — no cramming.
- Most projects cost $10–$40; a full DIY scheme runs $200–$500 total.
- DIY what you’re good at (signs, jars, garlands); buy linens and big florals.
- Dried and paper elements can be made weeks ahead with zero wilting.
- Pack by zone in labeled boxes and bring a setup kit on the day.
Final Thoughts
DIY wedding decor isn’t about being cheap — it’s about making your wedding look like you. Nobody else will have your hand-painted sign, your photo clothesline, your paper flower wall. Start early, craft with friends, and enjoy the process: some of the best wedding memories happen around a craft table weeks before the big day.